
In the second article of Get certified with Ataccama series, we will focus on Adding a Data Source to the Catalog.
👉 First article of the series - #1 Adding Data Sources
🔎 LET’S TEST YOUR SKILLS
- Using the ONE Web App, in the ONE Knowledge Catalog module, add your database as a data source.
- Using the ONE Web App, in the ONE Knowledge Catalog module, add the table you created in ONE Desktop application to the Catalog Items.
💡 How to do it?
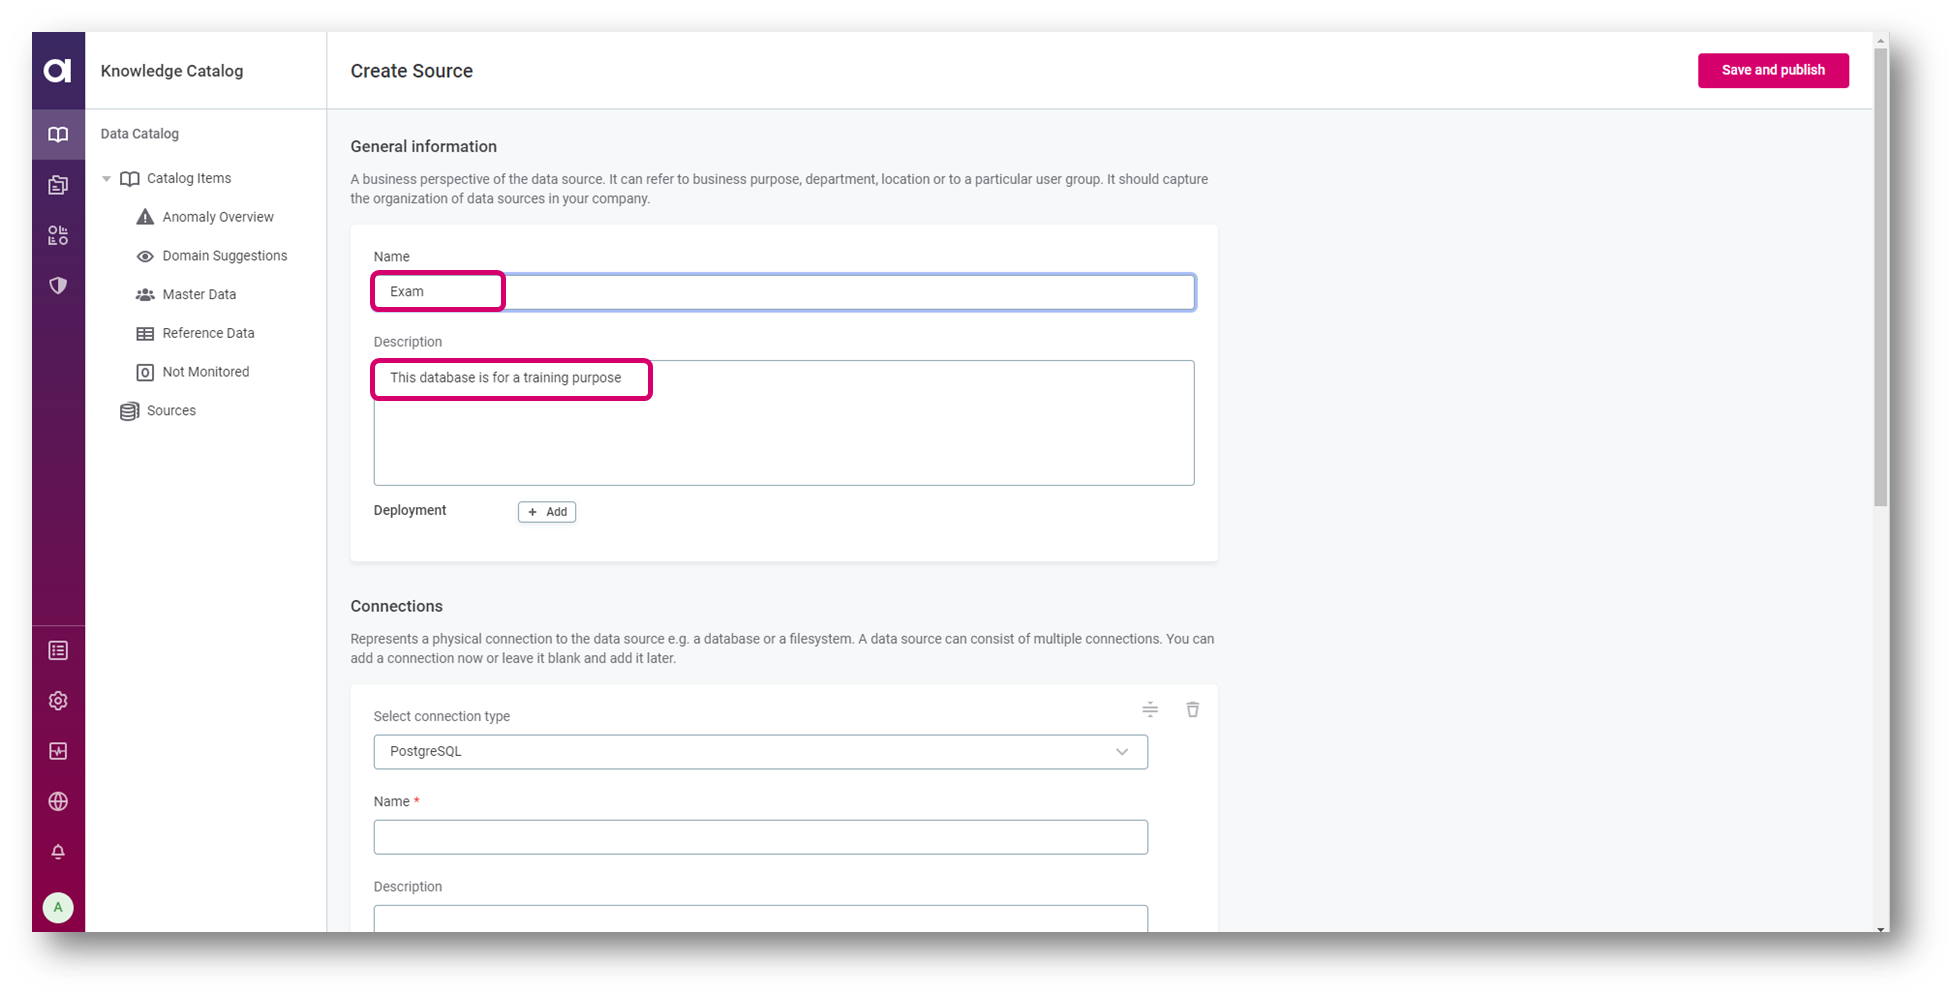
- Go to ONE Web App - Data Catalog - Sources and click on Create

- Fill in Name and Description (if needed)
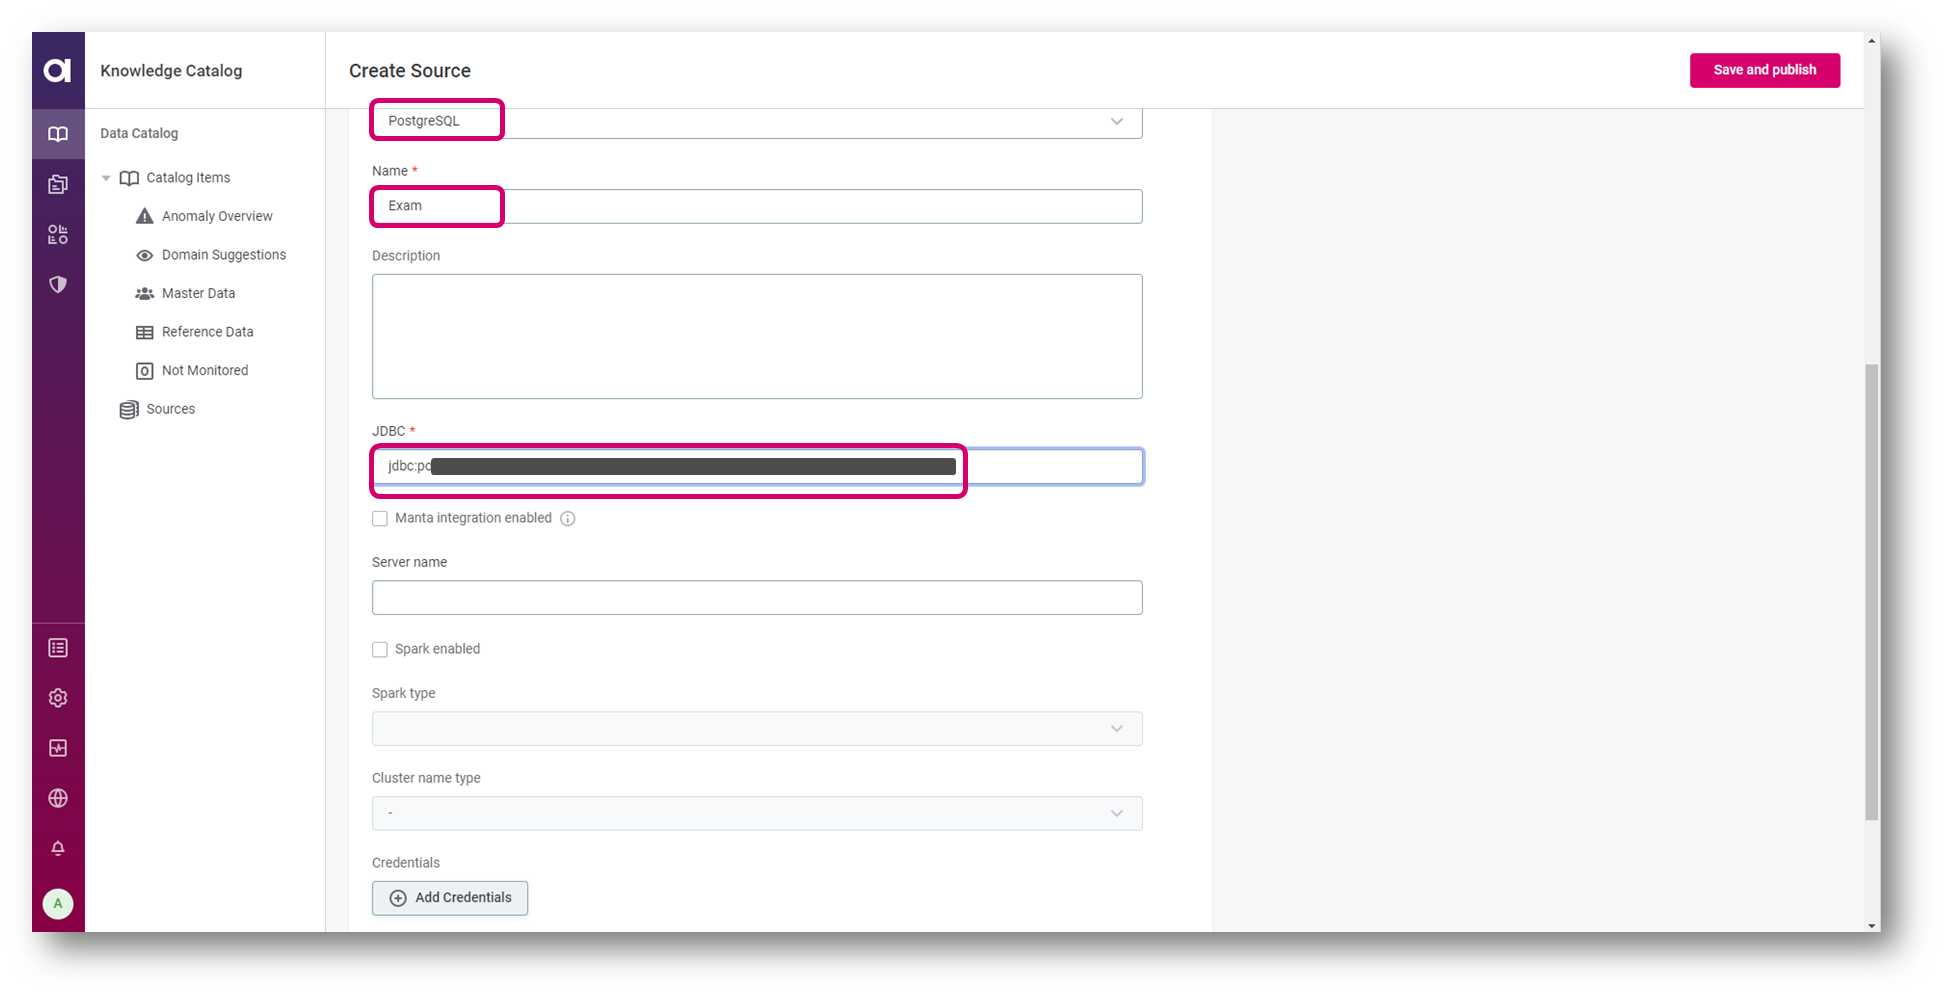
- Fill in Connection details - Select connection type, Name and JDBC
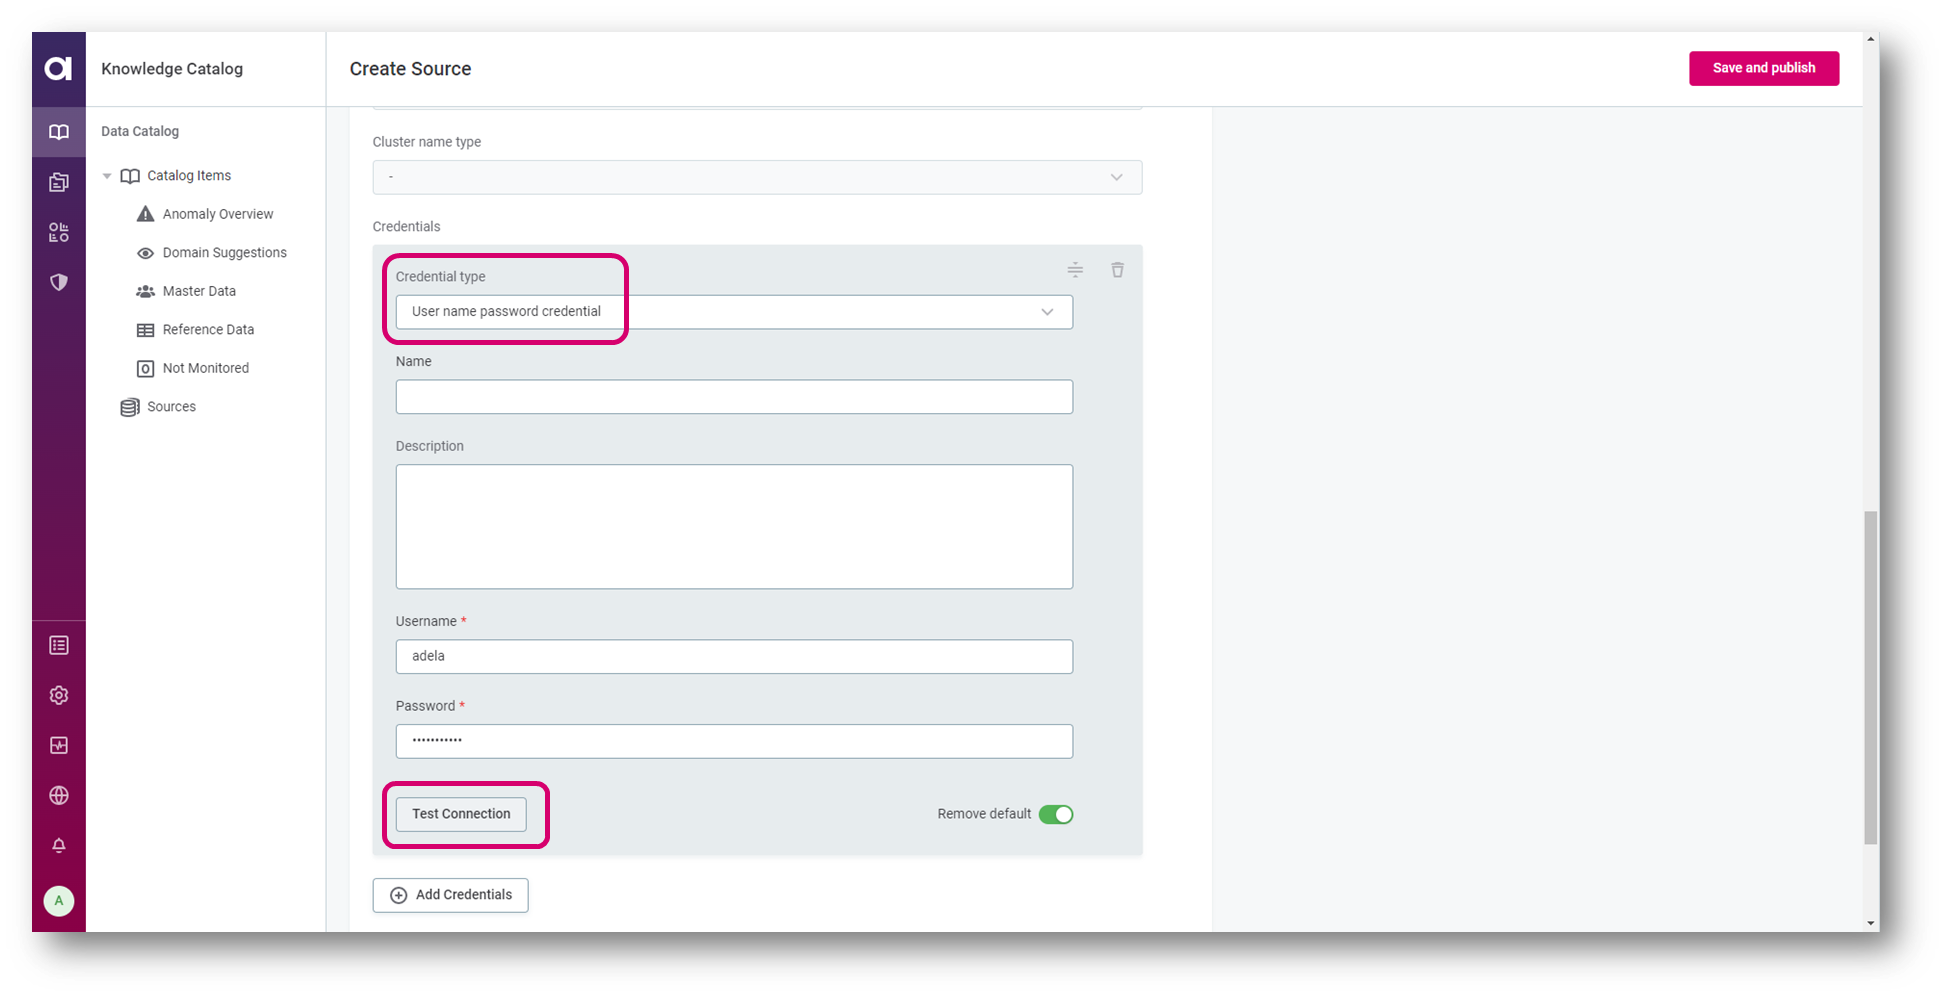
- Add Credentials, select Credential type, fill in required information and Test Connection
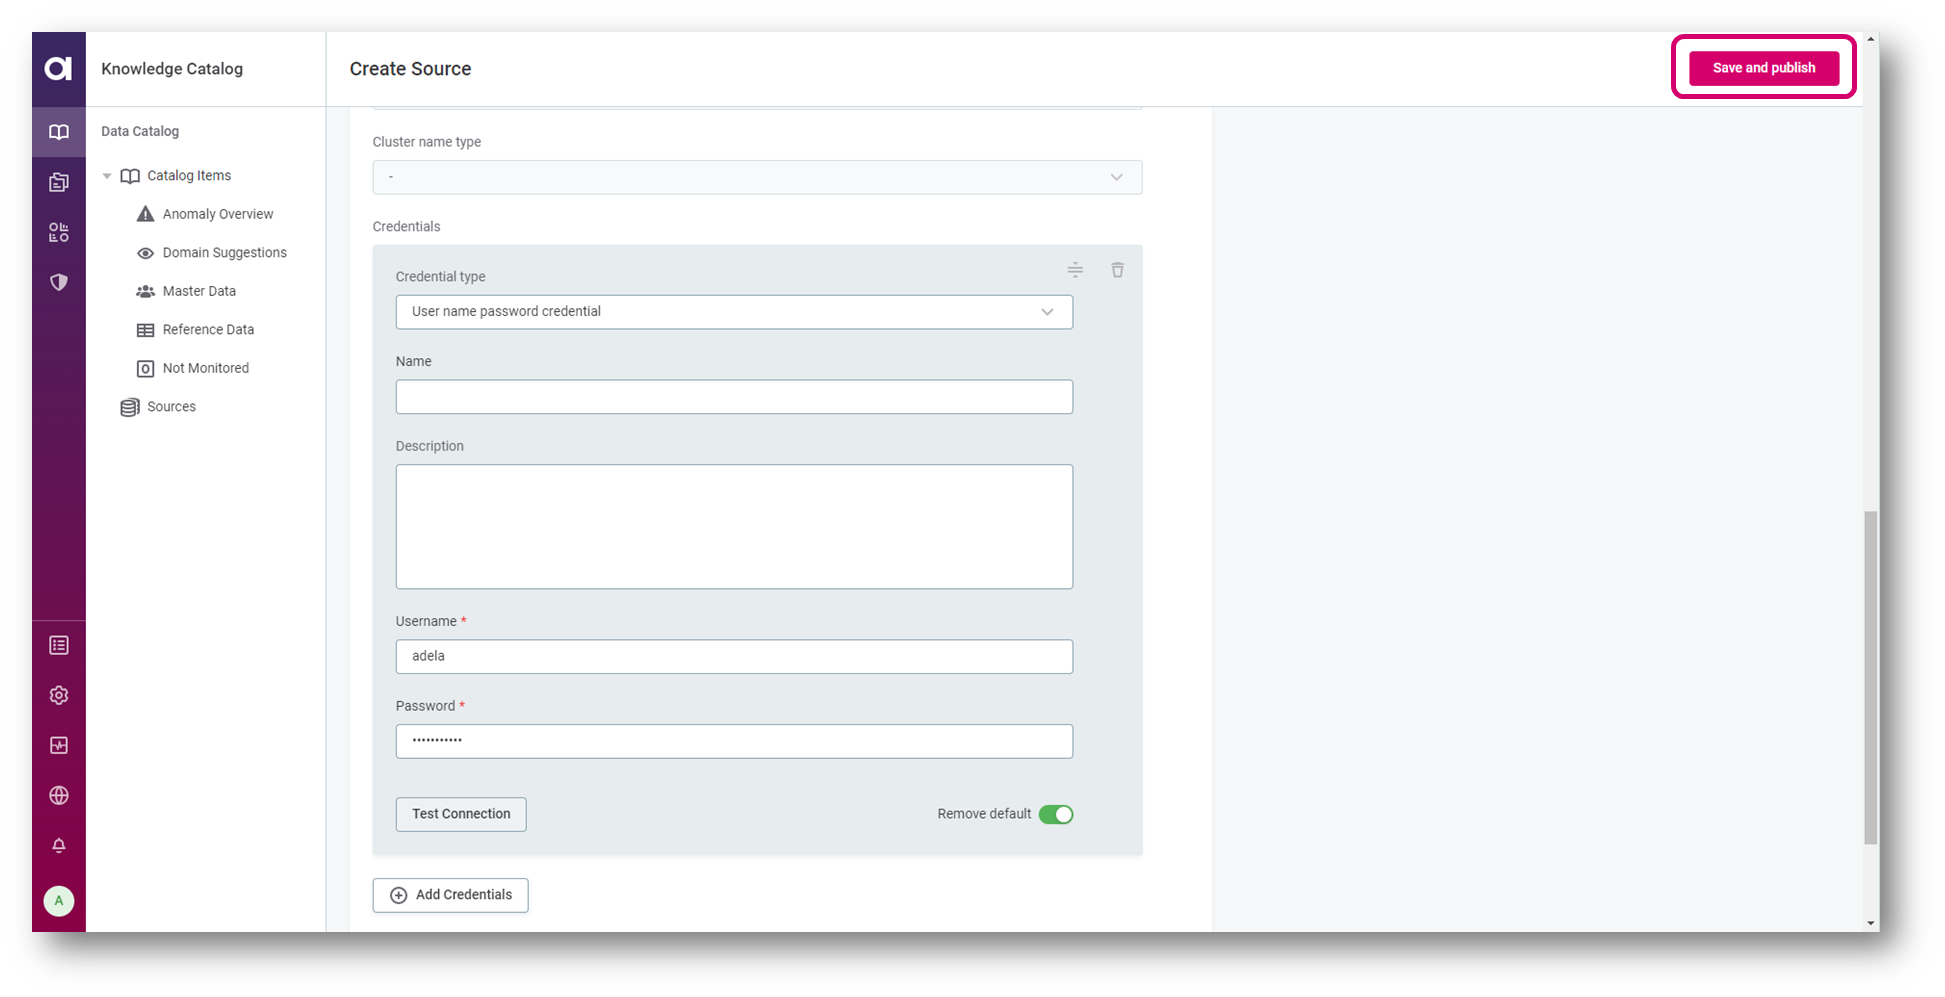
- Save and publish
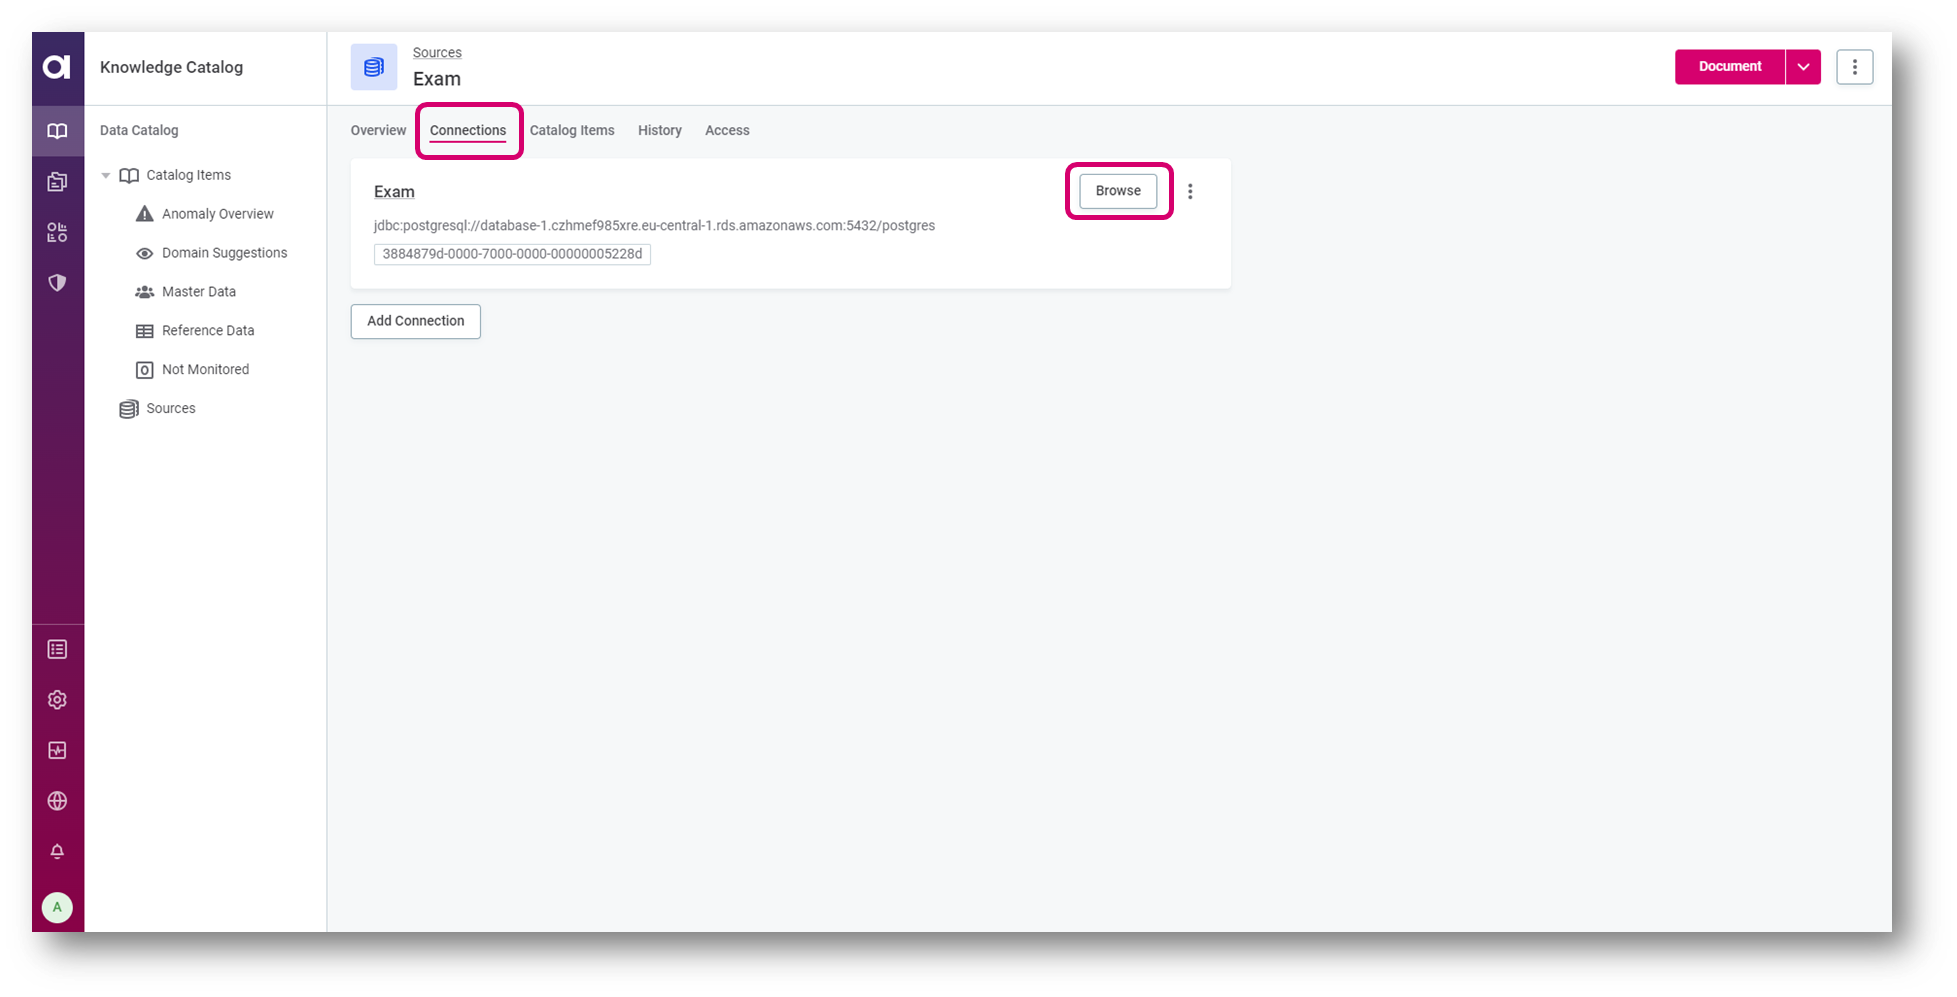
- Navigate to Connections in and click on Browse
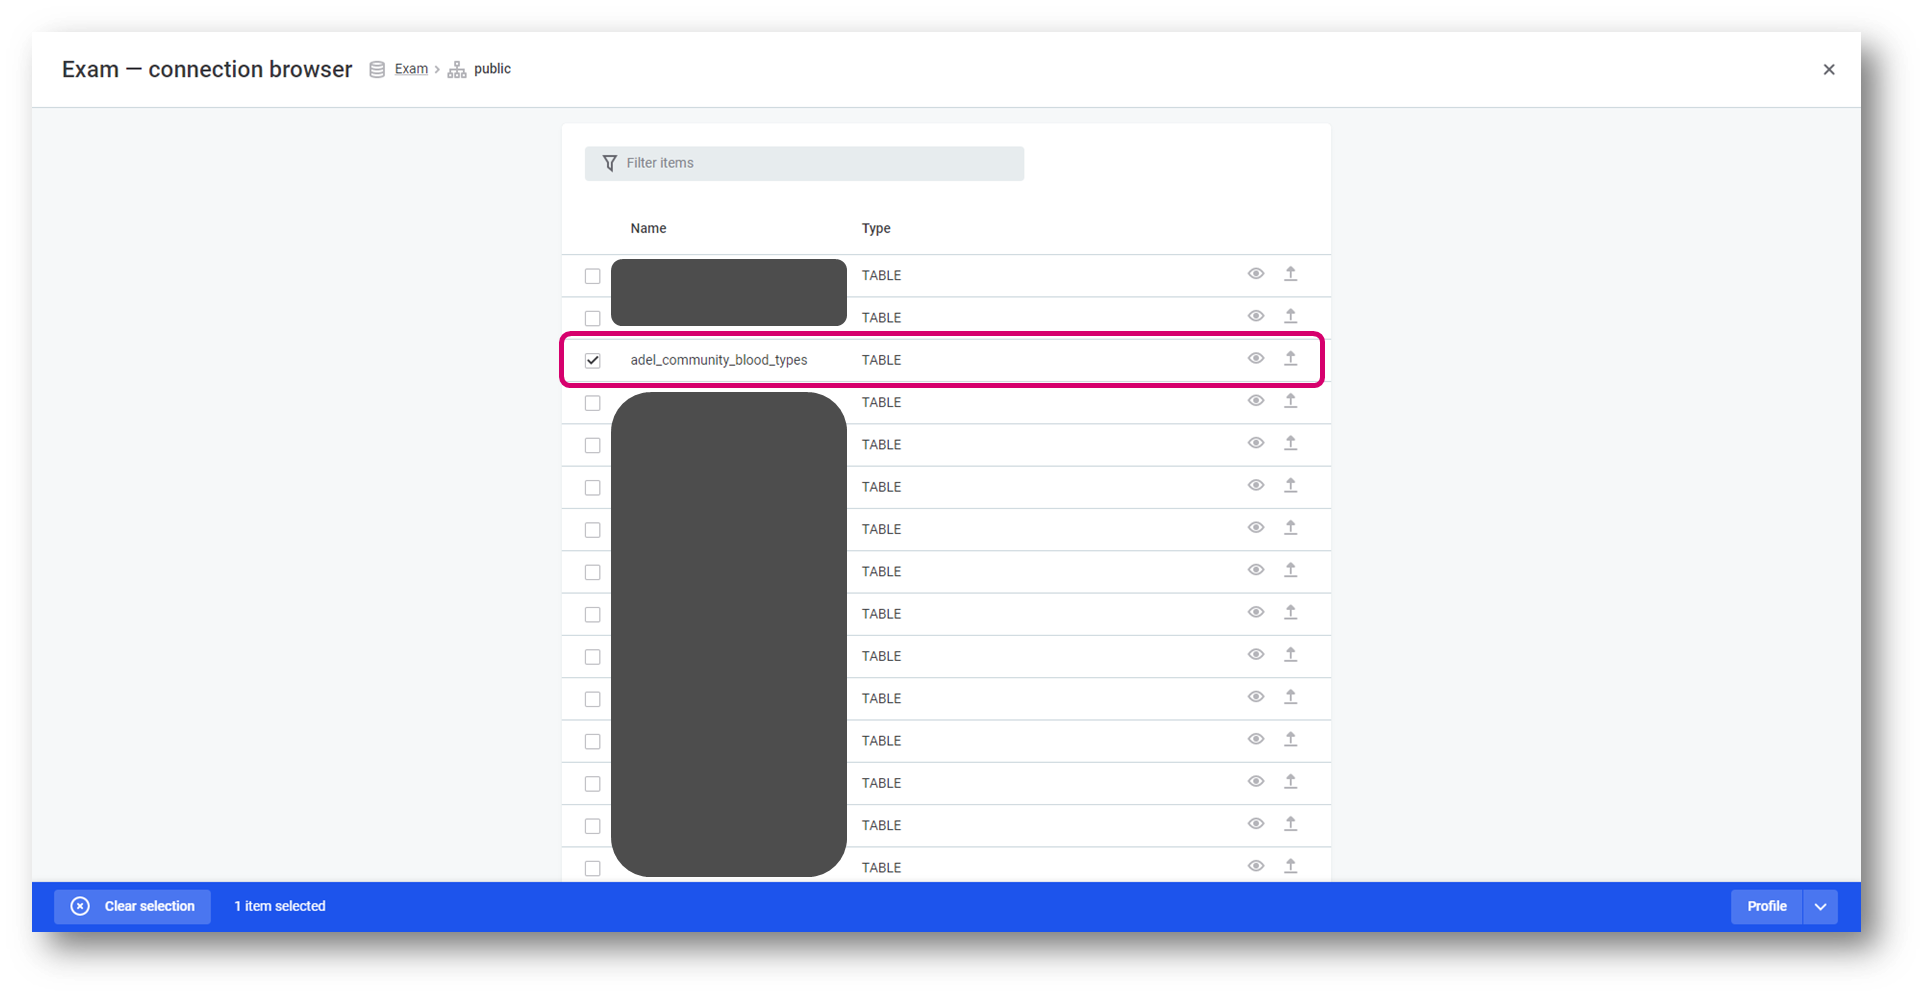
- Select your table
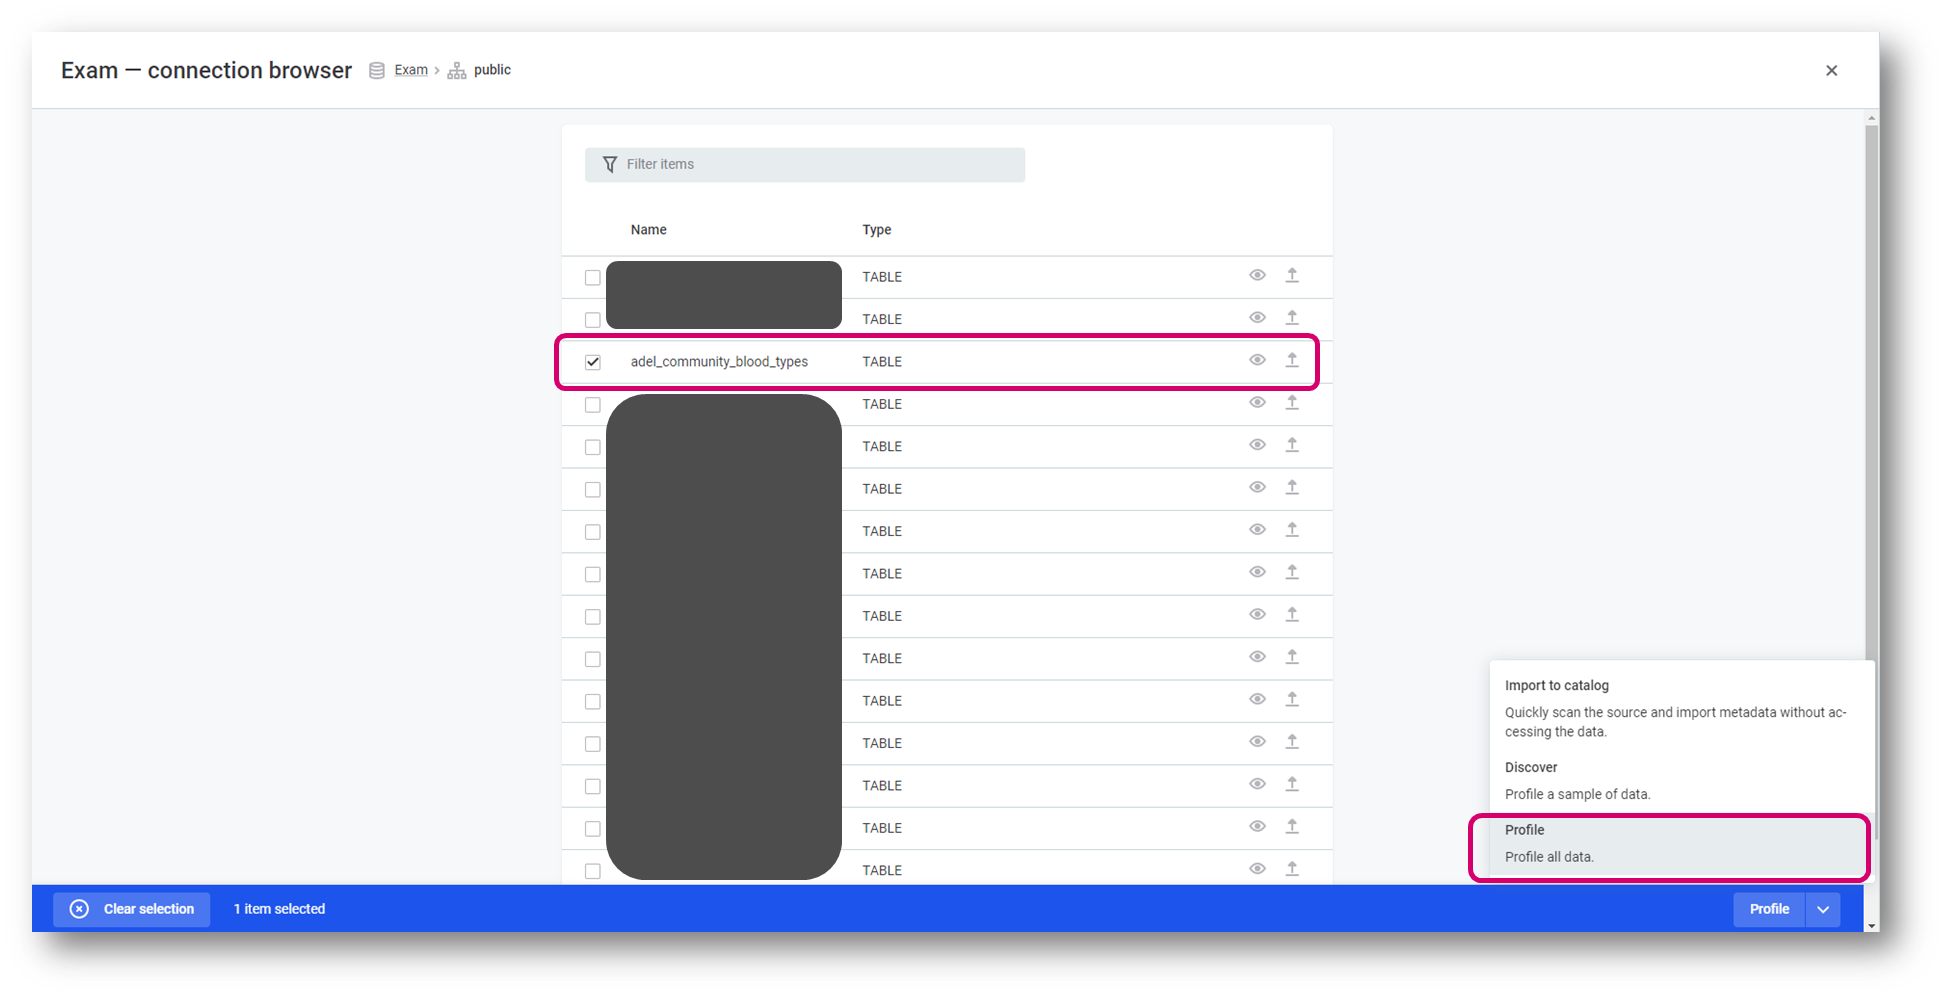
- From Profile menu select Profile
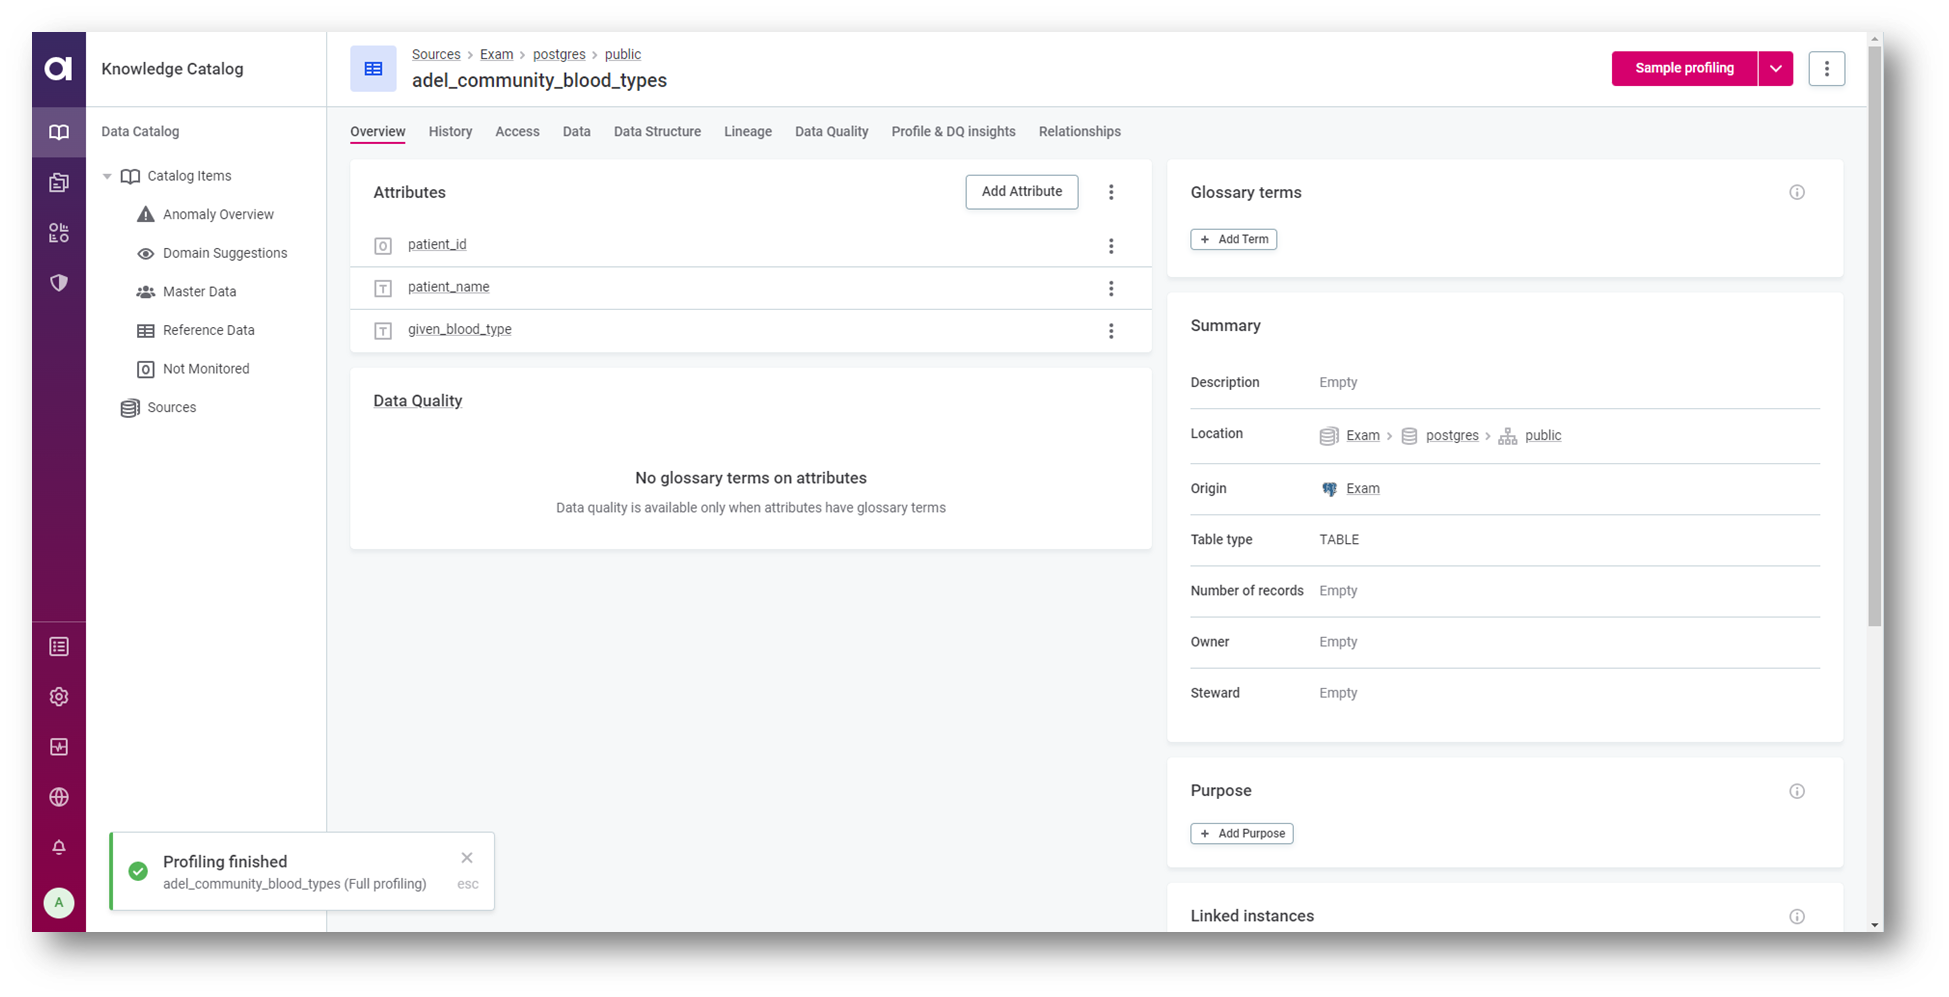
- After the profiling is done, check that your table is in the Catalog items list
Do you have any question or tips&tricks? Let us know in comments section!