👋 Welcome to our new article series, where we will go through the individual topics that are part of the Ataccama Data Quality & Governance Certified Professional: Foundation Level Ataccama ONE v13 certification exam.
We will focus on practicing and pointing out the most common mistakes. Our first topic is Adding Data Sources.
🔎 LET’S TEST YOUR SKILLS
- Using ONE Desktop Application, create a database connection to your database.
- Using the ONE Desktop Application, upload the 'bloodtypes.xlsx' into your database. Create the database table <your_name>_bloodtypes, and upload the contents of the 'bloodtypes.xlsx' file.
💡 How to do it?
- Open Ataccama ONE Desktop Application and create a new project
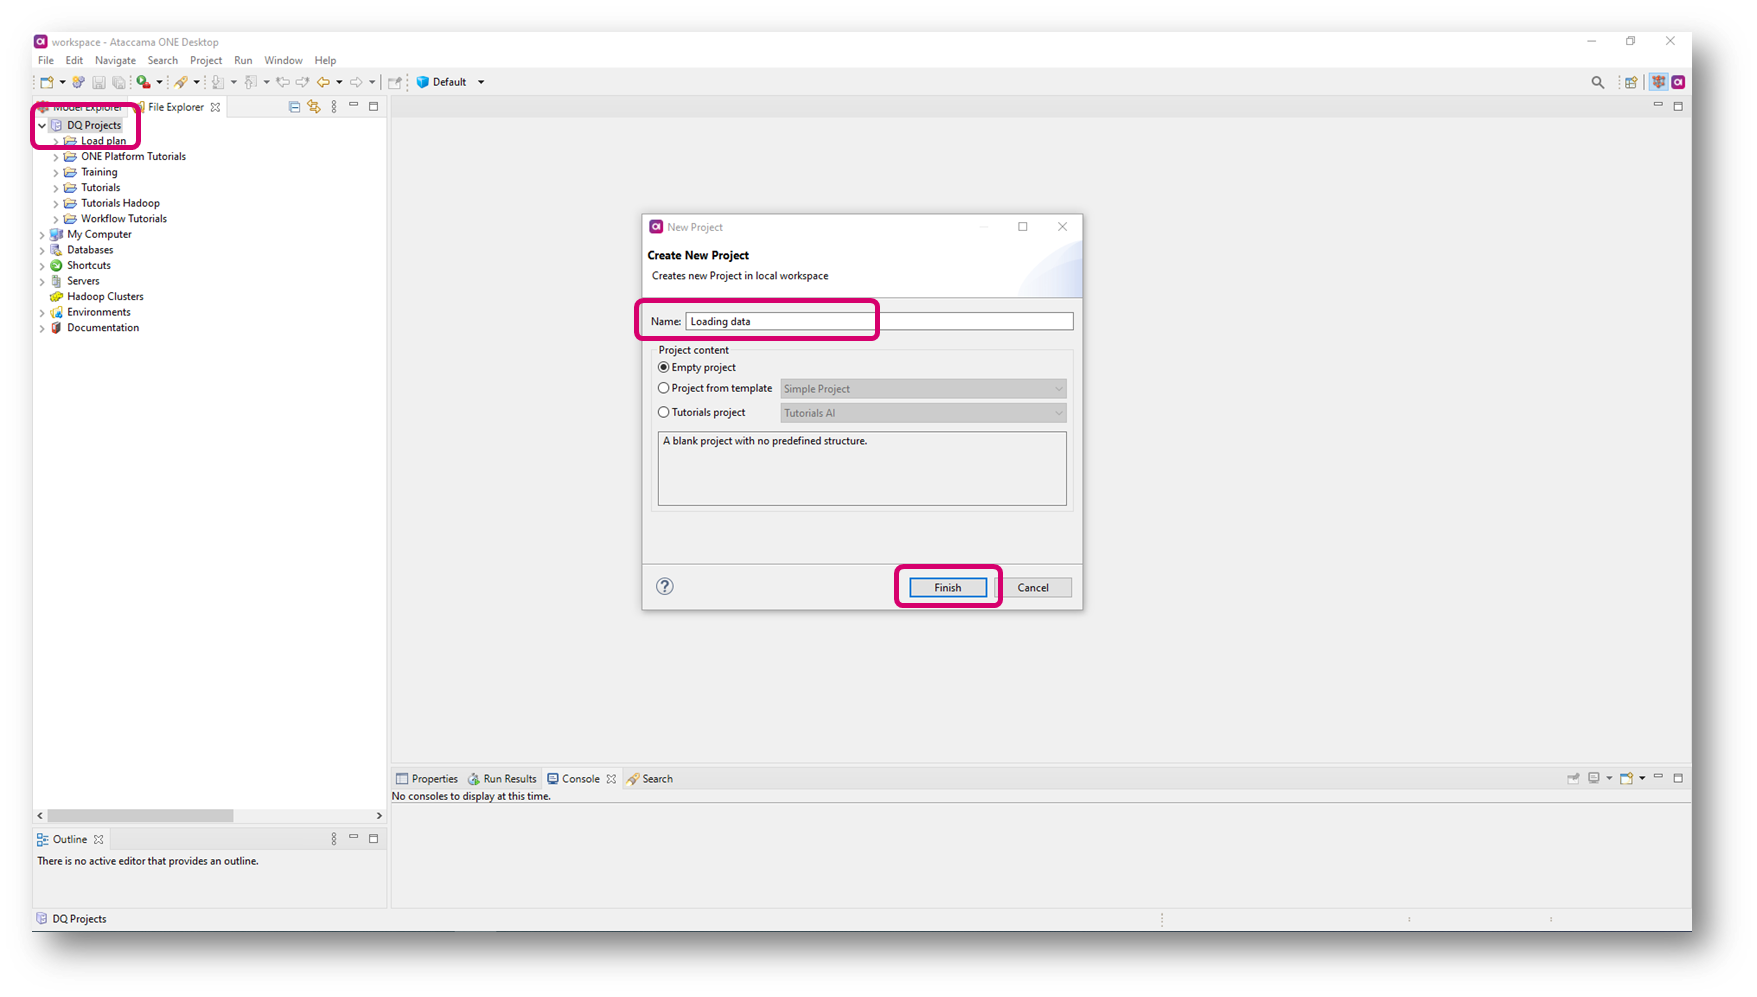
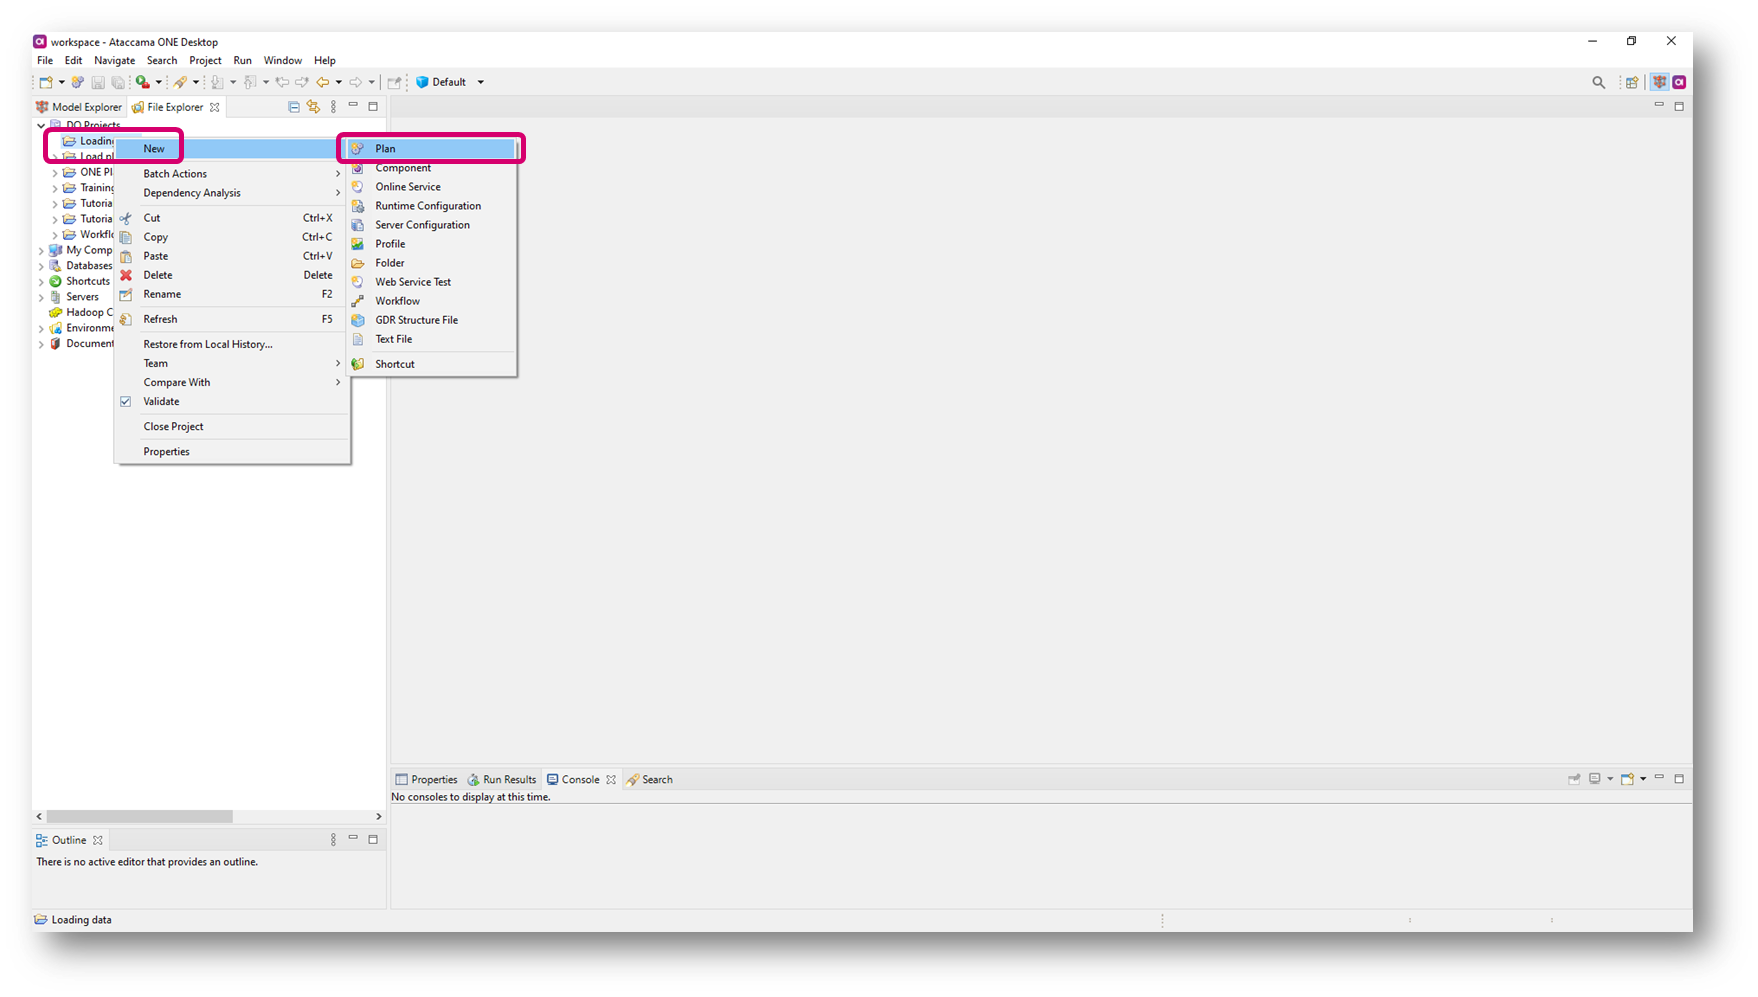
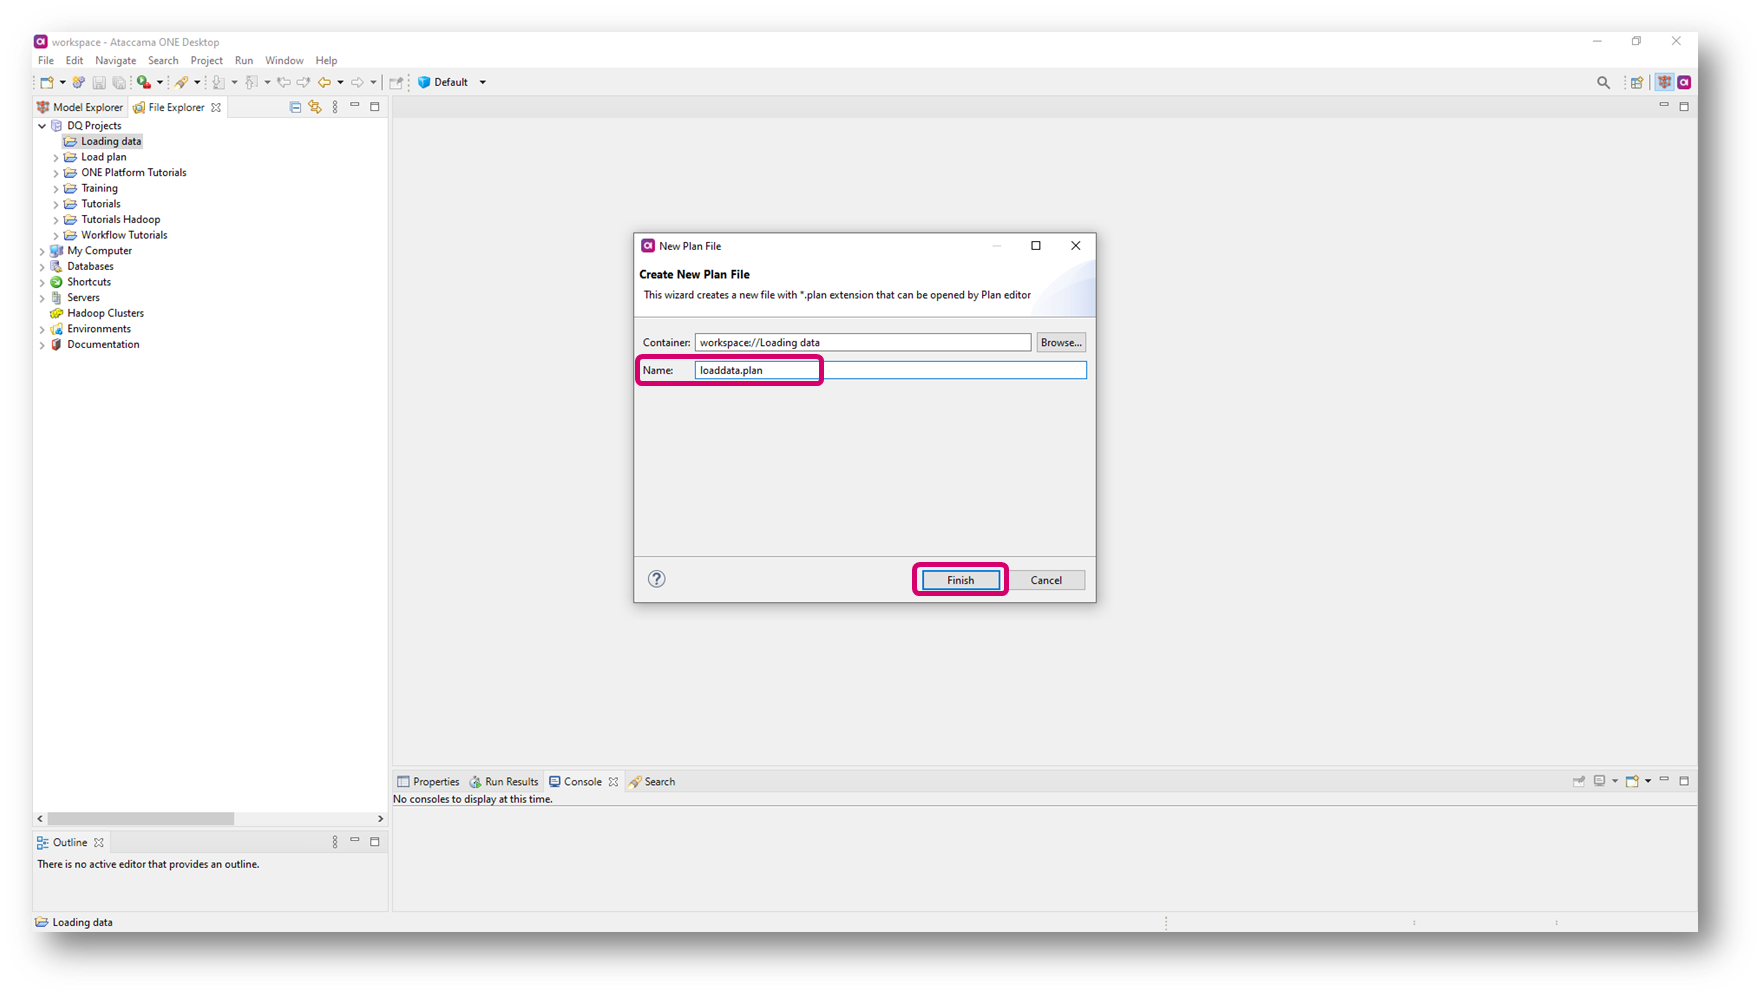
- In your newly created project, create a plan and name it
loaddata.plan
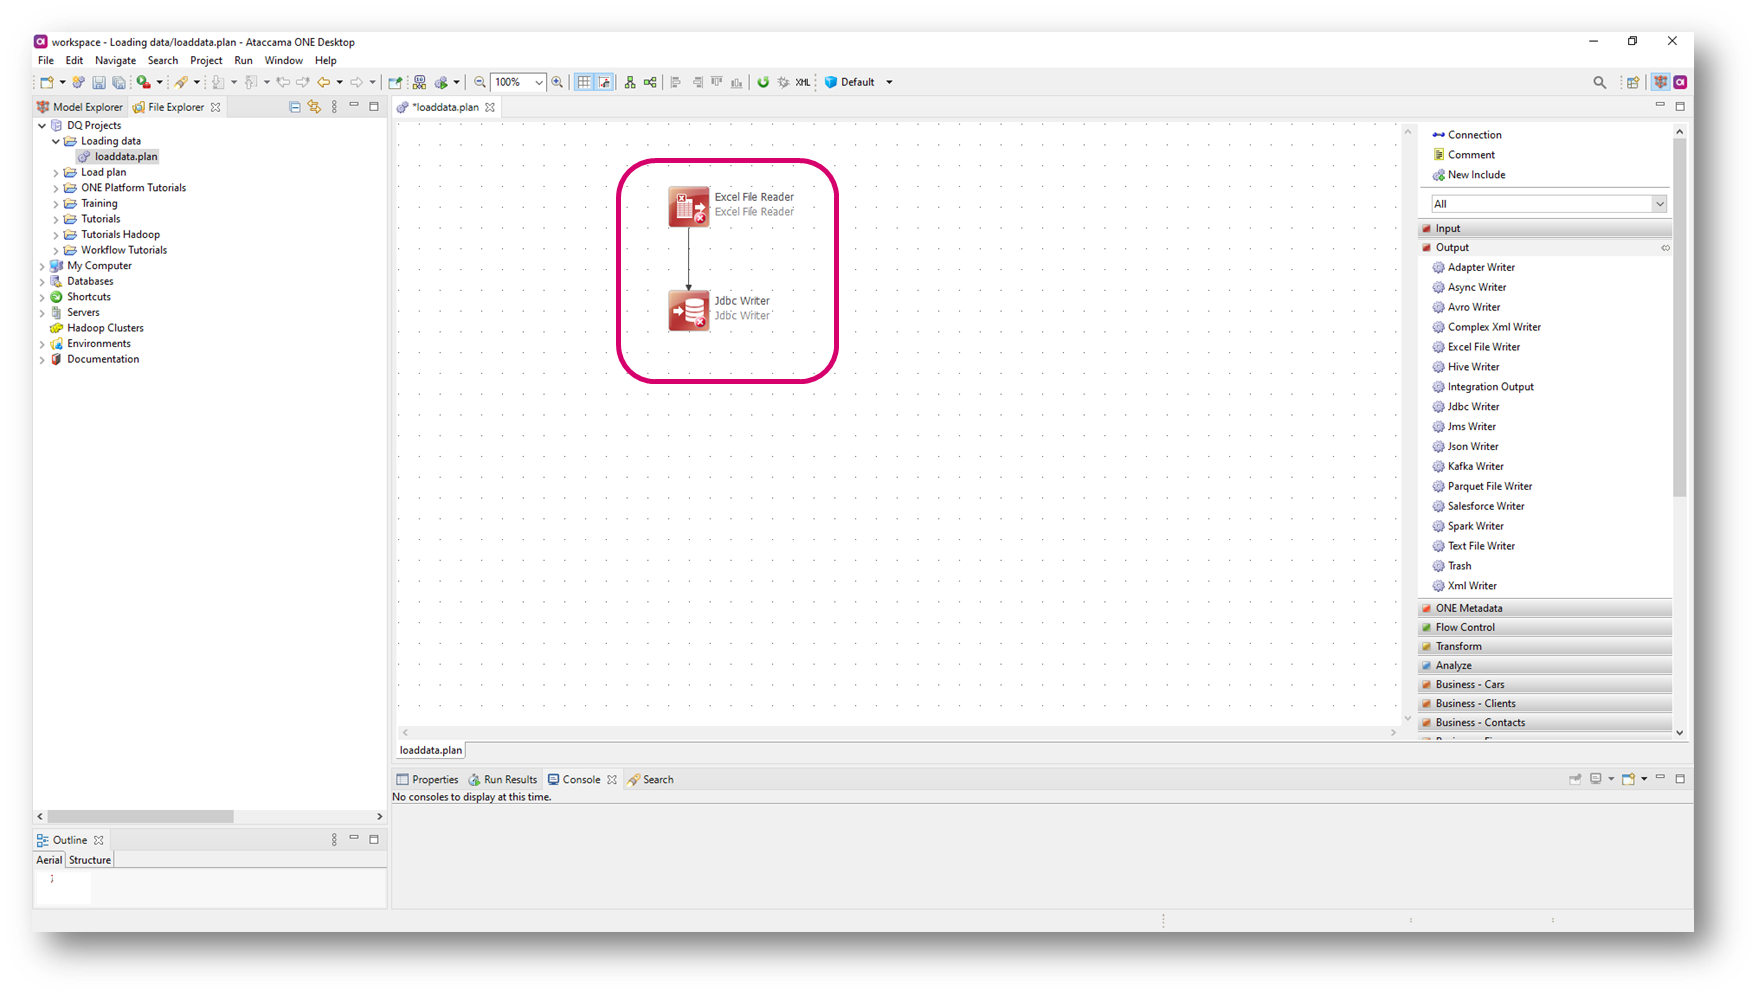
- Add (drag and drop from the palette on the left side) steps Excel File Reader and Jdbc Writer
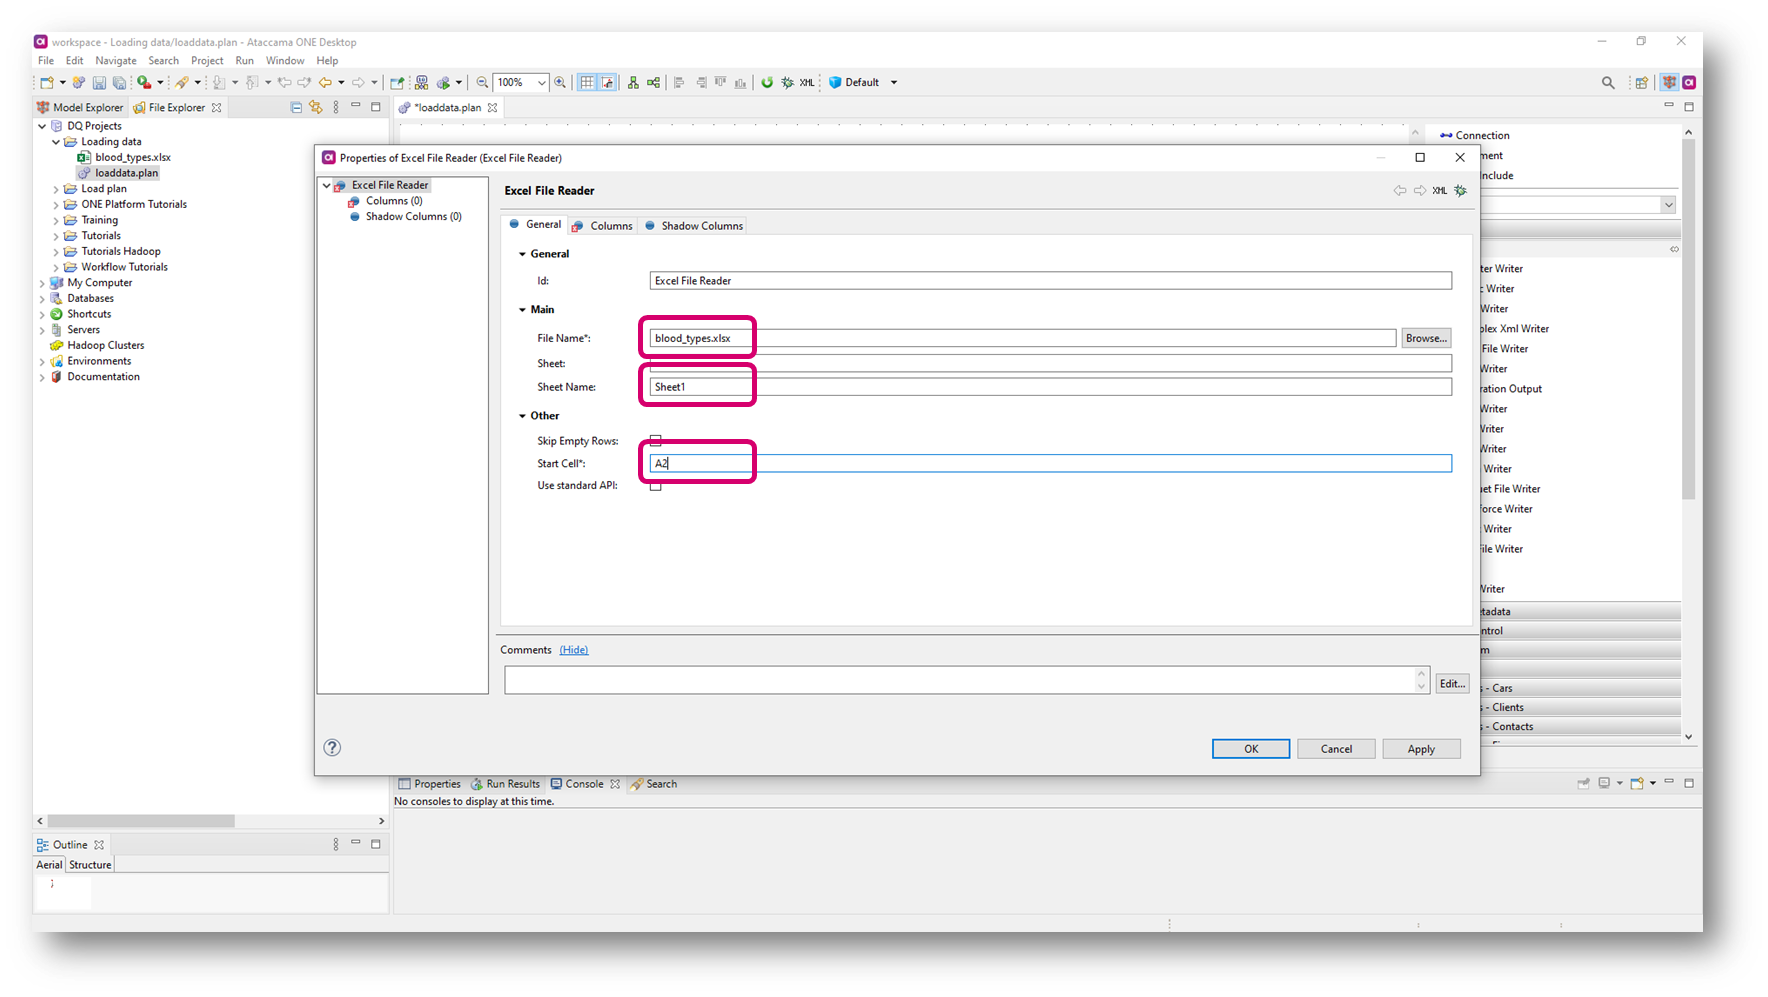
- Upload
bloodtypes.xlsx(attached to this article) into your project - Open Excel File Reader and fill in File Name, Sheet Name and Start Cell in General tab, add Columns in Columns tab

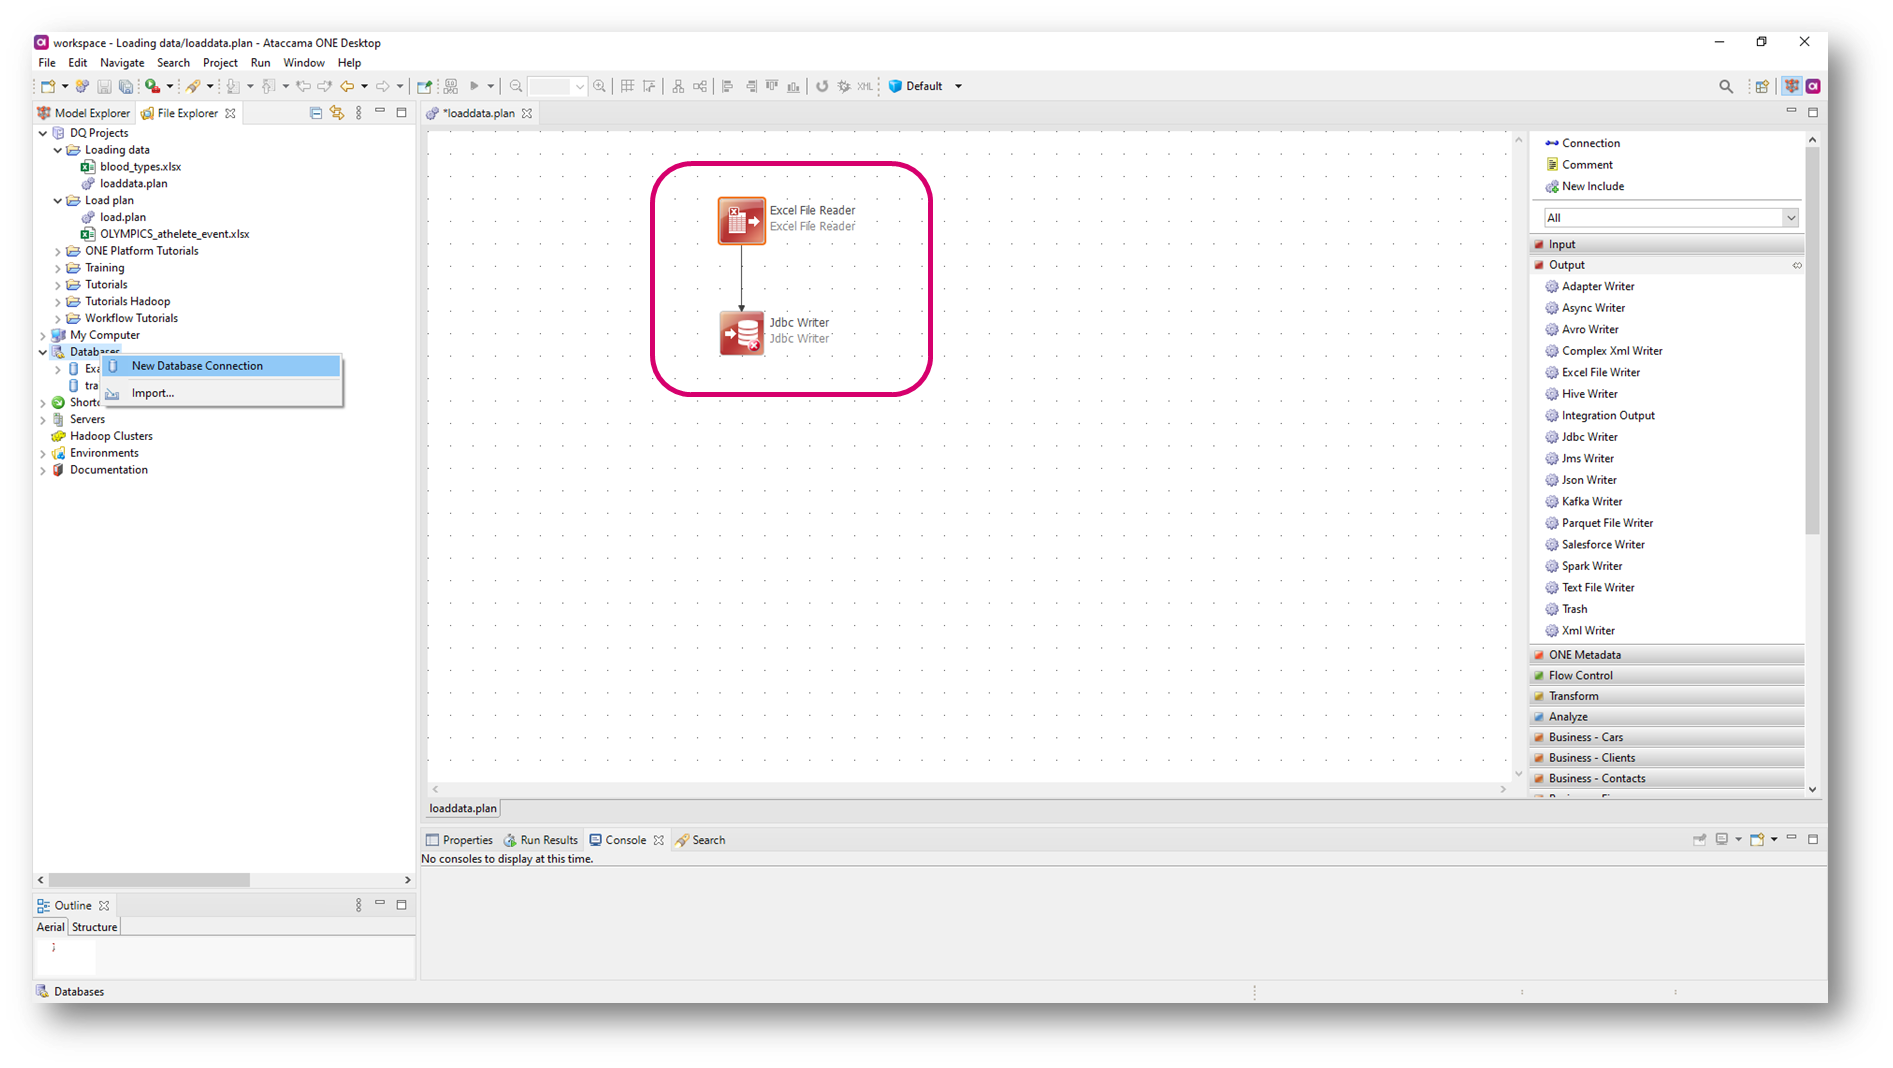
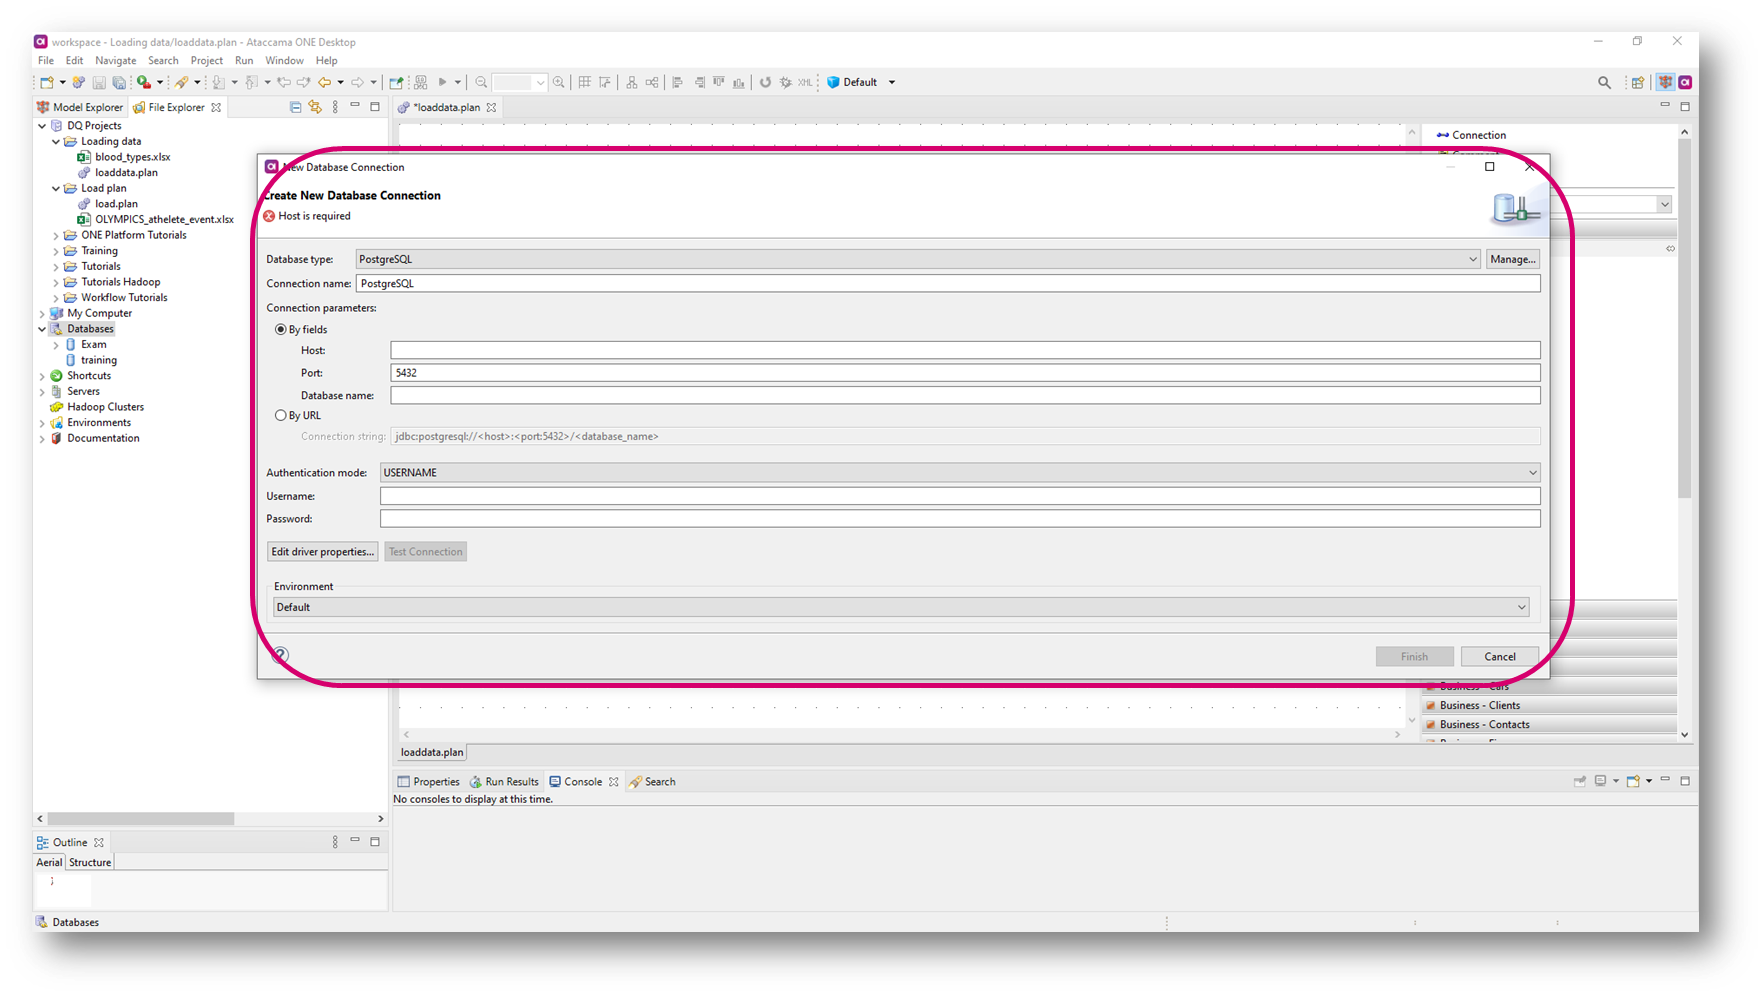
- Your plan is ready, now let’s create a database connection - go to Databases and select New Database Connection
- Select Database type, fill in Connection name, add Connection parameters (either by fields or by URL) and select Authentication mode and necessary details afterwards Test Connection if successful - Finish
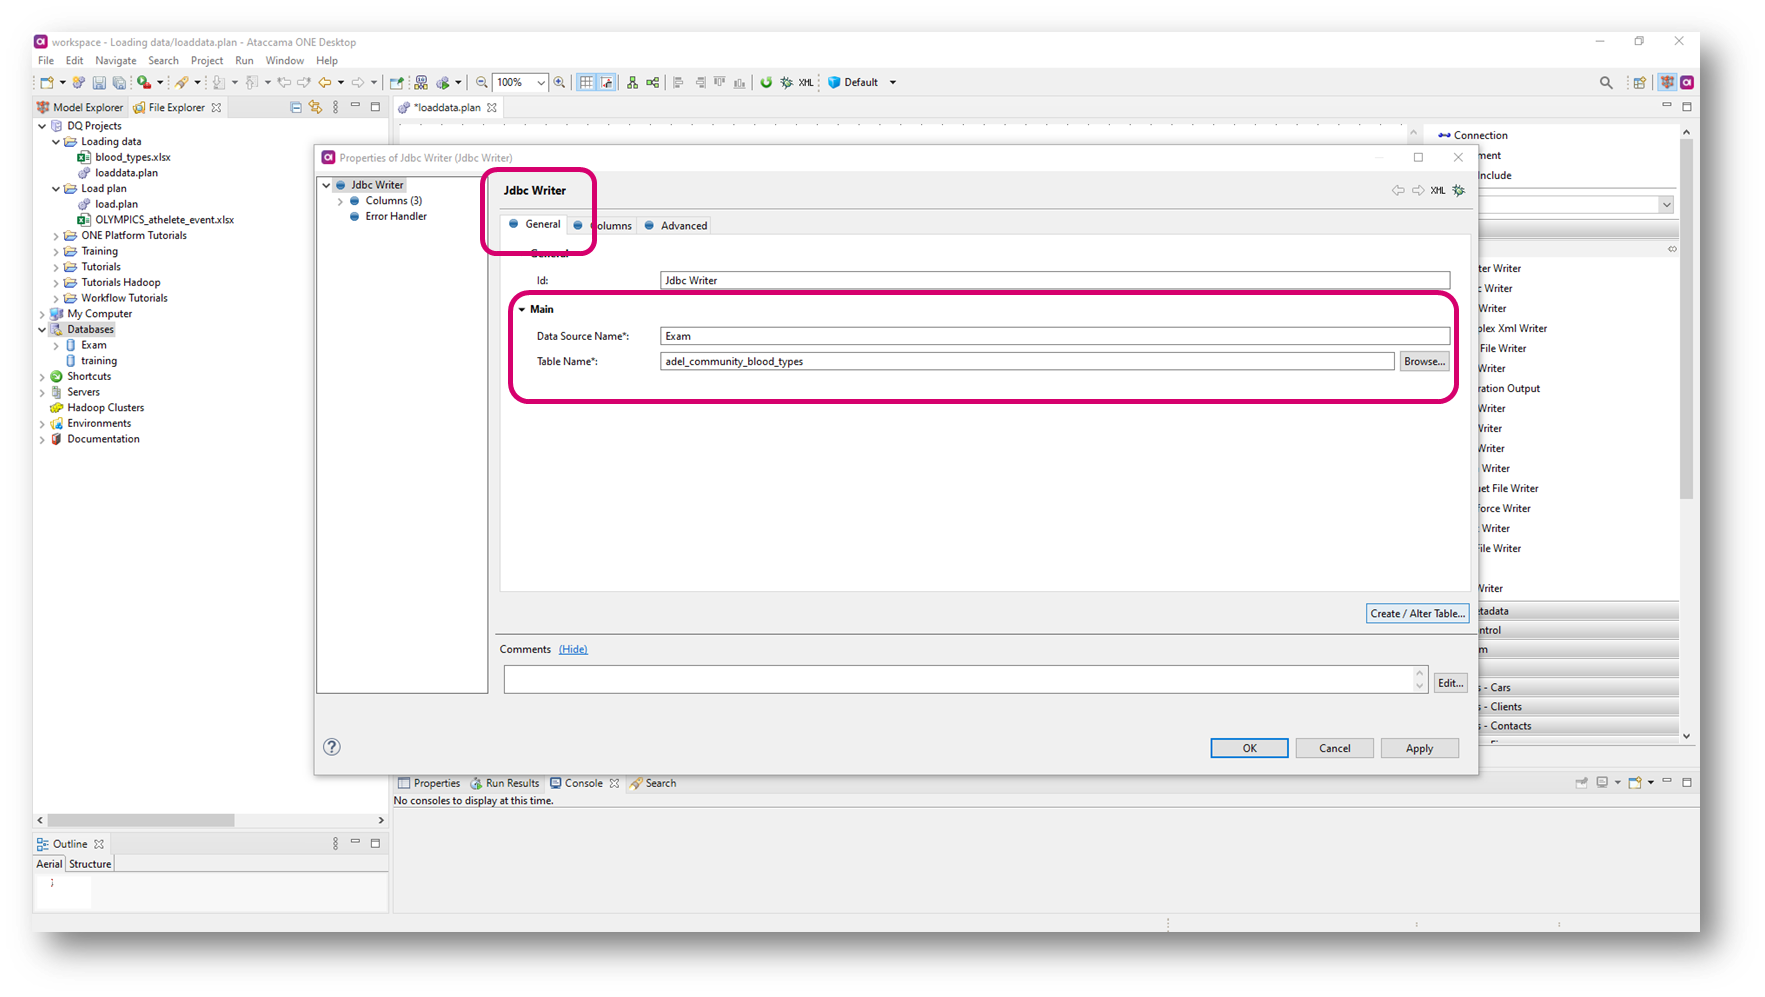
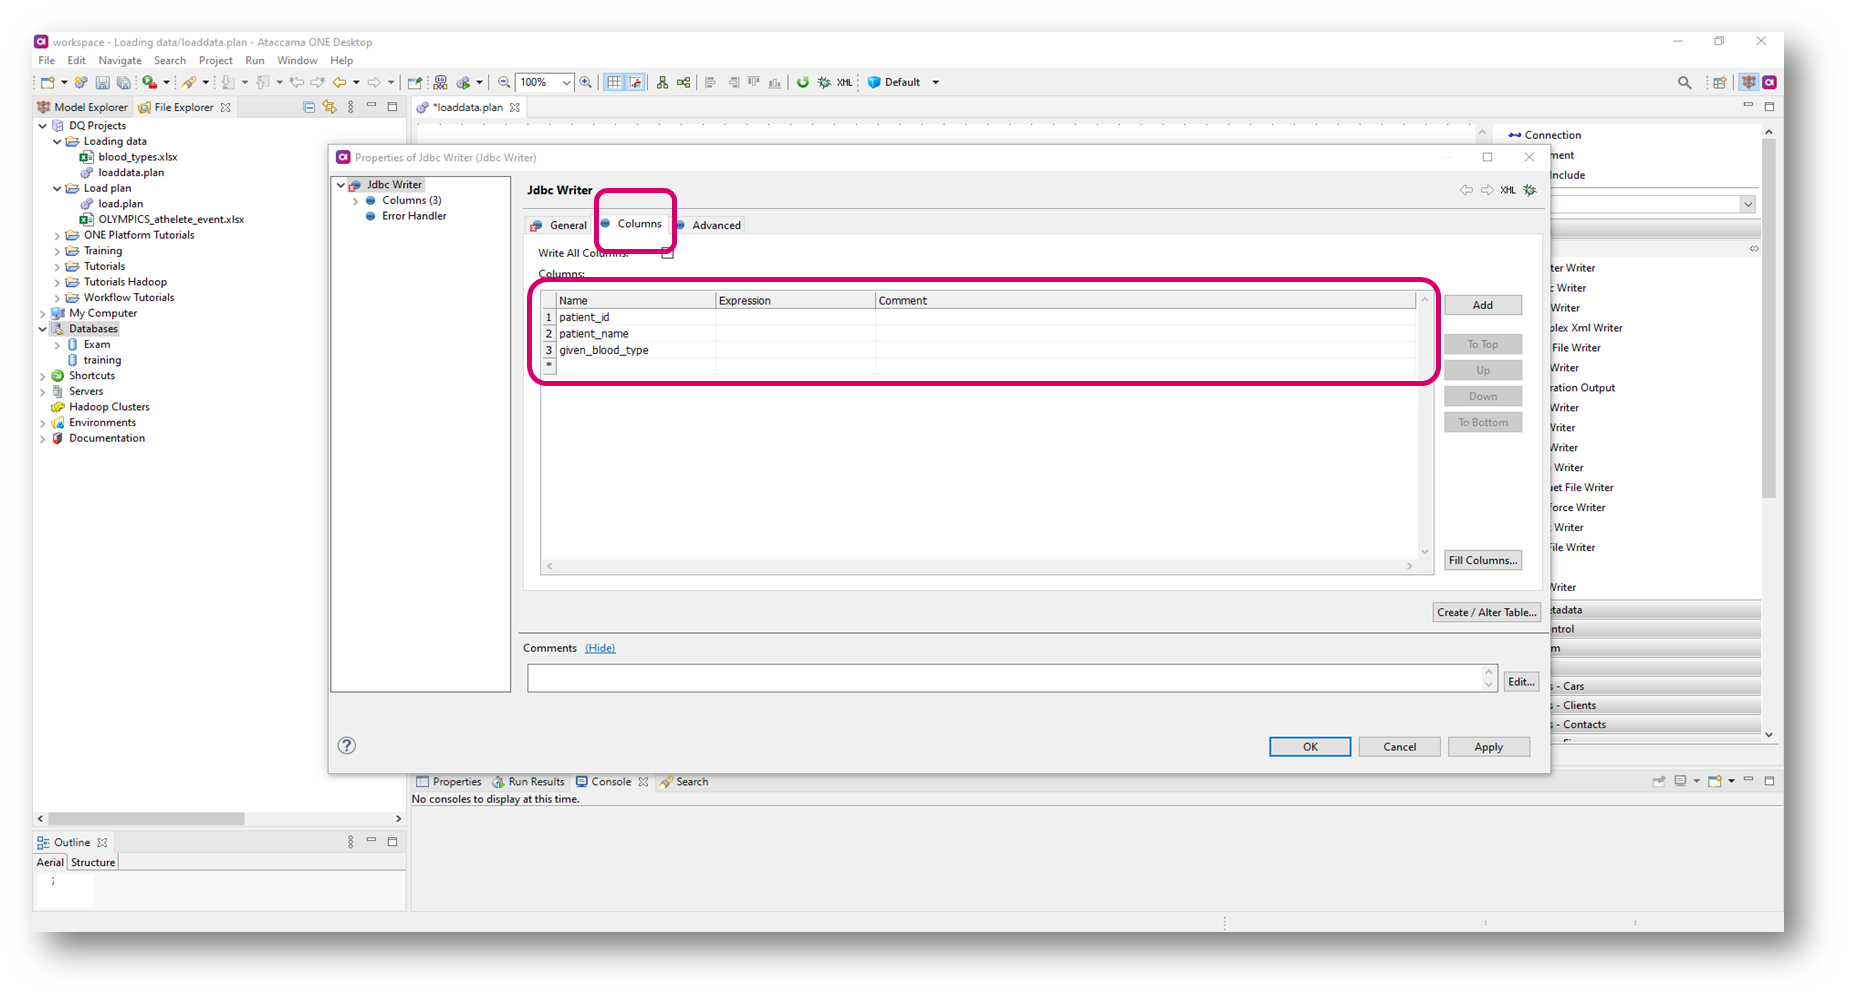
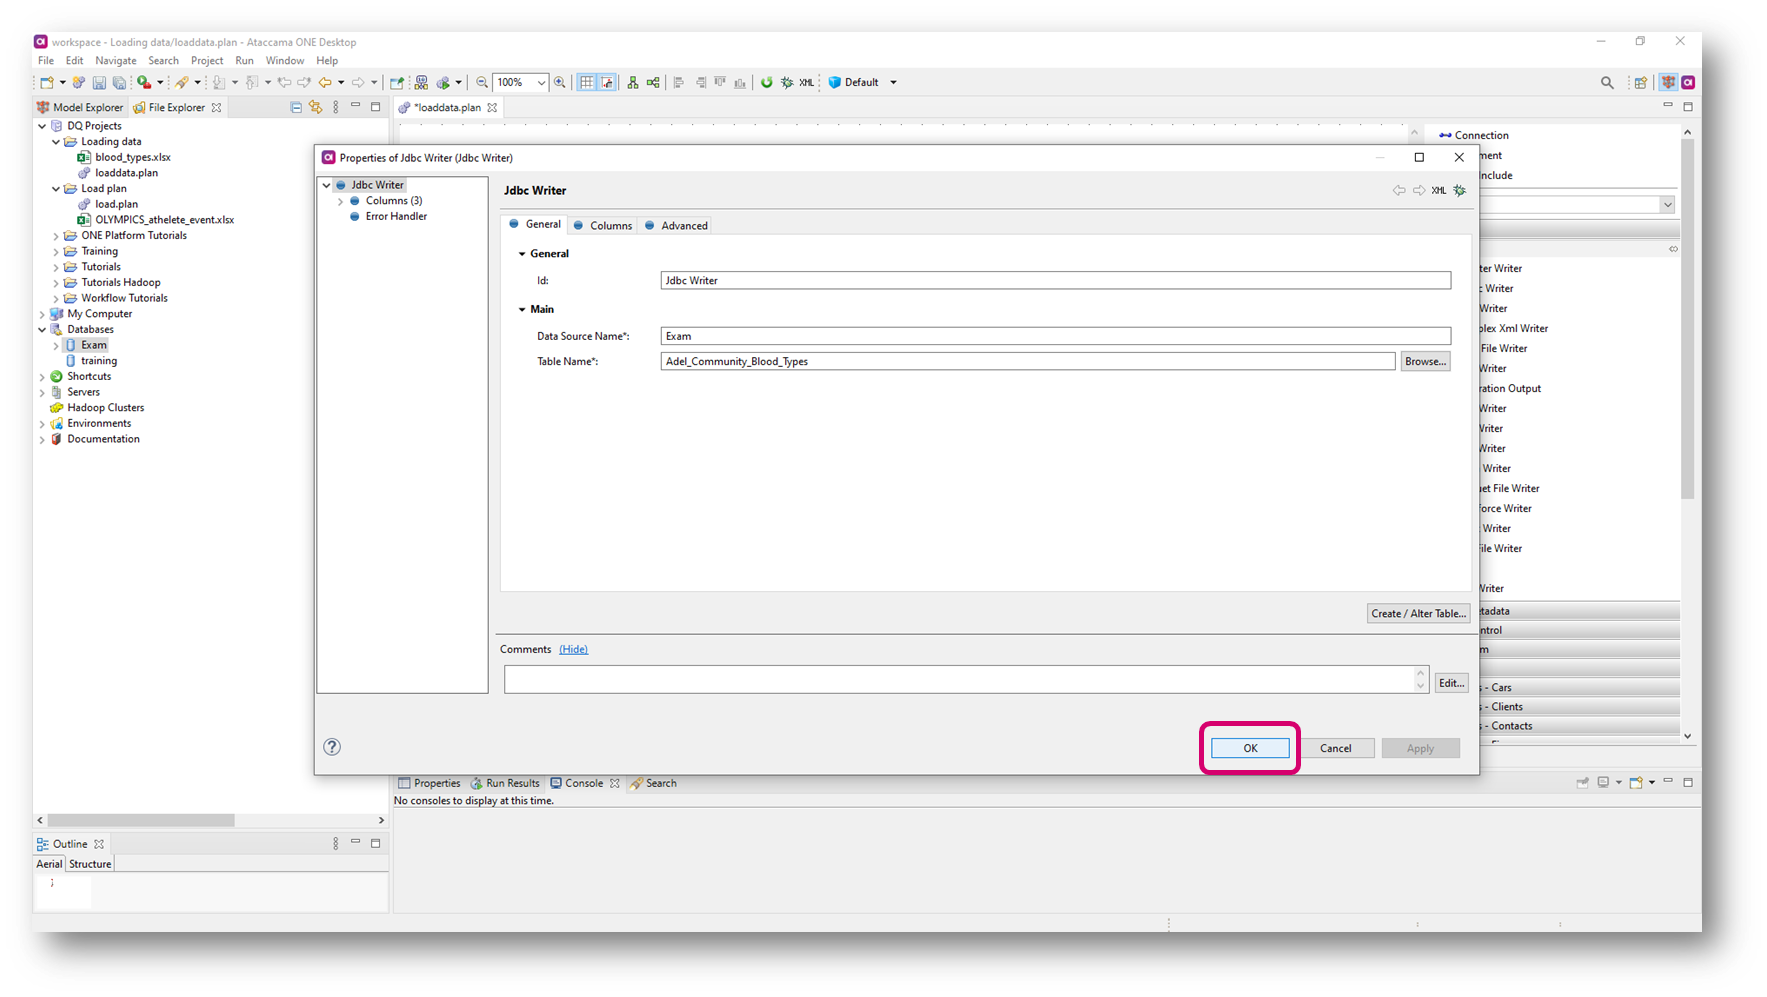
- In your plan, open Jdbc Writer and fill in Data Source Name (your Database name) and Table Name
<your name>_blood_typesin General tab and Columns in Columns tab
- Click on Create a table (you need to wait and then confirm the SQL statement in the popup dialog box) once done, continue with Apply
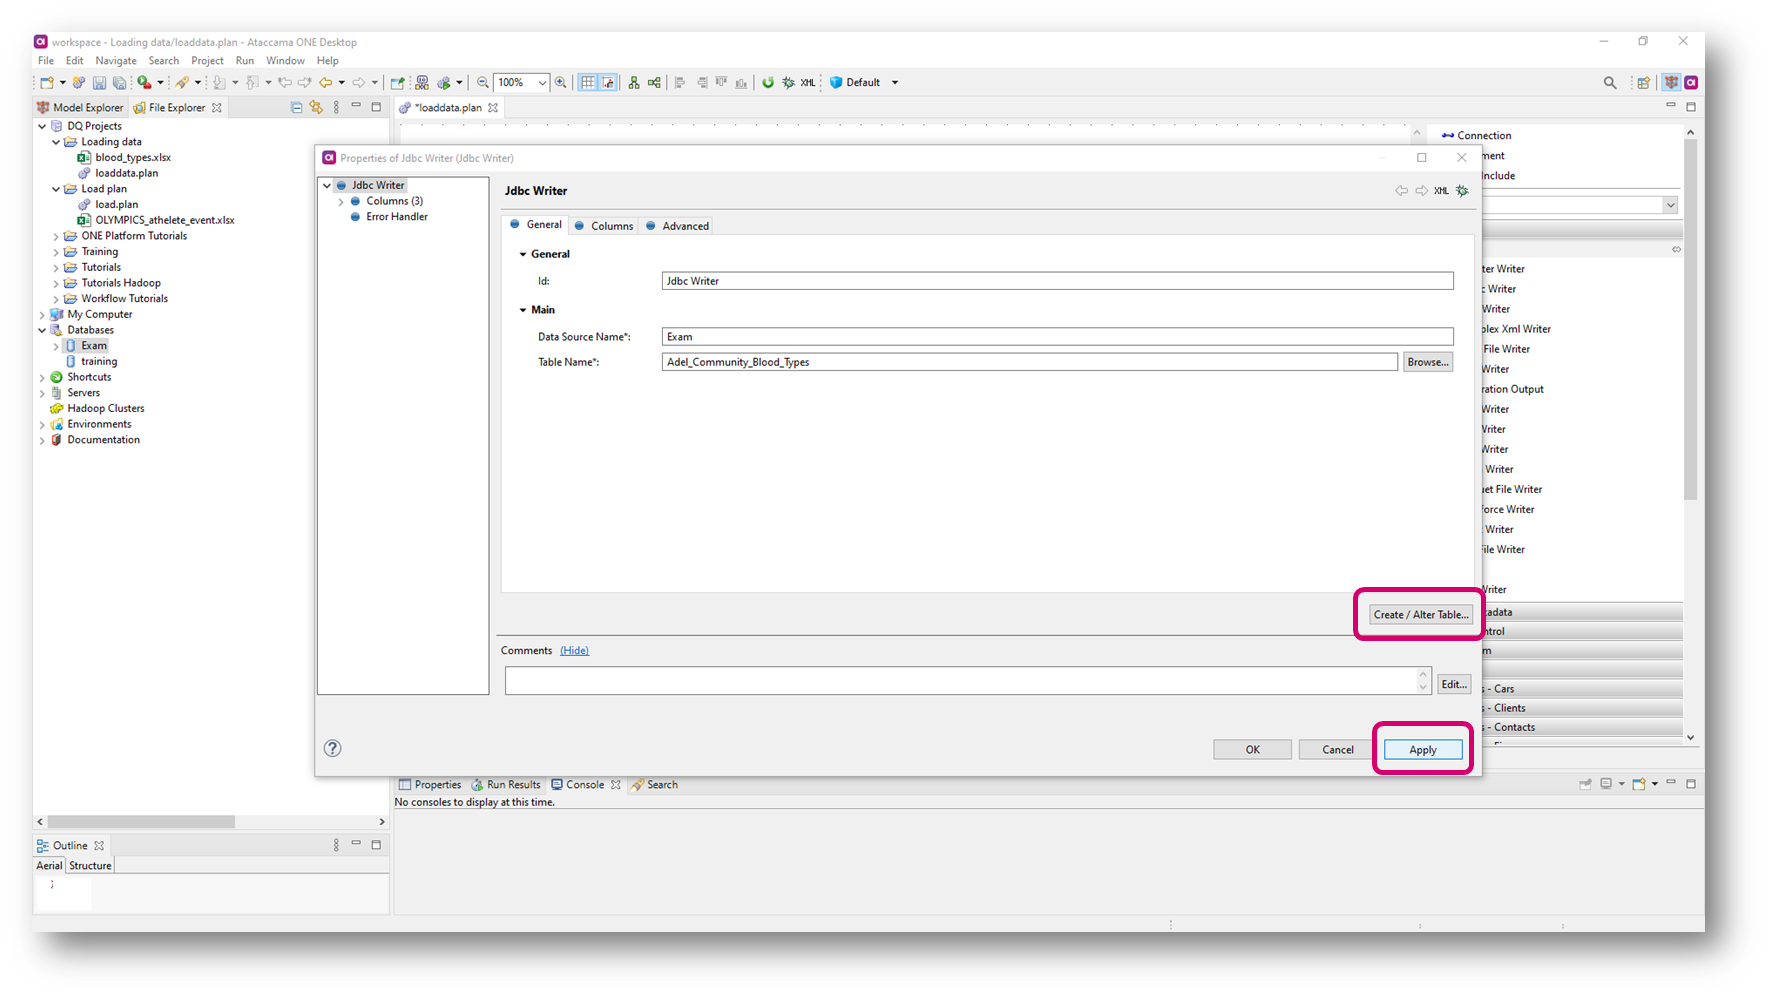
- Confirm with OK
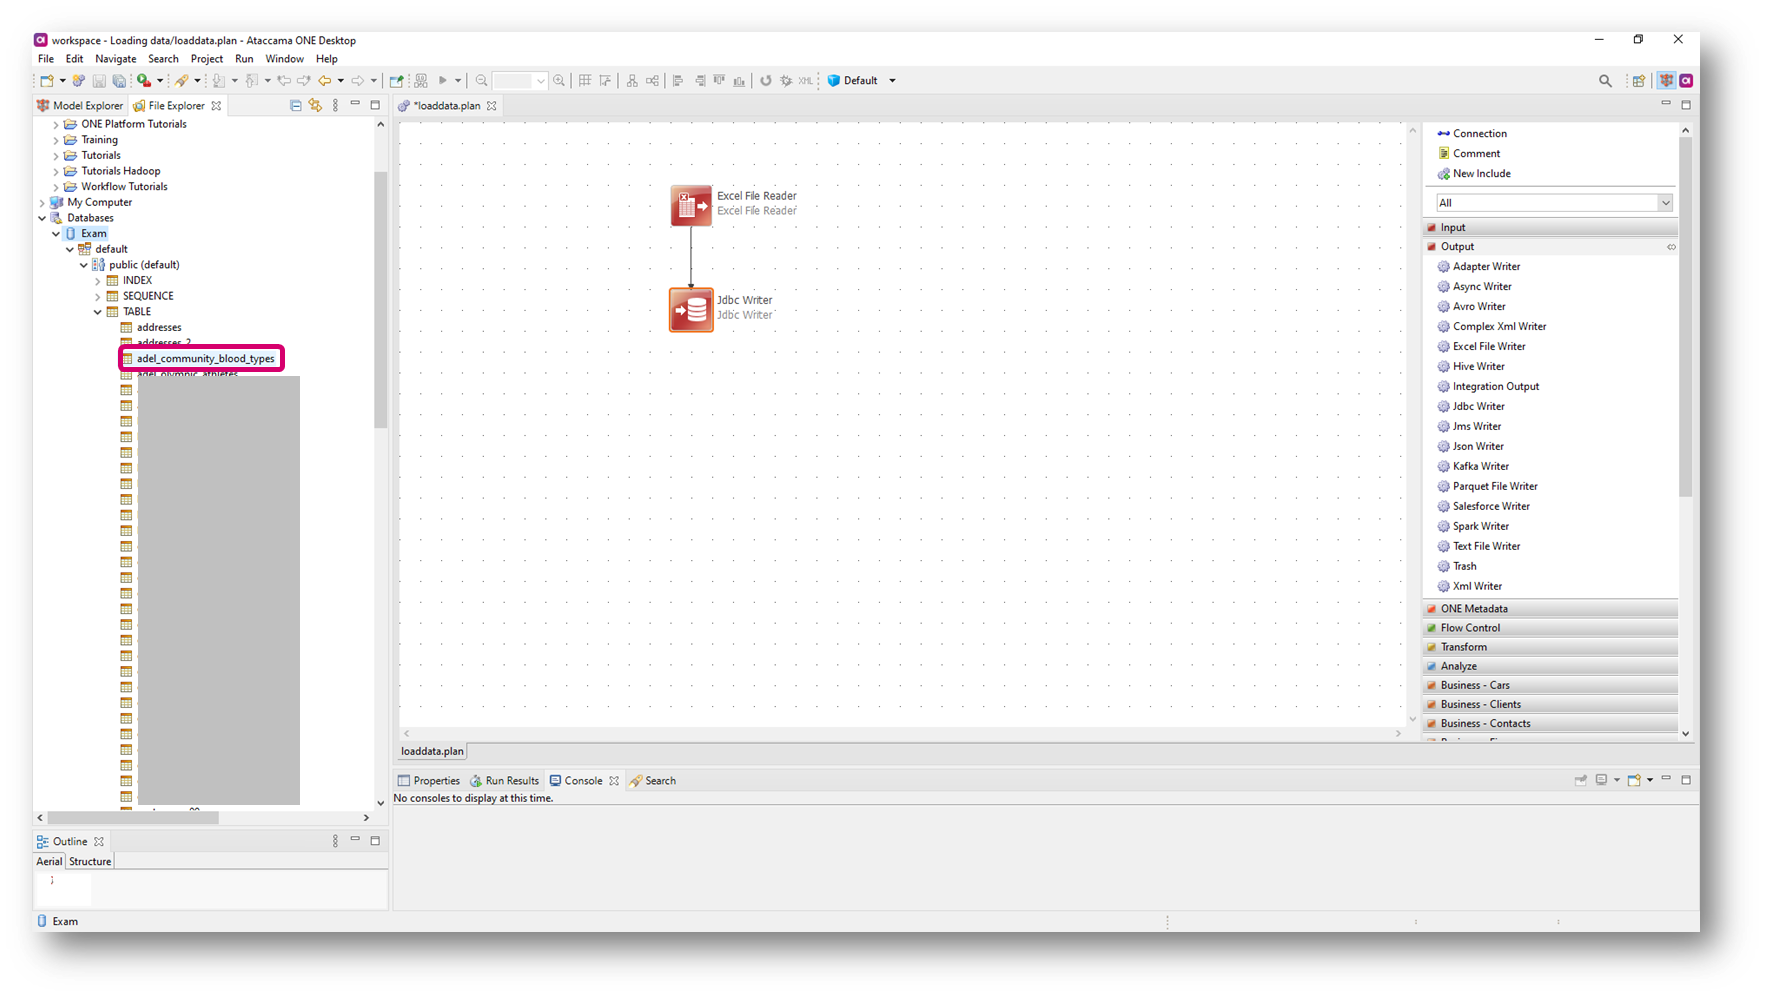
- Check that the table is visible in your database
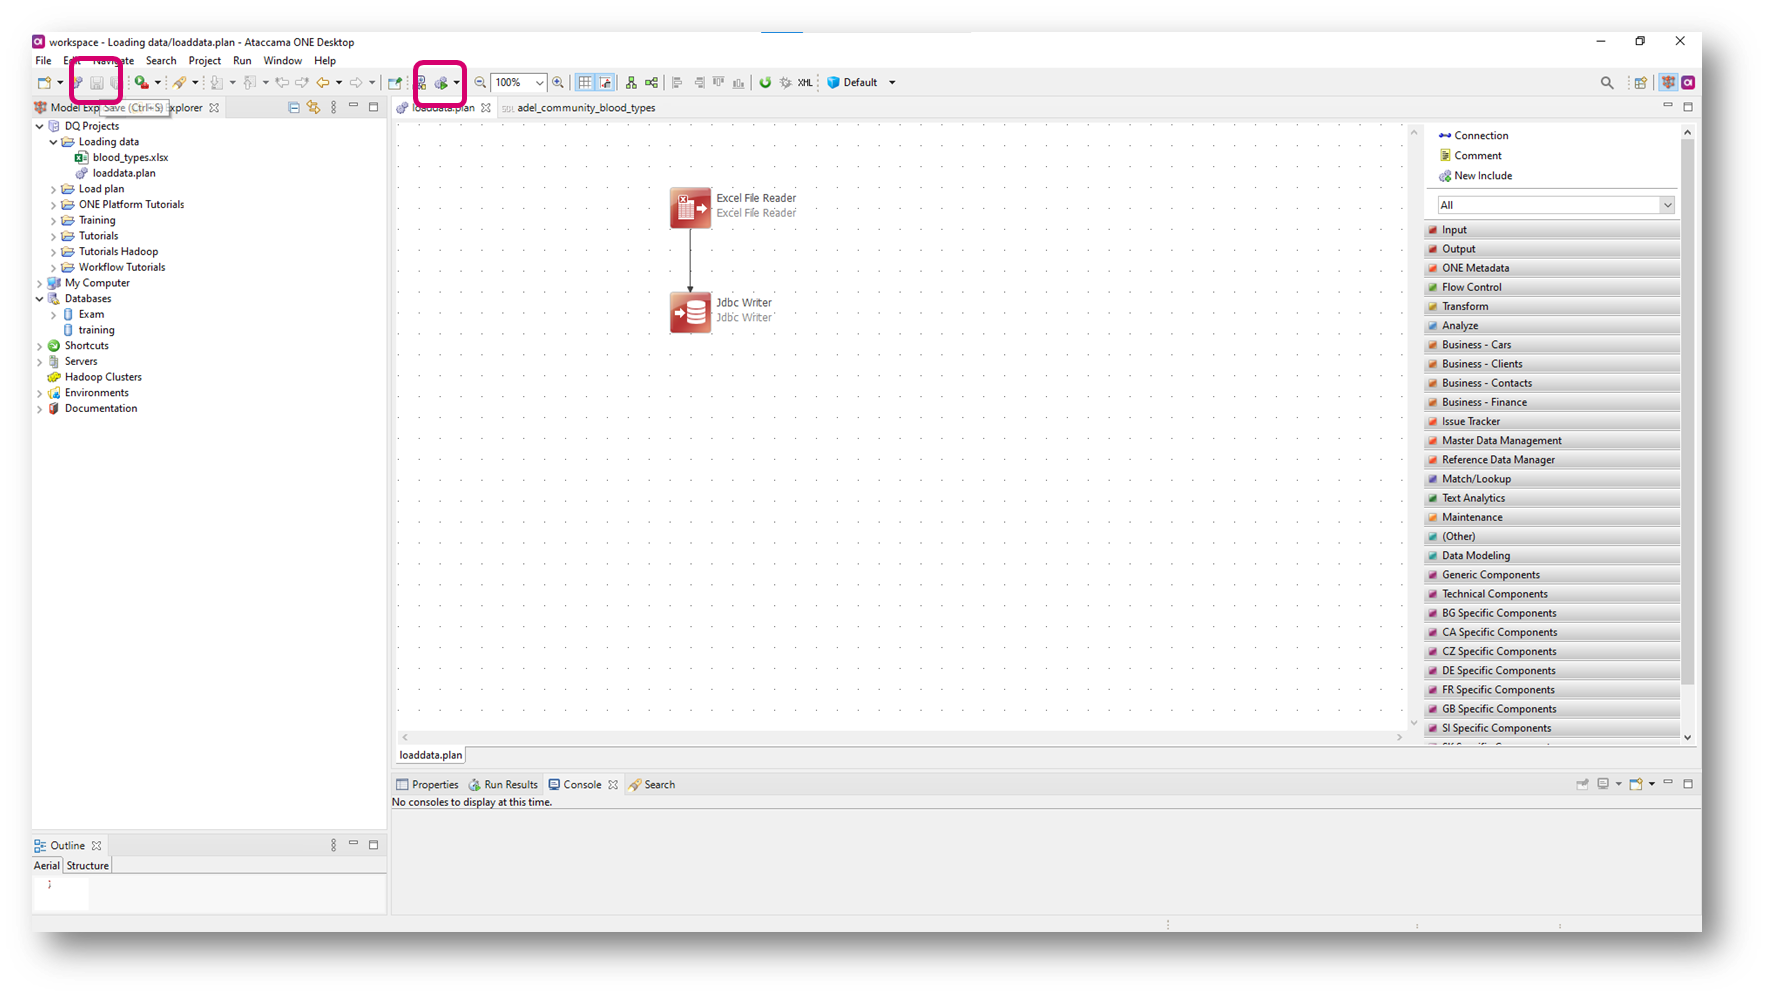
- Go back to your
loaddata.planand Save it and Run it
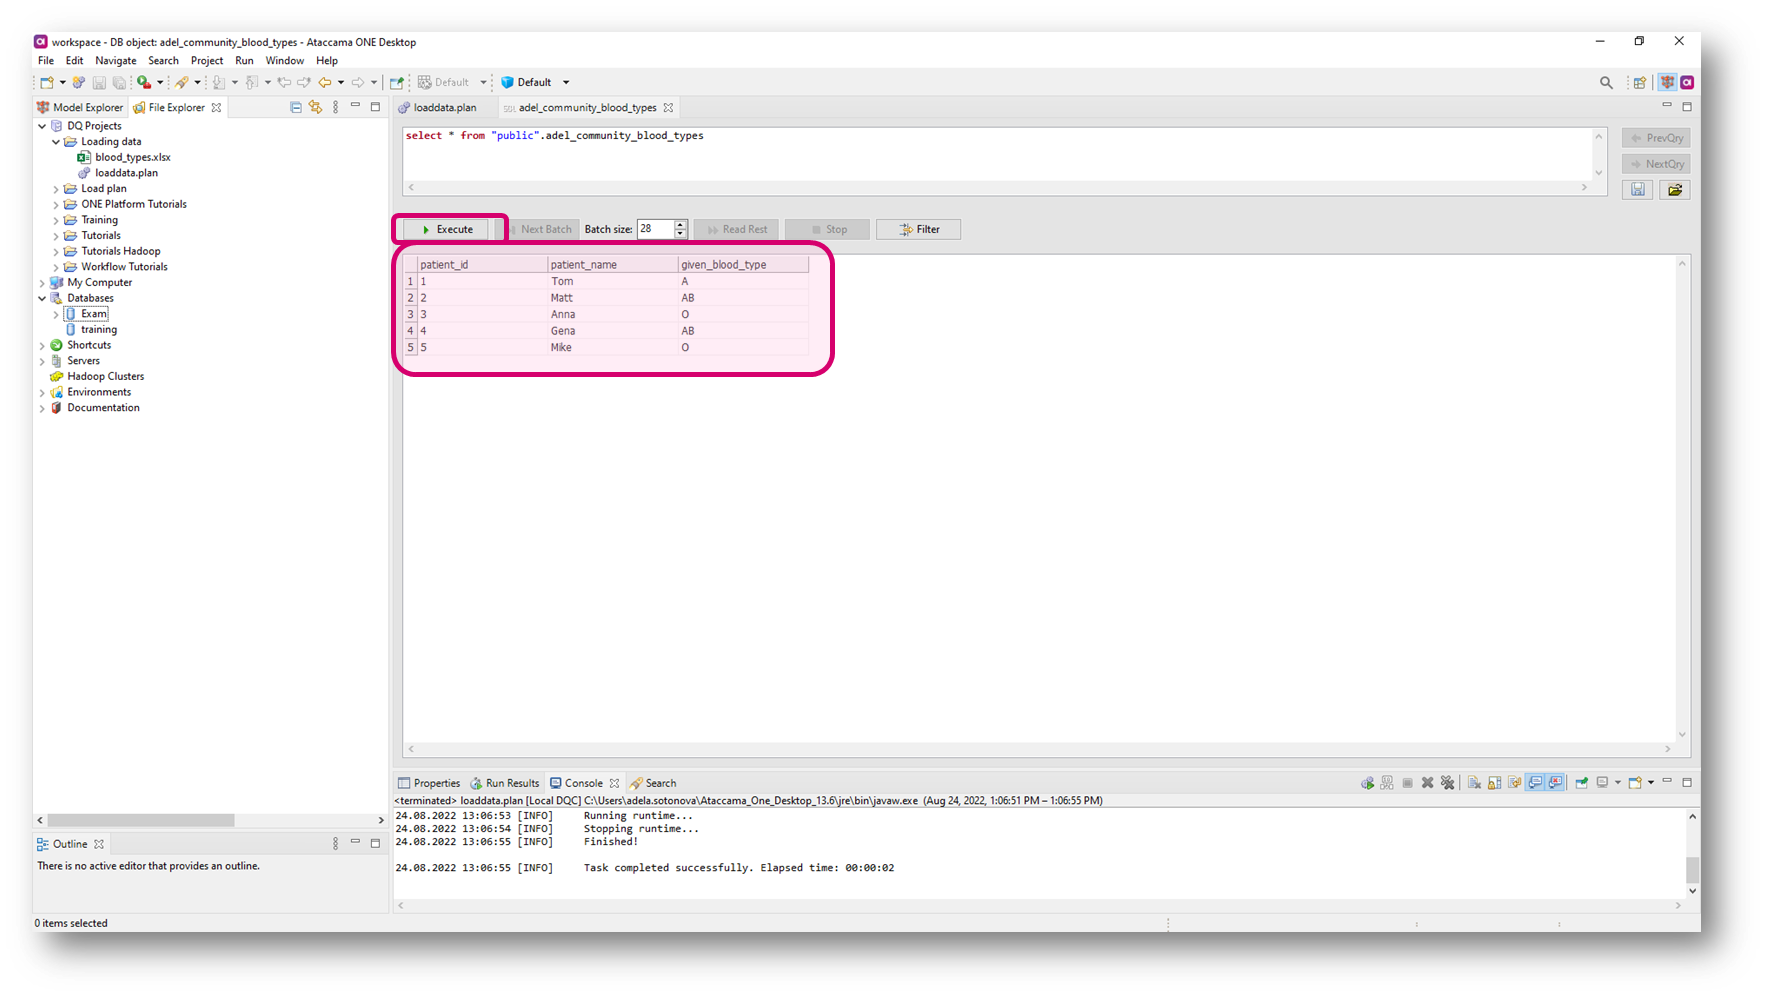
13. Execute your SQL sentence and you see that your data are in the database
- 💡Repeat steps 1-13 again for files rhesus_status.xlsx and patient.xlsx which we will use later in the series.
❗ COMMON MISTAKE
- Candidates quite often miss the step 9 and don’t create a table in the database as required
Do you have any question or tips&tricks? Let us know in comments section!