Adding more details to a list view and providing additional filtering options can help business users in their daily tasks as you scale Data Governance across multiple teams, geographies, or business functions.
In this article we’ll customize the Business Glossary to show additional term attributes as columns in the list view and to enable filtering by those attributes. This approach generally works across the Ataccama ONE Web app, so you can use this article as a guide to customize other pages, for example Rules, Catalog Items, or Monitoring Projects.
You don’t have to be a developer to follow this guide. If you come across any concepts you’re not familiar with, have a look at our documentation.
Adding columns
First, navigate to the Business Glossary’s Terms list. In the top right, find the 3-dot menu which features the option to Edit page.

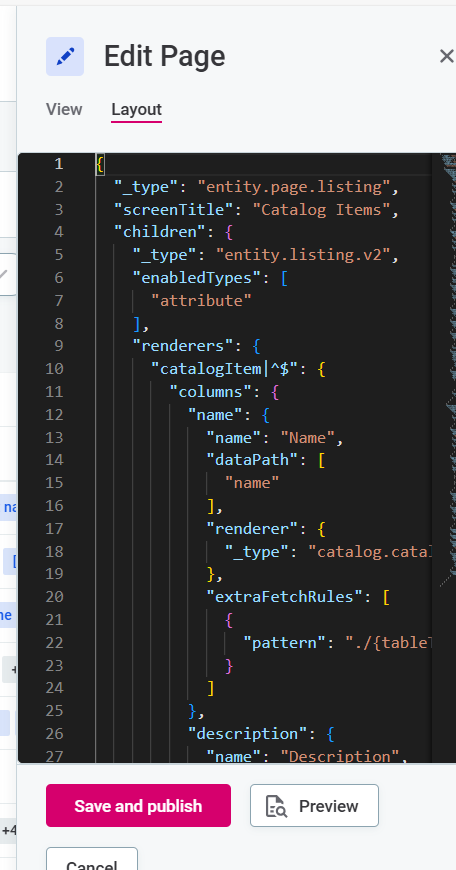
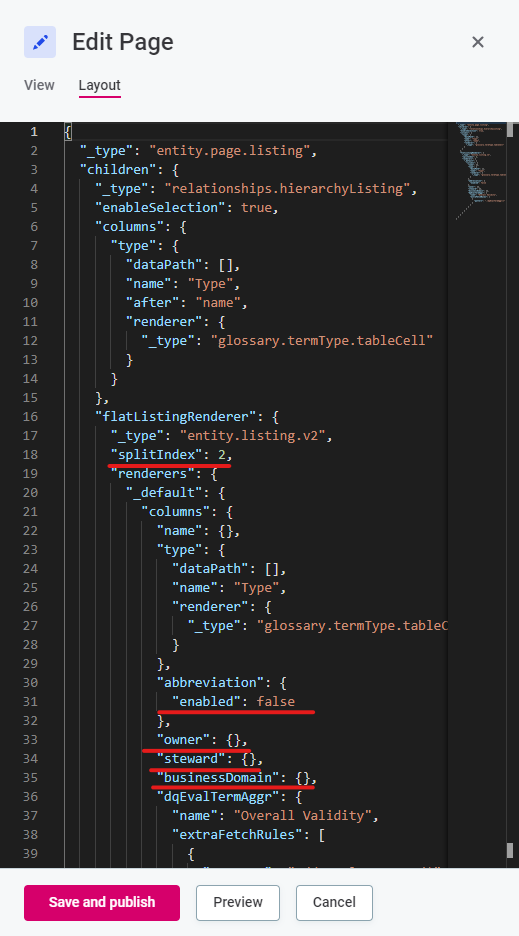
In the side bar that opens up, go to the Layout tab. You’ll see the JSON that describes how the objects are shown on this page when the web app loads it.
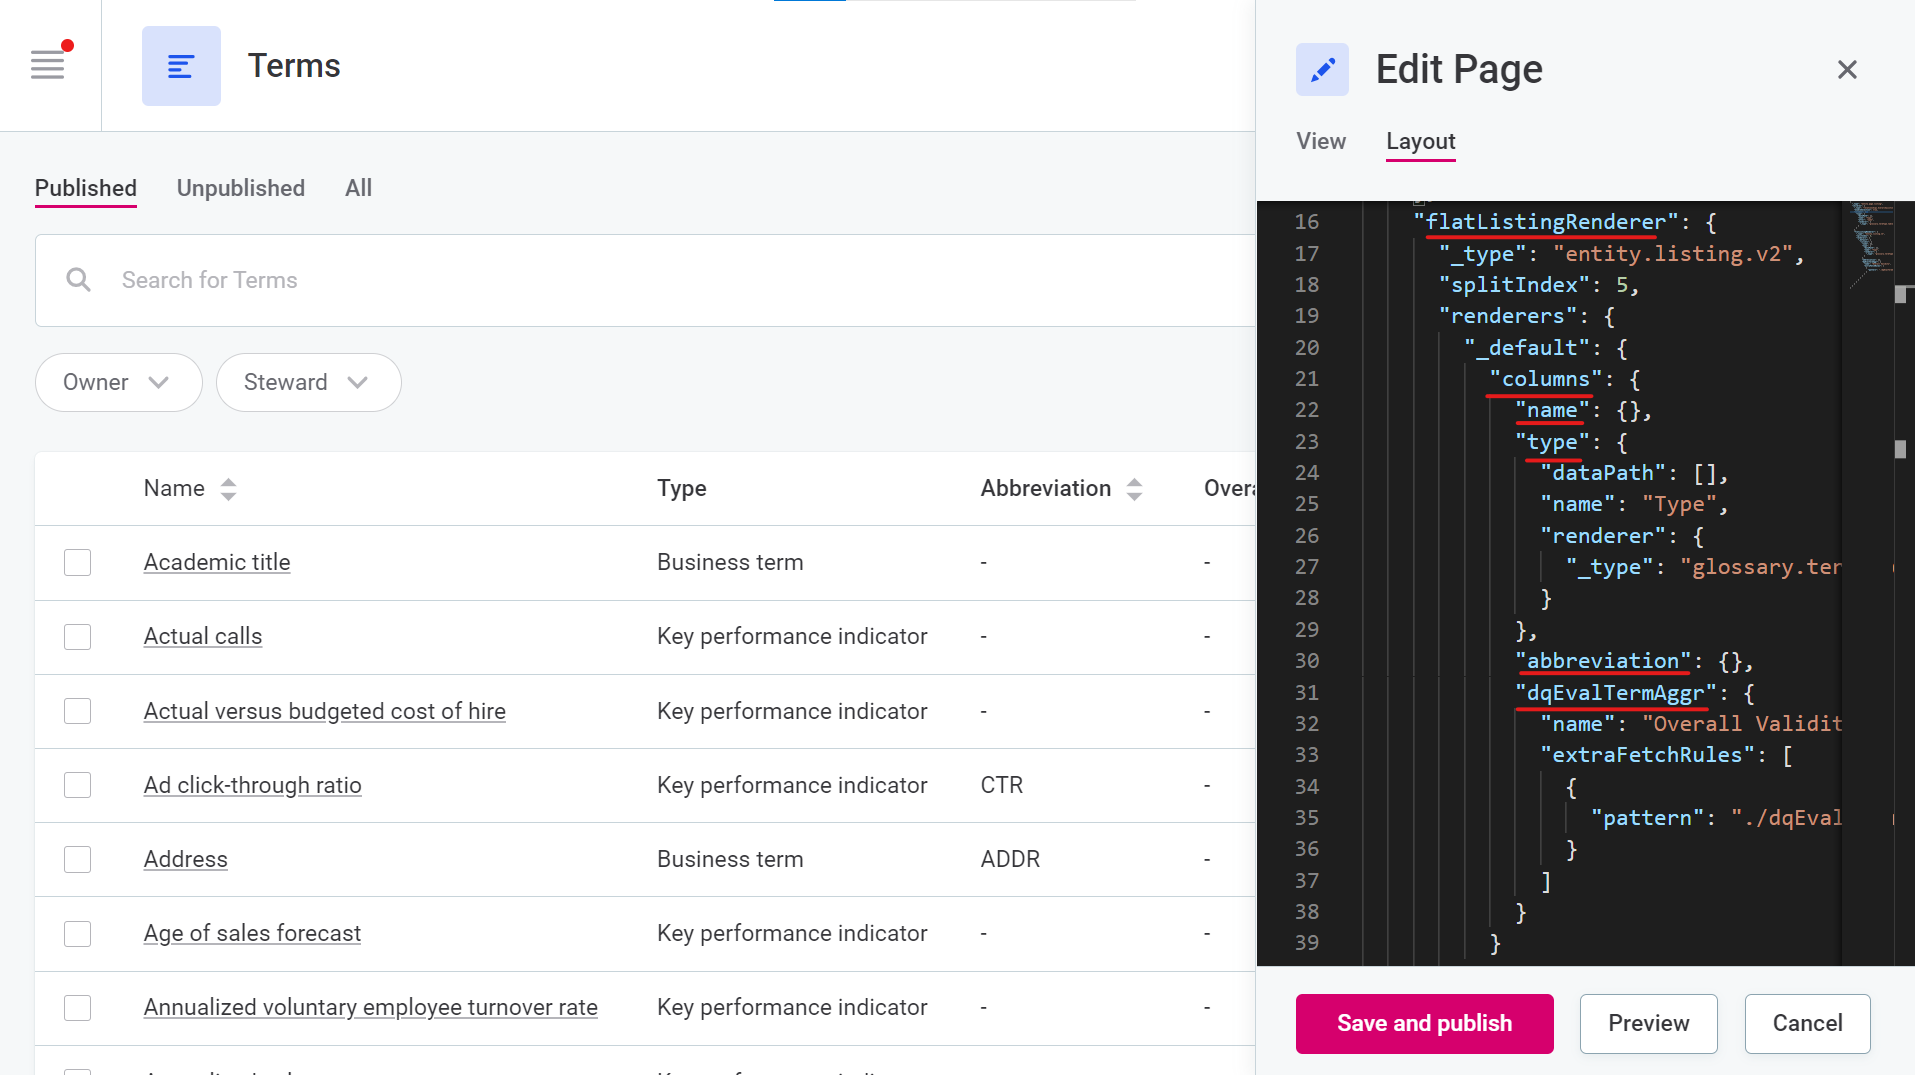
Locate “columns” and see how the columns on the Terms page correspond to the respective definitions in the JSON, e.g. “name”, “type”, “abbreviation” and “dqEvaltermAggr”.
💡 The page layout references entity and property names defined by the Metadata Model. If you reference some property name that doesn’t actually exist, the app won’t be able to fetch anything to display in that column.You can lookup the Metadata Model for the entity you’re interested in and see what its properties are called.
Now, we want the owner, the steward and the business domain of each term to appear in the list view. At the same time, we’re not actively using abbreviations, so we might as well hide this column.
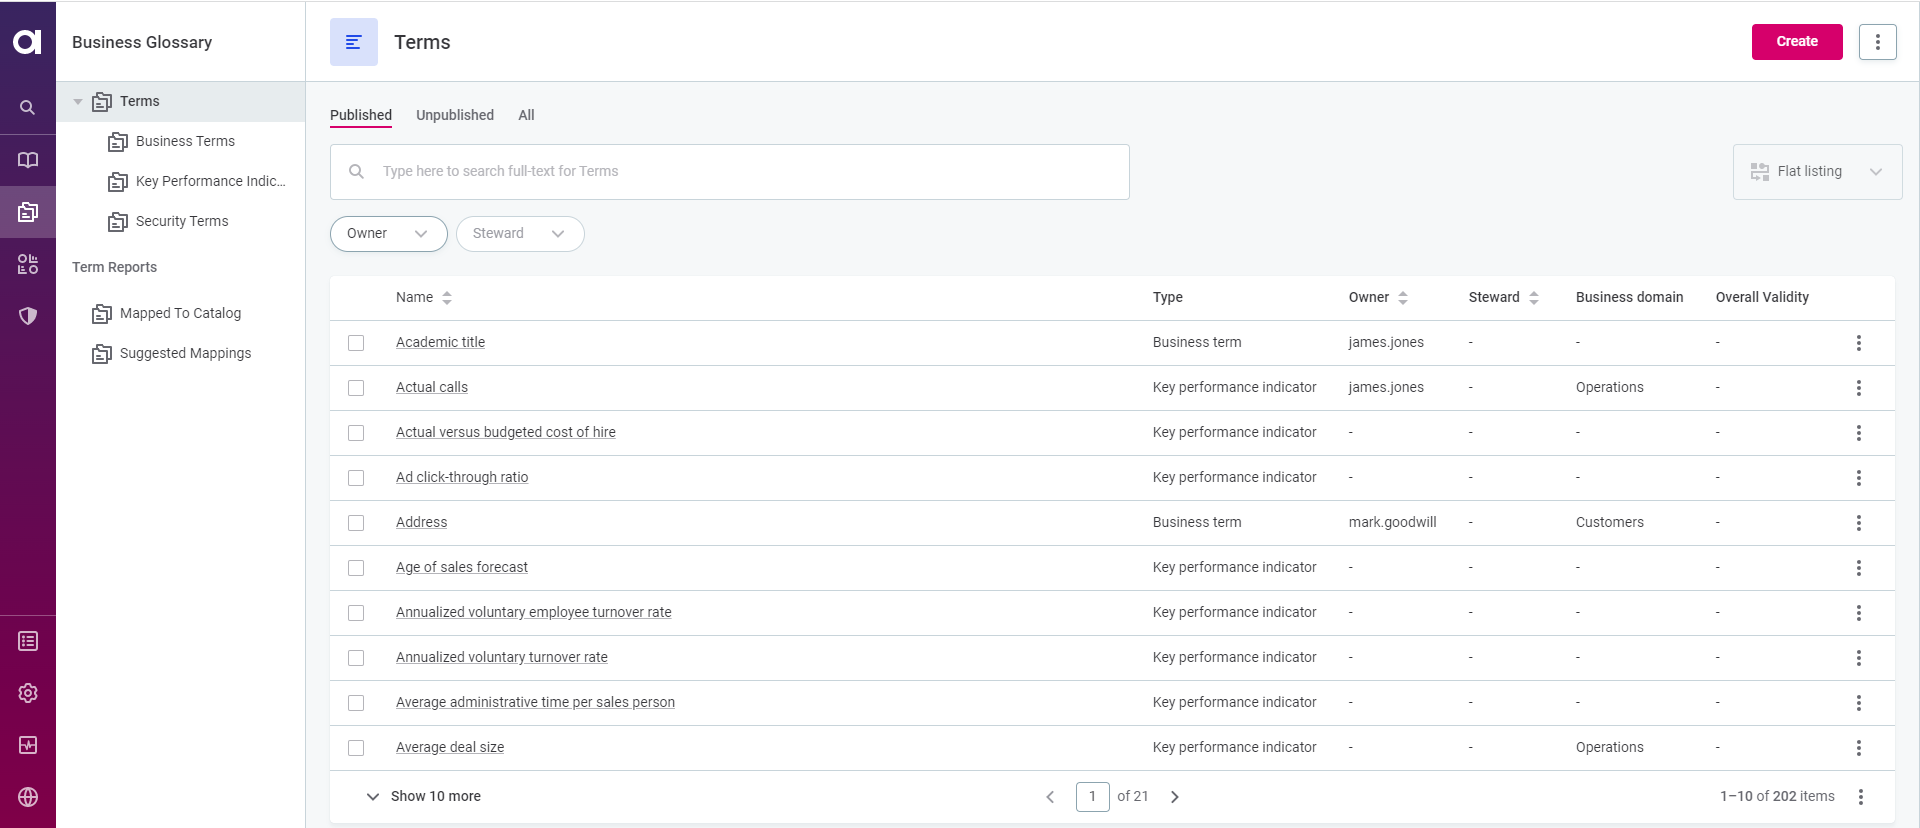
Here’s what the changes are going to look like:
Here we’ve added the parameter for the abbreviation column to disable it, and added the definitions for the 3 new columns we want to place in the list view.
We’ve also changed the value of “splitIndex” from 5 to 2. The “blank space” which serves as a visual separator within the grid will appear in the position of the 2nd column, after Name.
Here’s what the result looks like once we Save and publish.
💡 You’ll notice Business Domain isn’t a standard property that Terms have out of the box. As an Application Admin, you can add custom properties to the Metadata Model - here’s how we’ve added Business Domain as a dropdown/picklist property type.
💡When adding referenced properties to the screen layout of a list view, you may want to make them not only visible, but also sortable. In this case a different approach should be used. To make property columns sortable, the column definition should provide the details about the property of the target entity that's referenced from the current property. For example, for the owner property of a term, which references the username property of a person, this is what the column definition will look like:
            "username": {
              "name": "Owner",
              "dataPath": [
                "owner",
                "username"
              ],
              "renderer": {
                "_type": "entity.scalar.tableCell"
              },
              "extraFetchRules": [
                {
                  "pattern": "./owner/*"
                }
              ]
            },
Adding Filters
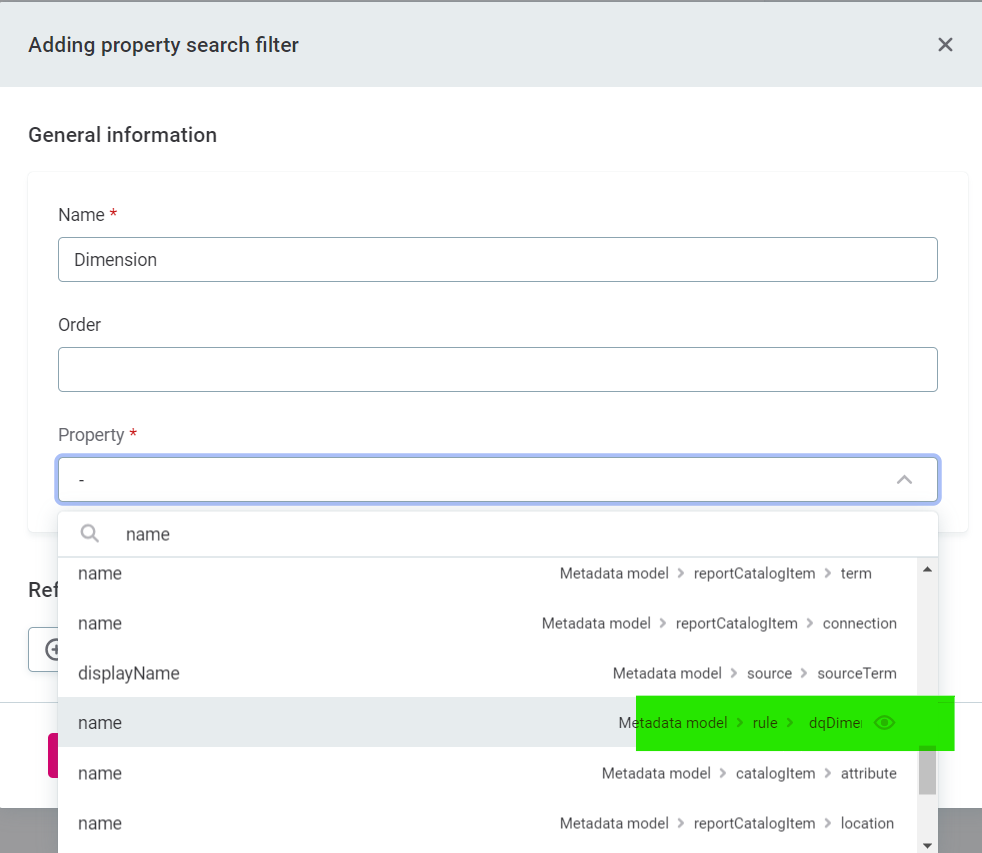
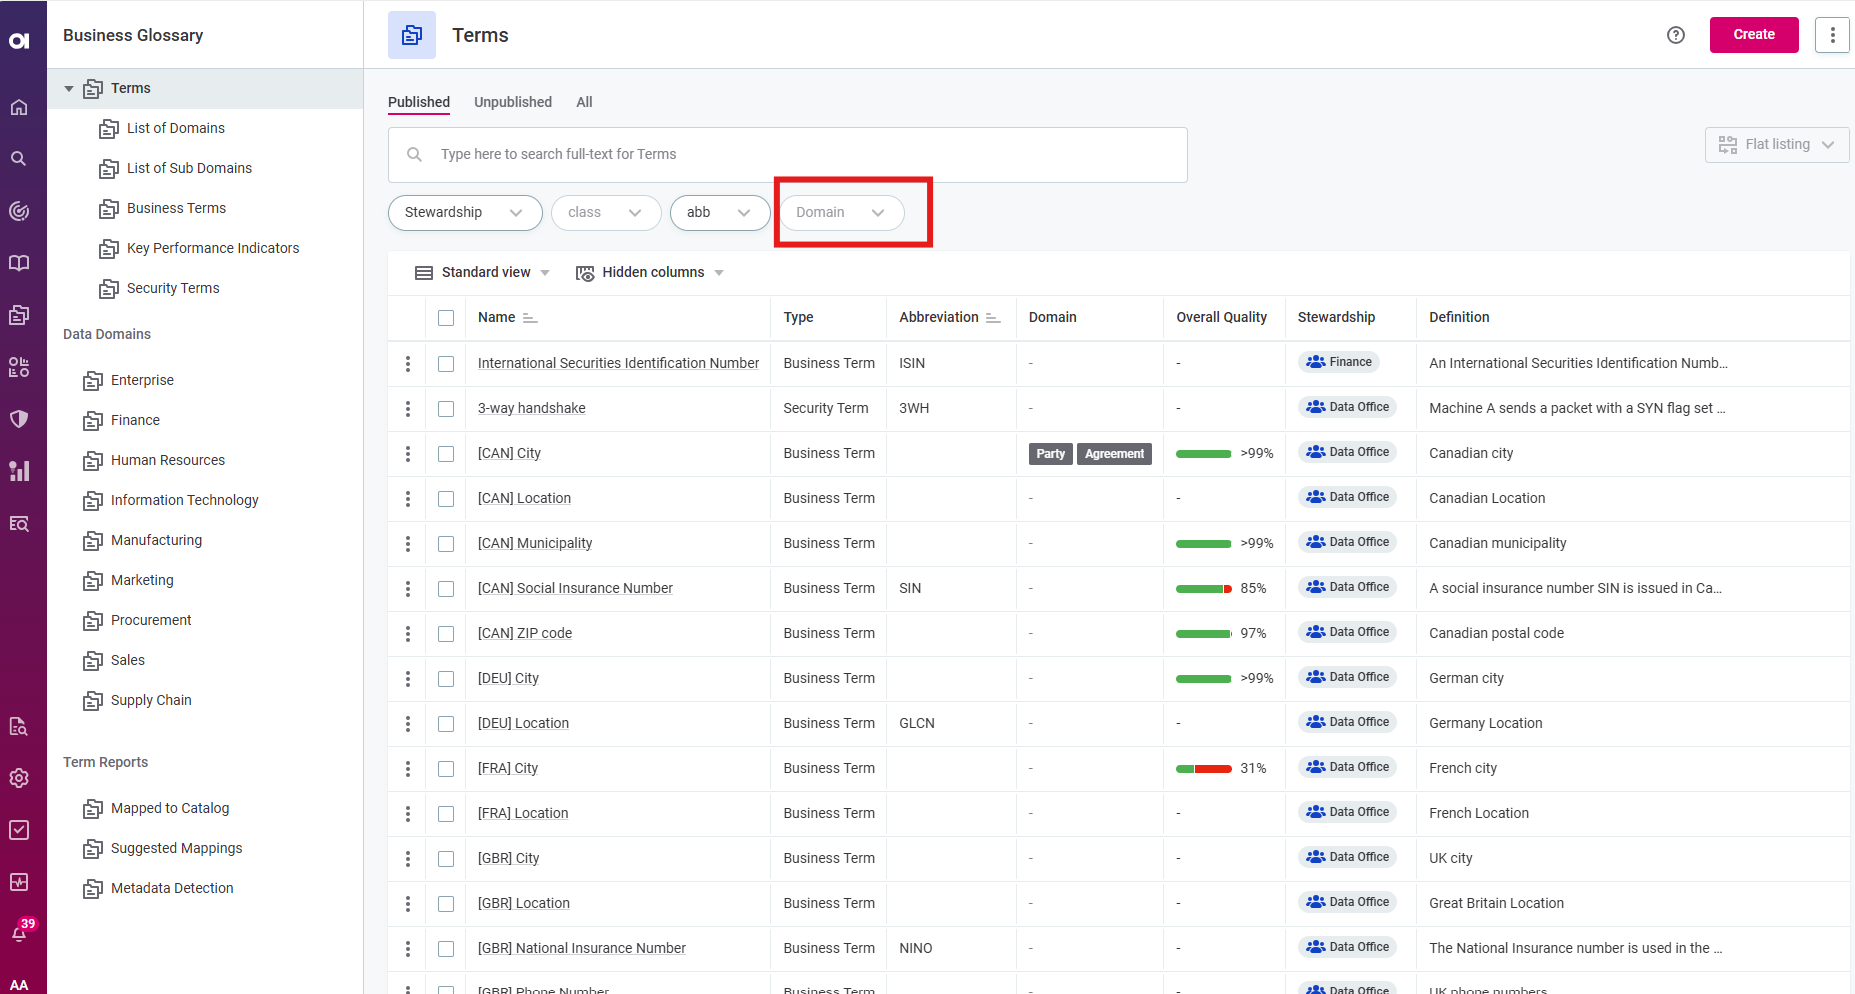
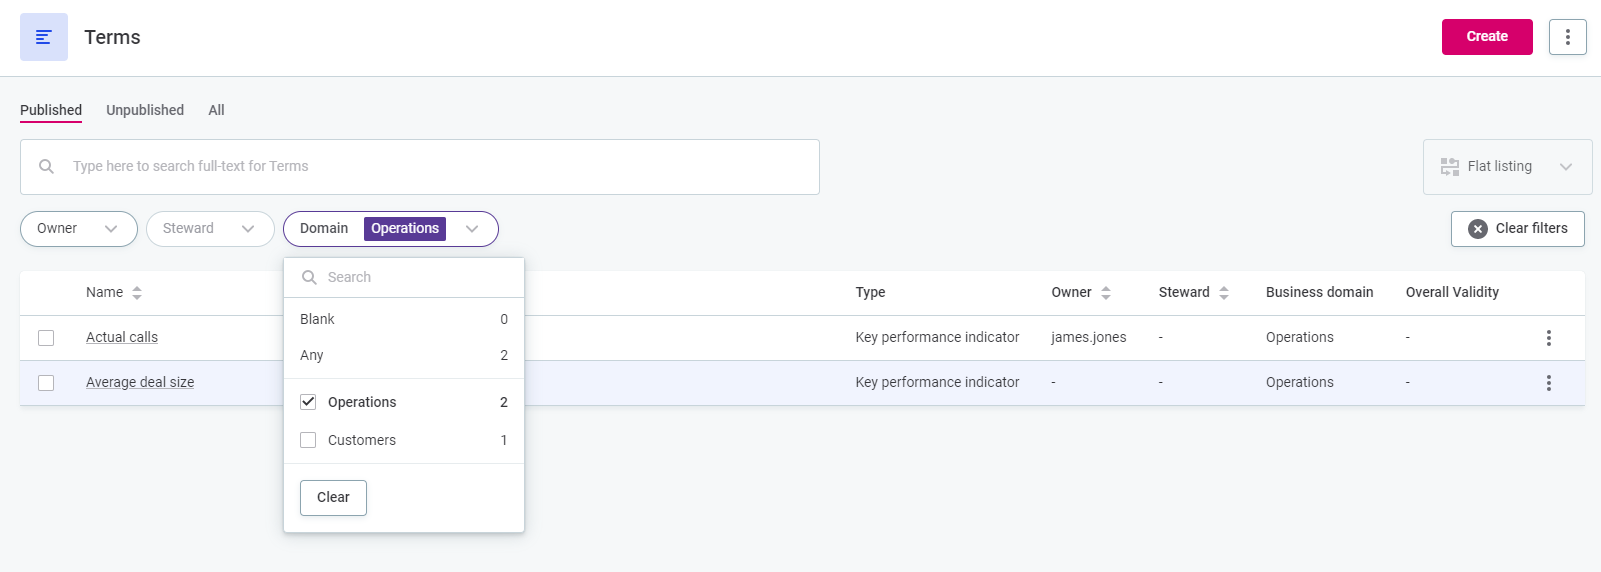
To make it even easier to find items in the Glossary, let’s make an additional filtering option from the property Business Domain.
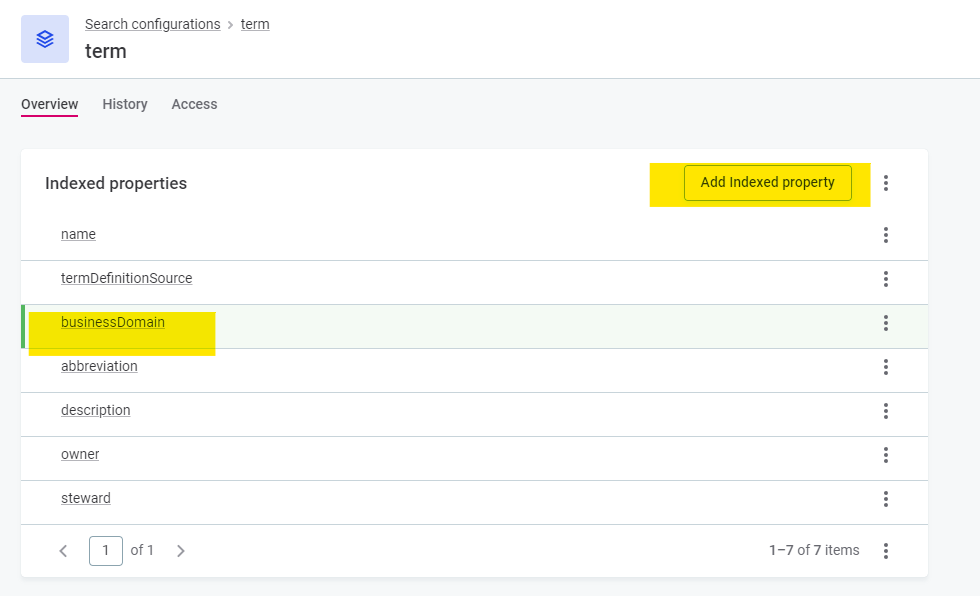
Go to Global Settings >> Search Configurations >> term. Notice that there’s already a number of nodes and their properties being indexed to power search in the app.
For businessDomain, the setup will be similar to what you’ll see for owner/steward if you explore the search configuration. Just like owner and steward, businessDomain is a referenced property that targets another standalone entity defined in the Metadata Model. Taking that into account, here’s how we’ll go about setting up search and filtering.
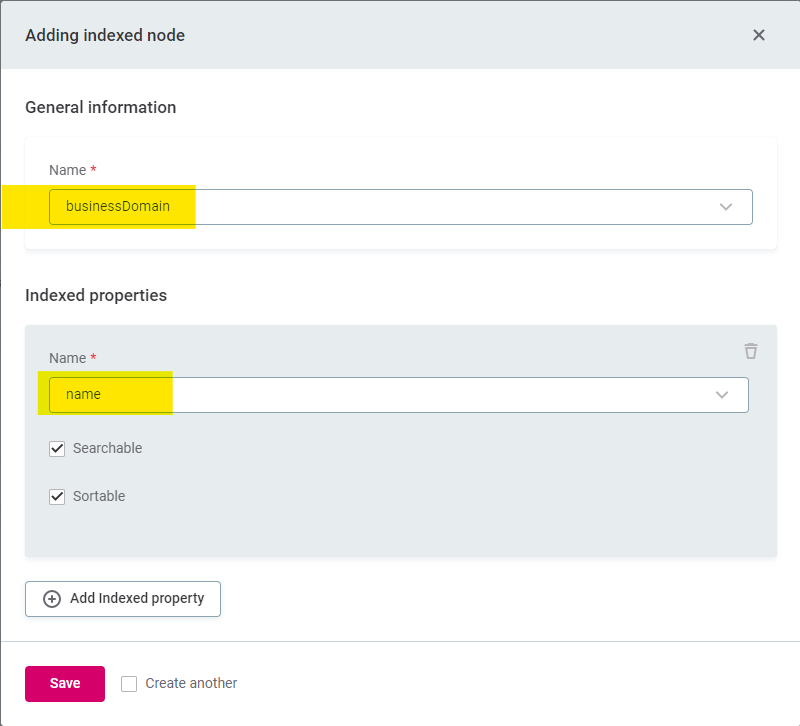
First, we’ll add businessDomain as a new Indexed Node with its name as the Indexed Property:
Then, we’ll open the Indexed Node term and add an Indexed Property businessDomain .
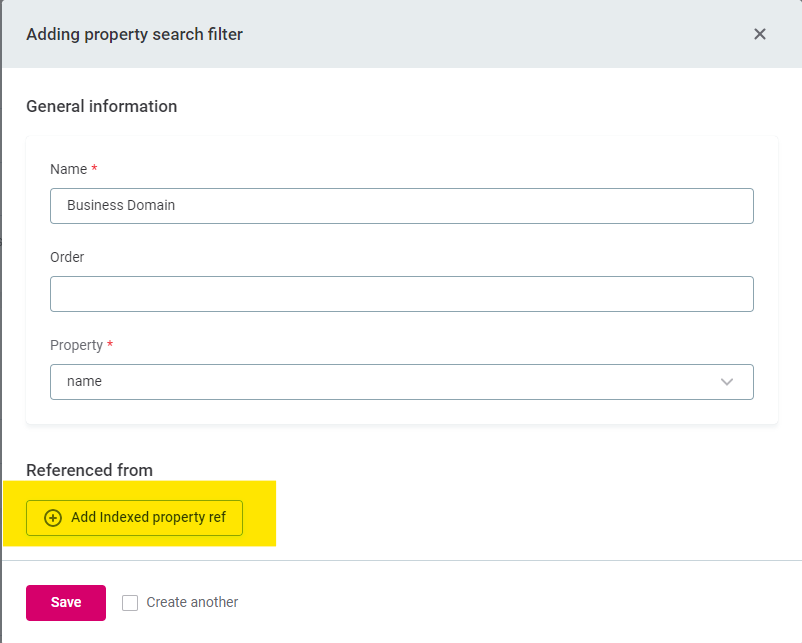
Finally, we’ll Add a Property Search filter called Domain, set as the property name of businessDomain (since we’ll want to be able to filter using the value of the business domain name).
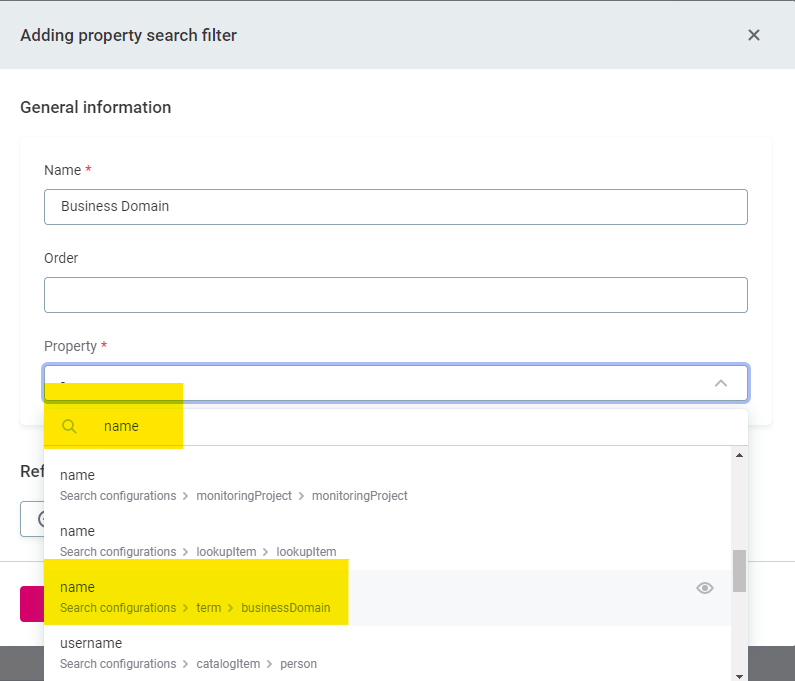
Make sure to also Add Indexed Property Ref. In the Target field, once again look for the name property related to Search Configuration > term > businessDomain.
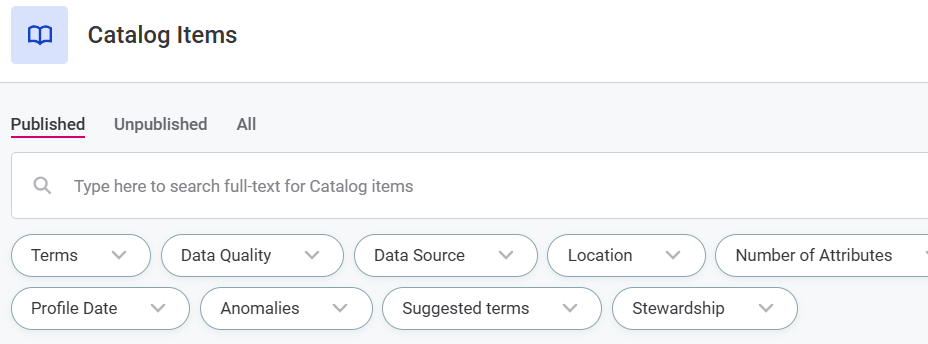
Once we’ve published the changes in the Search Configuration, the Terms listing will show a new filter:
Did you follow along? If you have any questions or thoughts please share them in the comments below.
P.S.If you liked this tutorial, keep an eye out for more articles on customizing the Ataccama ONE web app!