Steps overview:
- Download all components
- Install ONE Desktop
- Launch ONE Desktop and create the MDM CDI example project
- Place the files in the right structure
- Modify a bunch of files so they are working on MacOS
- Configure the Mac permissions to run things
- Launch ONE Desktop and create the MDM Banking example project
- Launch it all (keycloak, postrgres, mdm-server, server), one by one
Download:
- Builds (Latest versions here):
- MDM: Mdm-assembly-14.5.0-linux.zip
- ONE Desktop: Ataccama-one-desktop-14.5.0-macos.dmg
- ONE MDM Server: Mdm-server-assembly-14.5.0-linux.zip
- Plugins (Latest versions here, the official Postgres version for Linux missing for now):
- Your license (.plf file)
Install ONE Desktop:
- Install ONE Desktop (Ataccama-one-desktop-14.5.0-macos.dmg)
- Rename the application so that there are no spaces
- Make sure One Desktop application isn’t running while renaming the application
- For example
ONE Desktop.app—>ONEDesktop.app
Place the files in the right structure:
❗❗ To run the .sh scrips successfully, they need to be placed in a path that contains no spaces. The ONE Desktop path has at least one space, so we need to place the parts we want to run from the terminal on a spaceless path (Keycloak, Postgres, MDM, JRE and Server)
-
To view the contents of ONE Desktop in Finder:
- Under Applications, right click on the ONE Desktop application
- Click on Show Package Contents
- Click on Contents
- Click on Eclipse
-
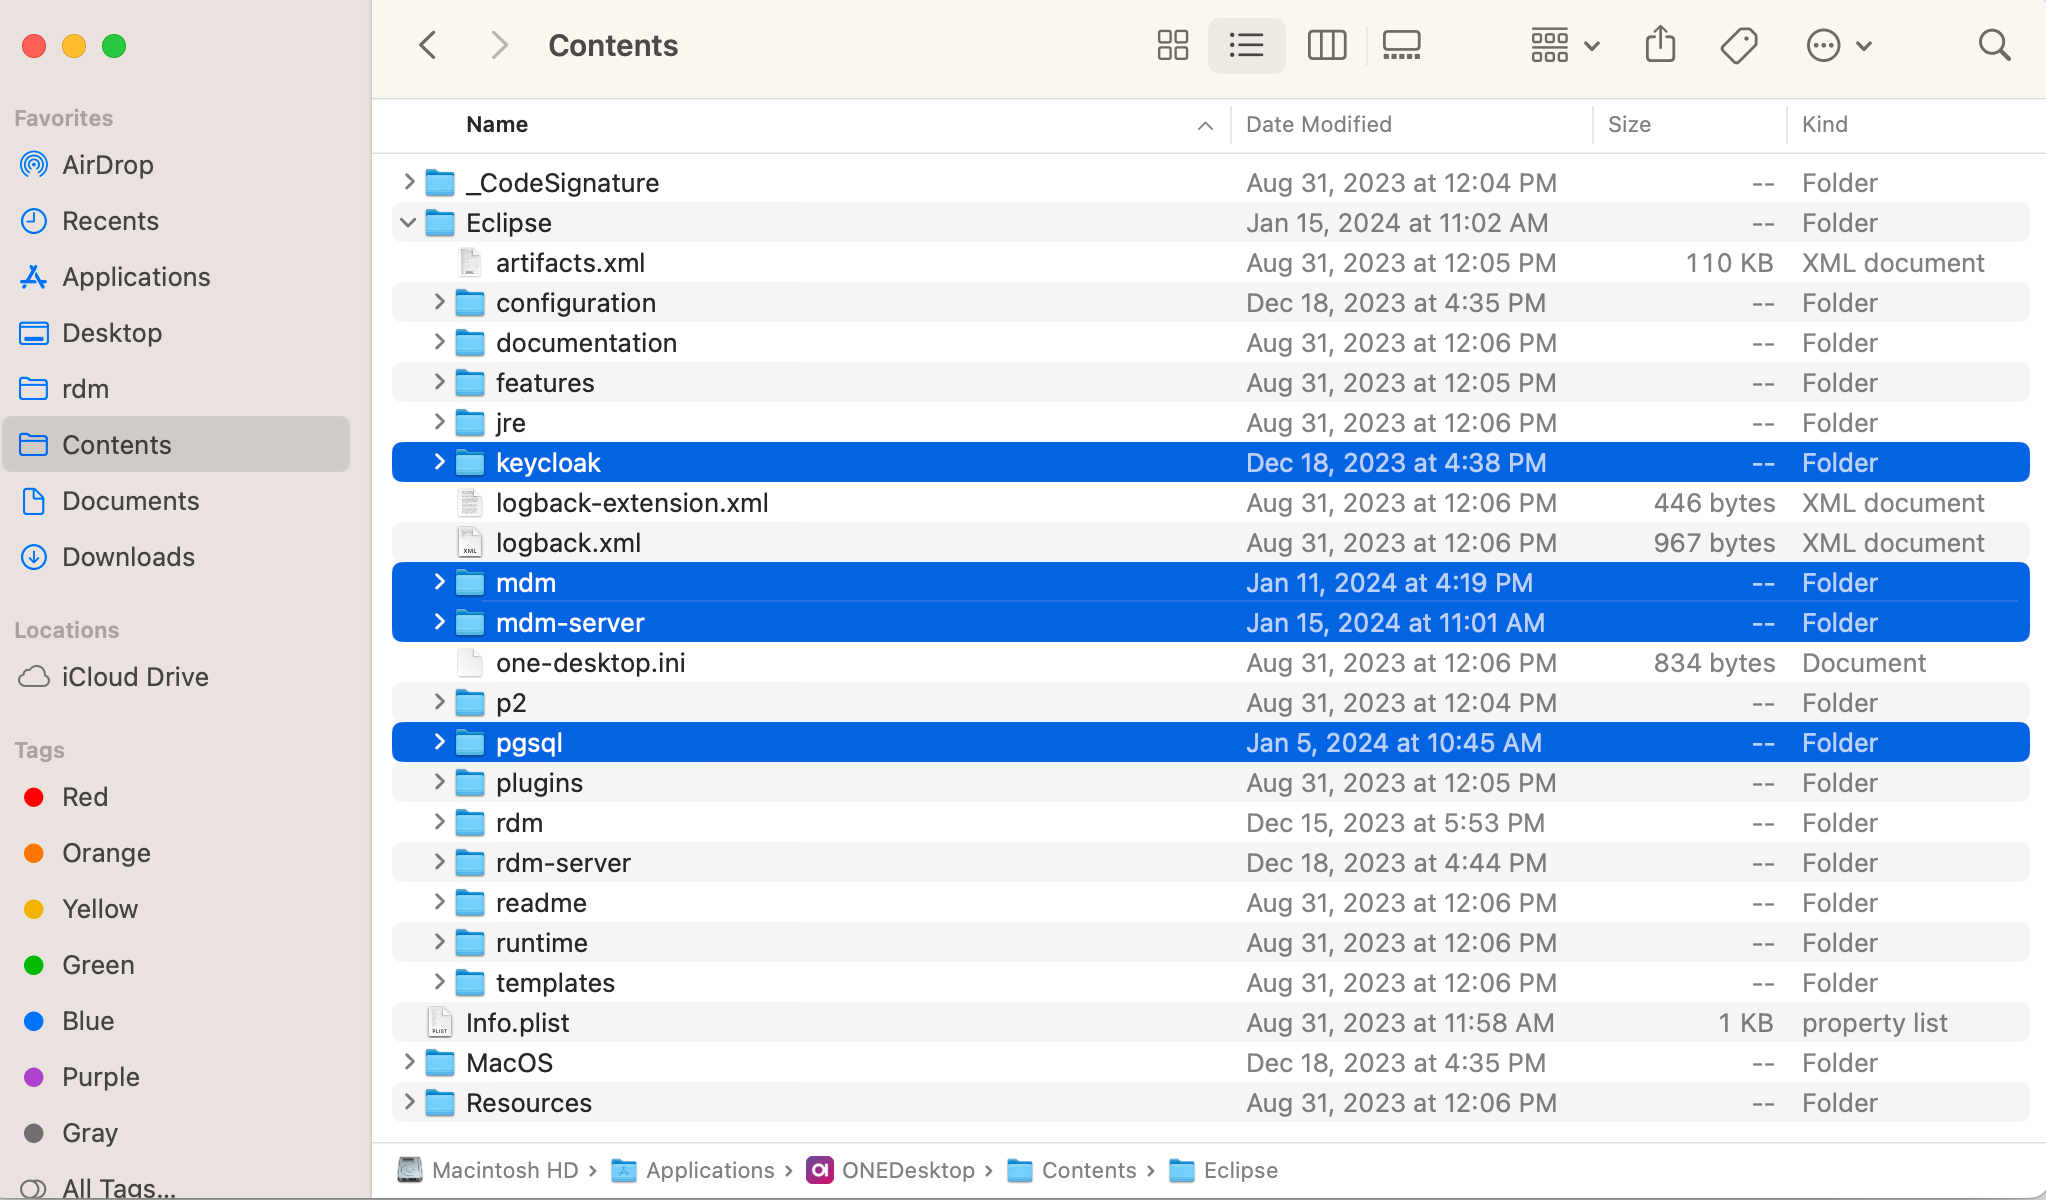
Extract the following archives in the Eclipse folder and rename the folder names to the following:
-
The folder structure should look like this

-
Your path without spaces should be similar to
/Applications/ONEDesktop.app/Contents/Eclipse -
Place your license in your home folder, e.g.
/Users/<username>/emp_license_14.plf -
Delete the data folder in
/Applications/ONEDesktop.app/Contents/Eclipse/pgsql -
(Optional) Replace the ataccama.json file in
/Applications/ONEDesktop.app/Contents/Eclipse/keycloak/with the one you downloaded -
(Optional) Replace the backup file in
/Applications/ONEDesktop.app/Contents/Eclipse/pgsql/pginitwith the one you downloaded -
(Optional) Download Java jdk (you can find the recommended and supported version here) and set it as Java Home
Launch ONE Desktop and create the MDM Banking example project:
- Open Ataccama ONE Desktop and select the Ataccama ONE Desktop perspective.
- In Model Explorer, select New and then Model Project.
- In Use template: select General MDM project - CDI Example.
Configure the Mac permissions to run things:
👉 Don't forget that if you replace some files you will need to again set the permissions and run the xattr command.
- Open the Terminal (command+Space Terminal) and navigate to the
/Applications/ONEDesktop.app/Contents/Eclipsefolder. Eg:cd /Applications/ONEDesktop.app/Contents/Eclipse- Type
CHMOD -R 777 .(the "." is intentional) - Type
xattr -r -d com.apple.quarantine .
- Type
- Navigate to
/Applications/ONEDesktop.app/Contents/Eclipse/pgsql- Type
chmod -R 0700 .
- Type
- Navigate to
/Applications/ONEDesktop.app/Contents/MacOs- Type
CHMOD -R 777 .
- Type
Launch it all, one by one:
- In the ONE Desktop, under the CDI Example navigate to the Files/bin folder
- Right-click
start-mdm-server.sh& select Open With Text Editor - Edit the path listed after
-configto point to the CDI serverConfig- eg.
config="/Applications/ONEDesktop.app/Contents/MacOS/workspace/mdm-cdi-example/Files/etc/mdm.serverConfig"
- eg.
- Right-click

- Launch keycloak: double-click on
start-keycloak.shand wait for Keycloak startup complete message to appear in the console - Launch postgres: double-click on
start-db-postgres.sh - Launch mdm-server: double-click on
start-mdm-server.sh - Launch mdm: double-click on
start-mdm.sh
💪 Once everything is launched correctly, you’ll find:
- MDM Web App: http://localhost:8050/
- MDM Admin Center: http://localhost:8051/
- Keycloak: http://localhost:8083/auth


