


Hi everyone!
We are back with the second part of the introduction to RDM series. If you missed our first post you can find it here 👇🏻
In this post, we'll delve into the fundamentals of RDM—creating new reference data, editing existing records, publishing changes, and exploring advanced features like viewing modes and hierarchies. Let's get started 🏃🏻♀️
How to Create New Reference Data
Let’s go through a quick example to demonstrate.
-
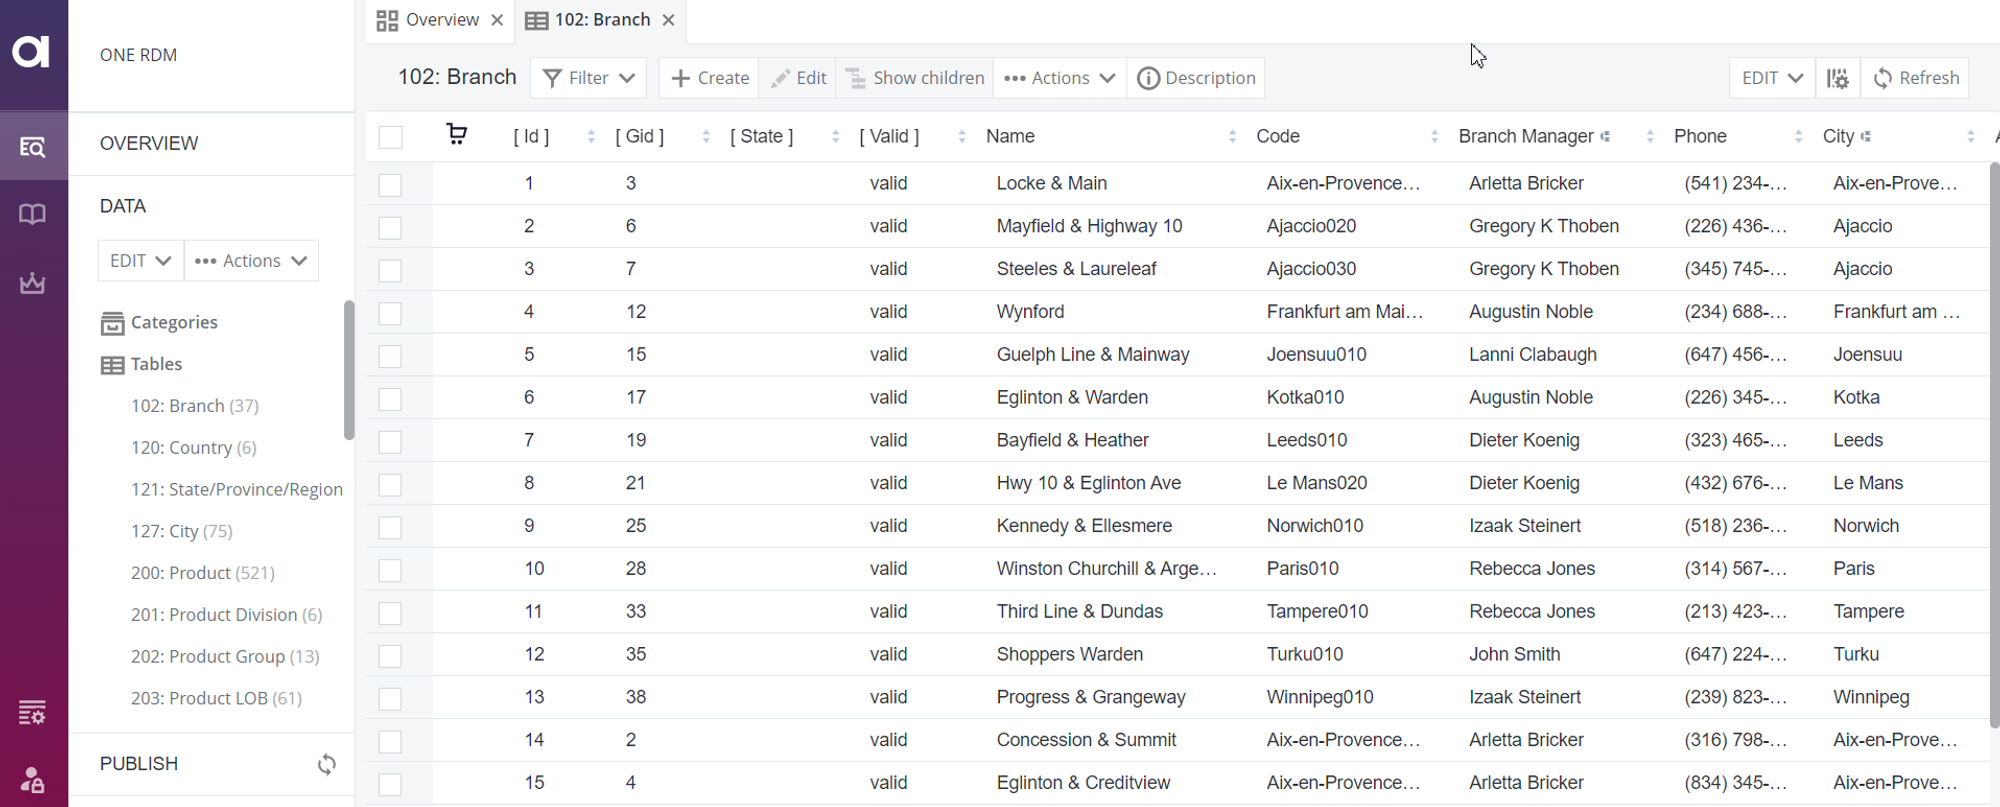
Navigate to 102: Branch Table:
- Open the DATA section in the left menu.
- Choose Tables and open the 102: Branch table, showcasing a list of banking branches.
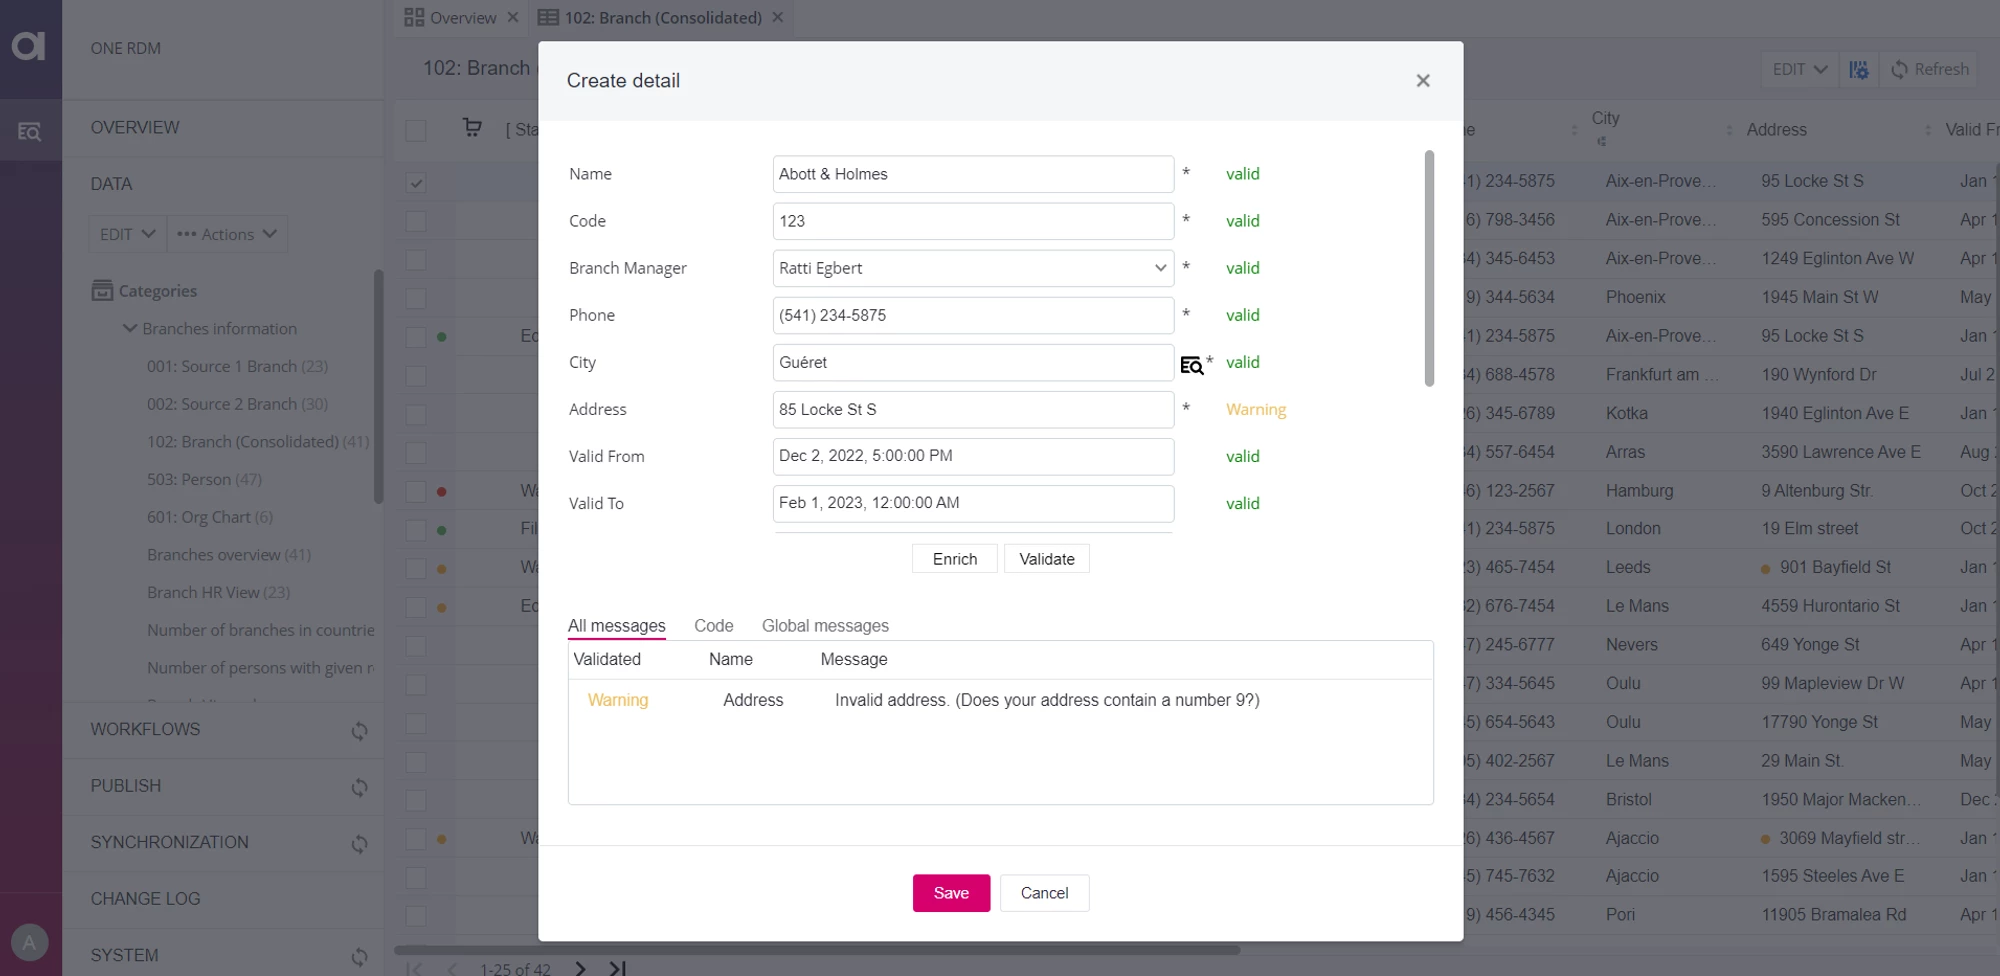
- Create New Record:
- Hit the Create button, unveiling an empty form.
- Fill in required fields, leaving Code blank.
- Validate your entries, correcting any issues.
- Hit Enrich to auto-populate certain fields based on predefined logic.
- Before saving, ensure your Address lacks the number 9.
- Save the record, acknowledging the warning prompt.
- Explore the option to create a new record from an existing one for efficiency. Learn more about working with records in RDM.
How to Edit Reference Data
-
Navigate to 102: Branch Table:
- Go to the DATA section, select Tables, and open the 102: Branch table.
-
Find and Edit:
- Locate the record you wish to edit.
- Utilize sorting or filtering options.
- Hit Edit to modify details and perform enrichments.
- Validate and save your changes.
- Move the edited record to the publishing stage for approval. Learn more about working with records in RDM.
How to Publish Reference Data
Unlock the power of visibility by understanding how to publish your reference data changes:
-
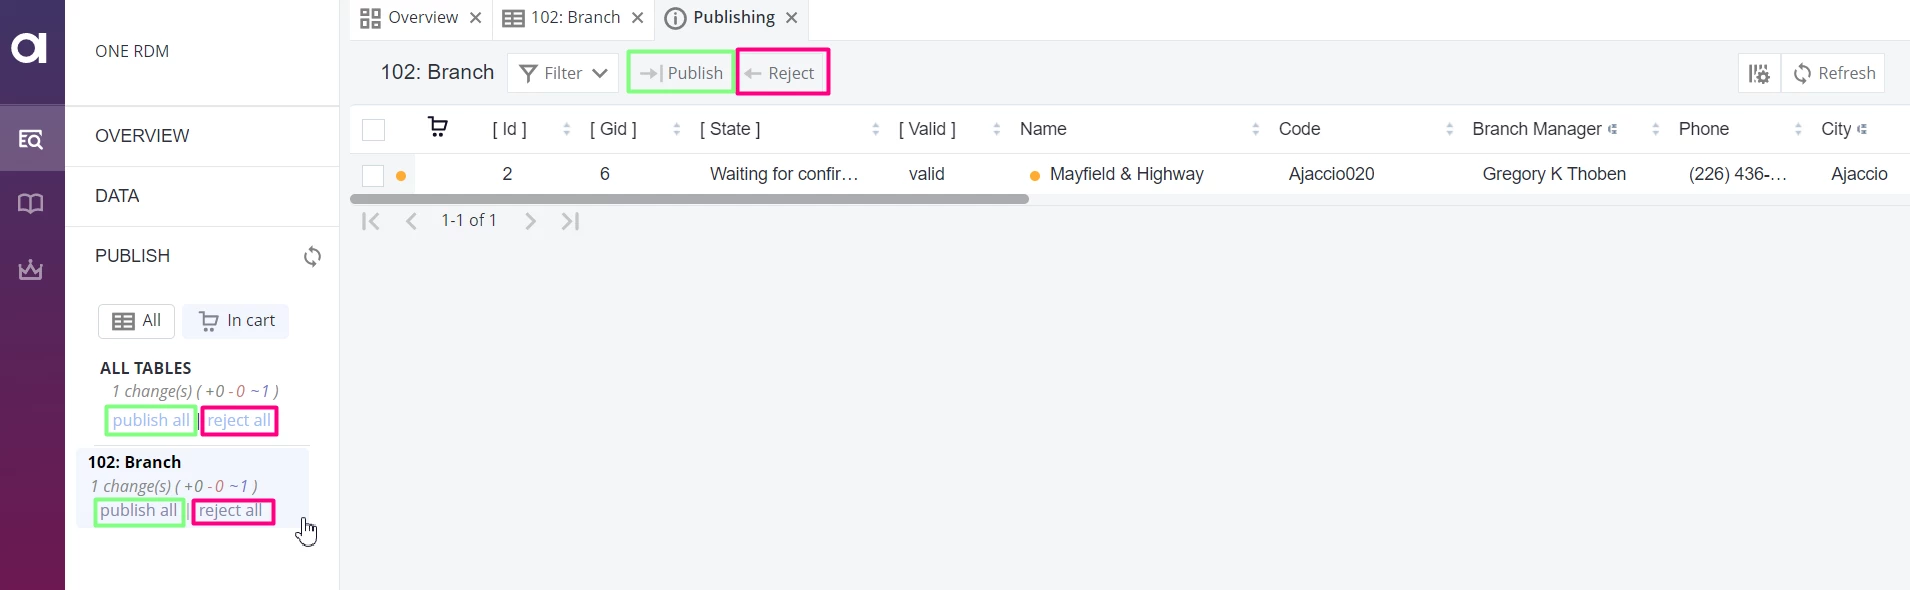
Navigate to PUBLISH Section:
- Open the PUBLISH section in the left menu.
- Gain an overview of changes in relevant tables.
-
Publishing Operations:
- Publish or reject records individually or collectively.
- Only valid reference data can be published; invalid data may cause the operation to fail.
Utilize the reject option for necessary adjustments. Learn more about publishing changes in RDM.
Viewing the Reference Data in RDM
Explore RDM's versatile viewing modes to comprehend data changes, approval workflows, and data consumption perspectives:
-
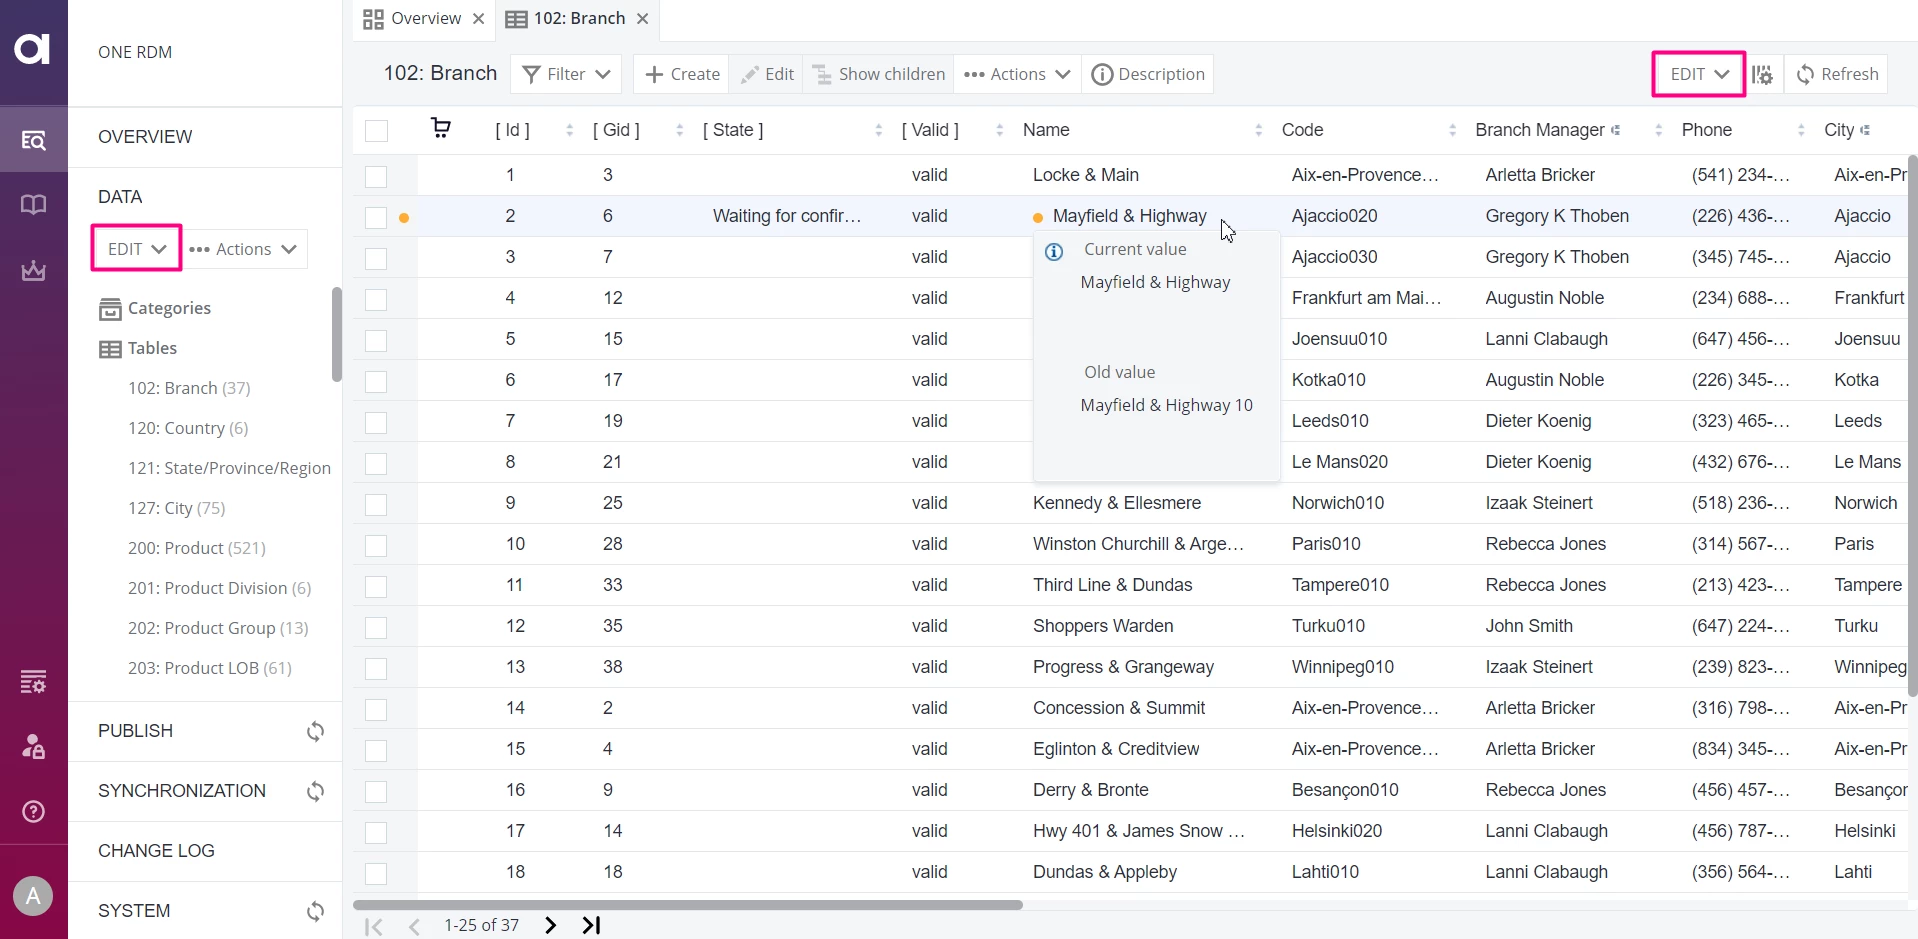
EDIT Mode: Displays records with changes since the latest publish, highlighting their approval stage.
-
PUBLISHED Mode: Exhibits the latest official version of reference data.
-
ALL_HISTORY Mode: Reveals the complete data history, showcasing all changes ever made.
Discover more about viewing data in RDM.
Hierarchies in RDM
-
Navigate to Hierarchies:
In the DATA section, go to Hierarchies and open Branch Hierarchy.
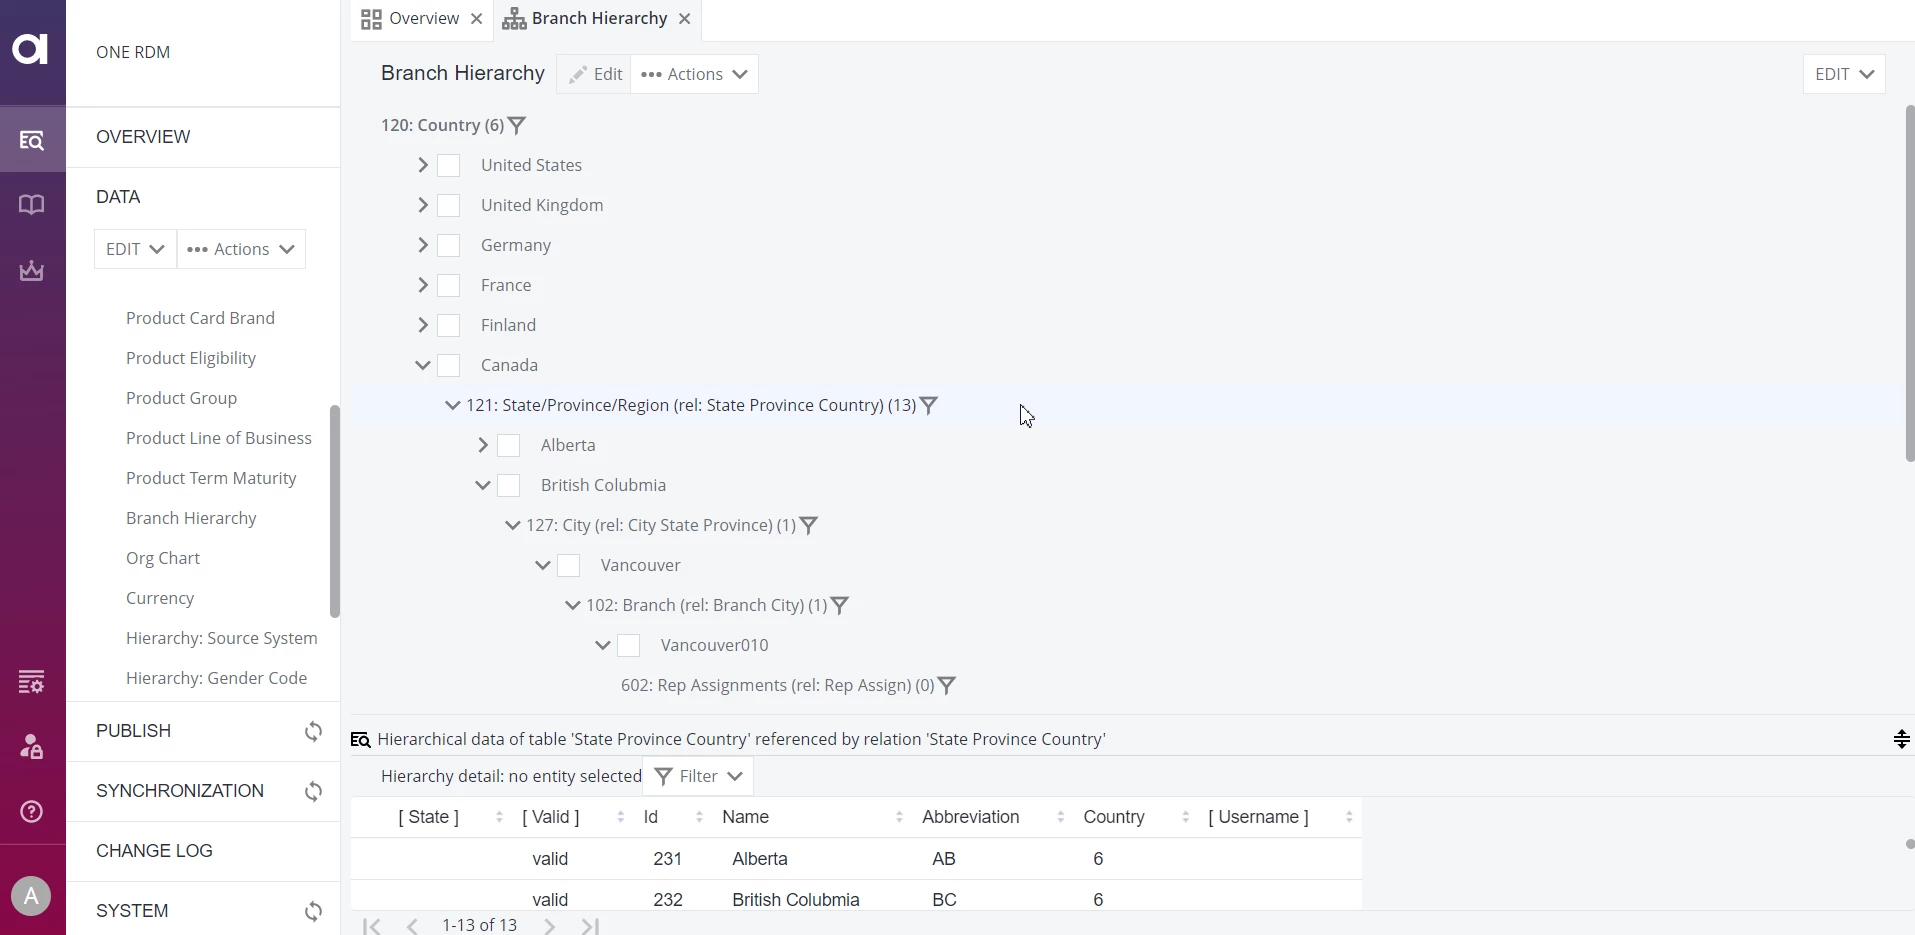
-
Explore Hierarchy Nodes:
- Check nodes for Canada > British Columbia > Vancouver > Vancouver010.
- Right-click on a level name for options like Create child or Show children.

- Create a new child record for the 602: Rep Assignments level.
Stay tuned for more RDM best practices in our upcoming posts!