Security Assertion Markup Language (SAML) allows users to use one set of credentials to log into many different websites. It is an open standard that allows identity providers (IdP) to pass authorization credentials to service providers(SP).
SAML transactions use Extensible Markup Language (XML) for standardized communications between the identity provider and service providers. SAML is the link between the authentication of a user’s identity and the authorization to use a service.
Items to consider prior to connecting to SAML- Best Practice
It is important to understand how your organization’s Active Directory is setup. Some pre-requisites needed can include things such as:
- Do you have a list of groups you need to import?
- If the answer is no, you may want to speak to your engagement manager from Ataccama to discuss in detail. In short, with AD Groups we can map Ataccama Roles to a single group. This benefit of doing this is, your internal dev-ops team won’t have to manually add/remove users to Keycloak each time someone is added/removed from Active Directory.
- Once you have decided on the number of groups/users, you must then submit a request within your organization for a federation metadata file. How long this takes, will heavily depend on your internal processes. Without this file, you will not be able to proceed with the SAML configuration.
- Best practice is to ensure that your AD groups are flexible enough to support one Ataccama role to one Azure AD group mapping. Some organizations decide to map 1 role to many groups, but this is a little more complicated. You may want to speak to your engagement manager from Ataccama to discuss in detail.
- Have you decided what permissions each SAML group should have in regards to Ataccama?
- If the answer is no, please contact your assigned engagement manager or visit our documentation portal to understand the default roles/permissions available to you at Roles and Permissions. This is a very important step if you are looking to build a data governance process and ensure that certain aspects of the Ataccama tool are restricted for their respective groups/users.
- Best practice is to have a meeting with an Ataccama resource in advance to discuss the various roles you have within your organization. This is very important as we will need to map your permissions to Ataccama roles. This will also have a major impact on how your groups in SAML will be created and mapped to your users.
- Consider the SAML attributes
- Because Active Directory allows you to structure all attributes at the organization level, you must confirm with your devops/security team for these attributes.
The list is as follows:- Username - For Azure AD, this will be user.userprincipalname and for Okta this will be based on the Attribute Values in your Okta configuration
- First Name - For Azure AD, this will be user.givenname and for Okta, this will be based on the Attribute Values in your Okta configuration
- Last Name - For Azure AD, this will be user.surname and for Okta, this will be based on the Attribute Values in your Okta configuration
- Email - For Azure AD, this will be user.mail and for Okta, this will be based on the Attribute Values in your Okta configuration
- Groups - For Azure AD, this will be user.groups[Security Groups], and for Okta, this will be based on the Attribute Values in your Okta Configuration
- Best practice is to ensure you have all the above attributes before rushing to setup SAML. We also recommend having an SAML expert from your internal team during the call for configuration, so that there are no delays in getting it completed.
- Because Active Directory allows you to structure all attributes at the organization level, you must confirm with your devops/security team for these attributes.
- Ensure you have the SAML form
- Most importantly, ensure you have the saml form and that it is located in the correct directory in your environment’s file system.
The form can be downloaded - SEE attachment
Once you have all the above information, then you are ready to proceed to the actual configuration of SAML with Keycloak 🎉
Steps to create a SAML connection
Before going through the following steps, please ensure you have your keycloak location (https://<ataccama_platform_fqdn>/auth). Also, upon logging in, at the top left hand corner make sure you are selecting the realm that you want to enable SAML on. Ataccamaone will be for ALL Ataccama related applications and Master is for keycloak login directly.
-
Initial Keycloak Configuration for SAML
- Navigate to “Identity Providers” on the menu on the left hand side
- Select the drop down menu
- Select “Saml v2.0”

- Once selected, the following screen should appear. In this screen, you can change the alias name to how you see fit.

- Be sure to do the following checks
- Check the Redirect URI - it should look something like: https://<ataccama_platform_fqdn>/auth/realms/ataccamaone/broker/saml/endpoint It’s important that the saml in the Redirect URI matches the value of the Alias field
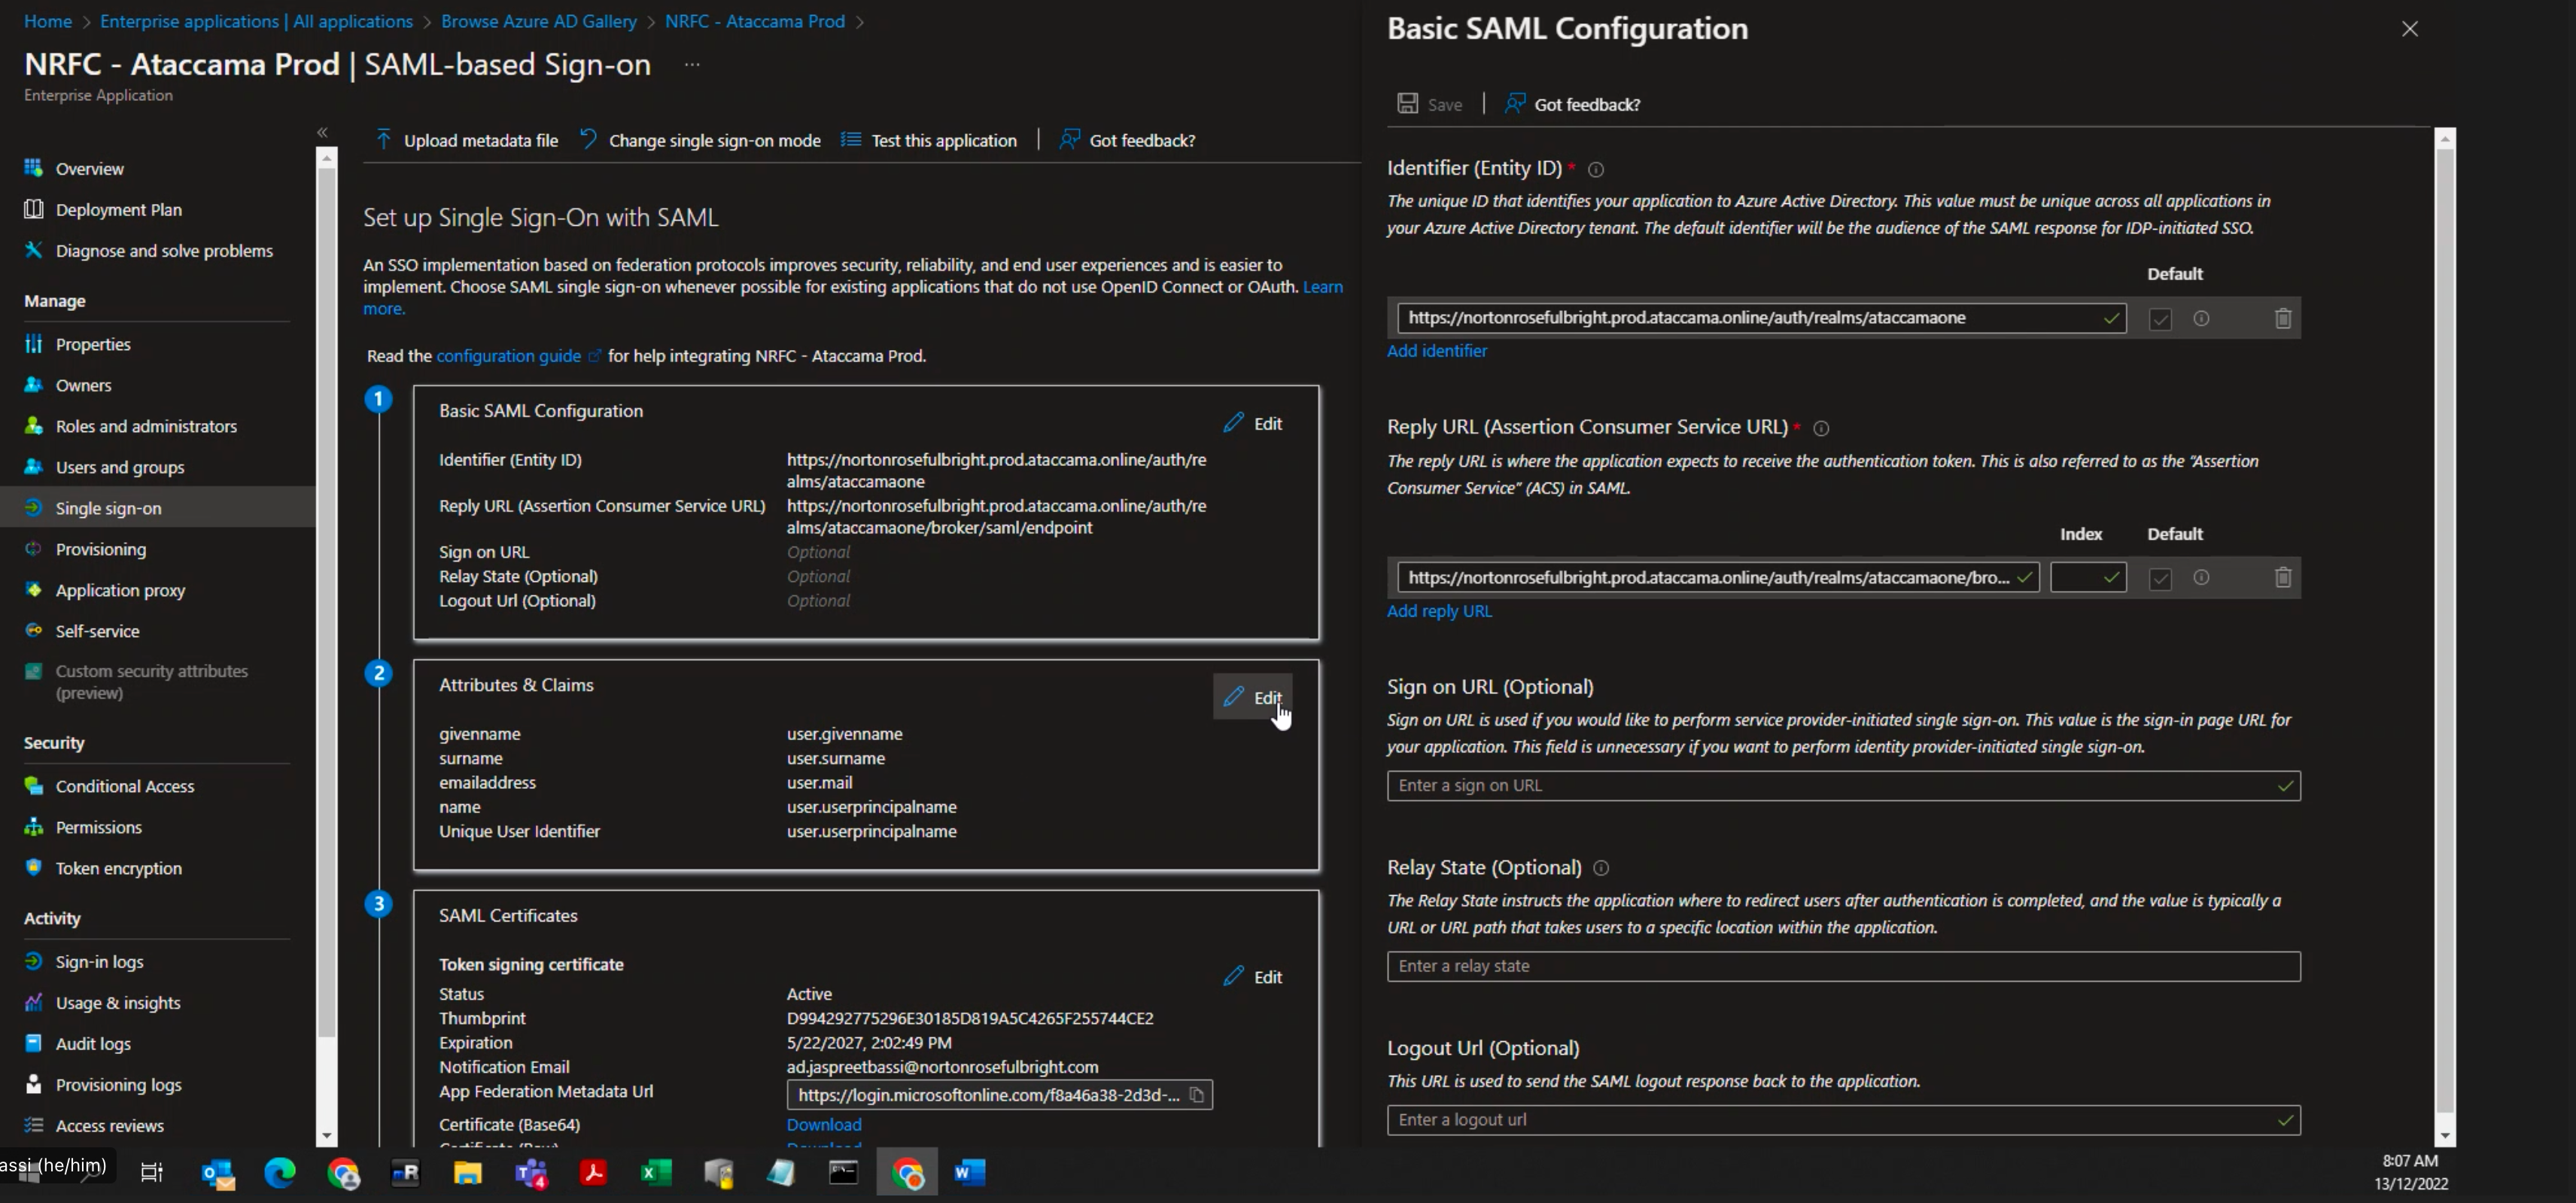
- Additionally, make note of the Redirect URI as this will be requested by the Client’s IAM team along with the User Identifier and the Reply (ACS) URL for Azure AD
- Identifier/Entity ID: https://<ataccama_platform_fqdn>/auth/realms/ataccamaone
- User Identifier: user.mail
- Reply (ACS) URL: https:///auth/realms/ataccamaone/broker/saml/endpoint

- DO NOT CLICK SAVE
-
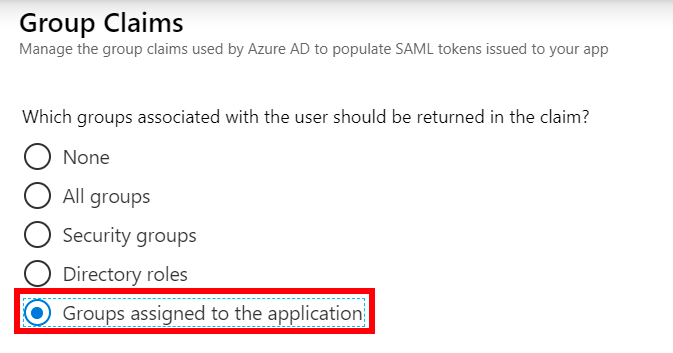
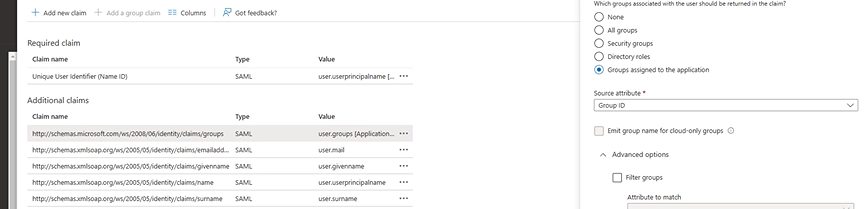
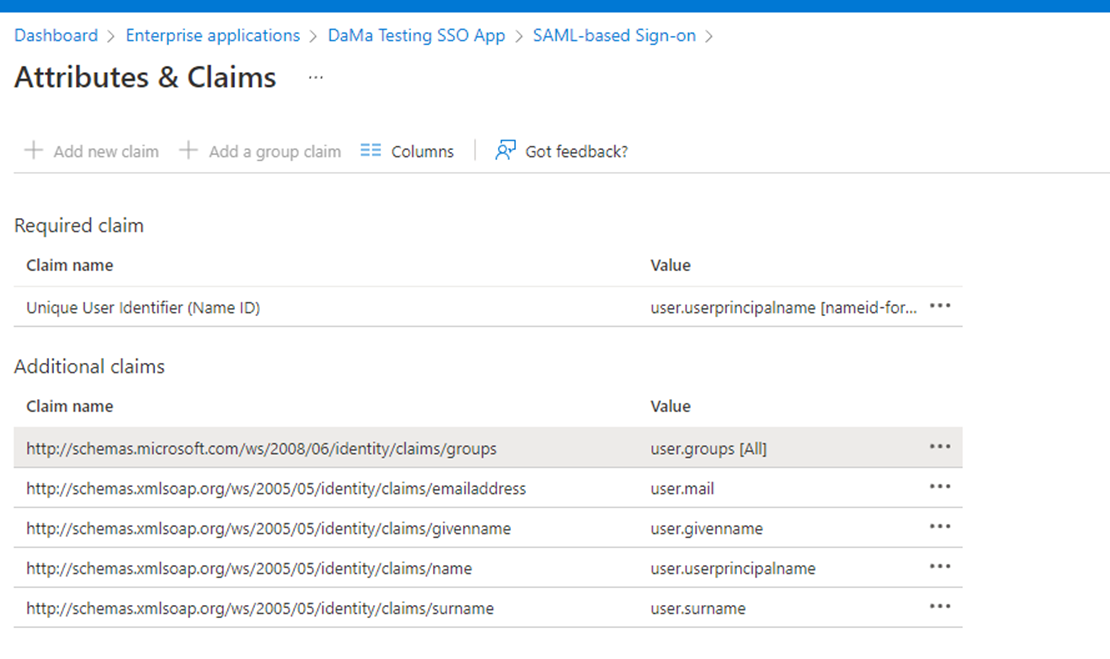
Azure AD Configuration
- After supplying the above information to the client’s IAM team, they should be able to generate an .xml file. This file should contain information that we specified in 3. Consider the SAML attributes
- To ensure that the .xml document has all the information needed, Attributes & Claims should look similar to what’s in the image. user.groups value should be user.groups[Security Groups]
-
Keycloak Configuration - Settings
- Now that we have the .xml file, under the Import External IDP Config, select Import from file, navigate to the folder where the file is located and double click on it
- Click on Import
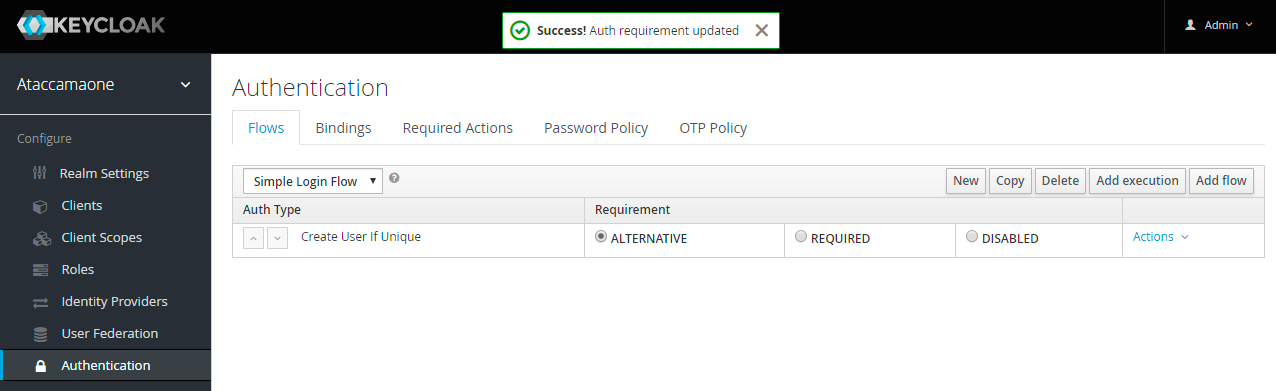
- If the format of the file is correct you should receive a notification (see image) and the Single Sign-On Service URL will now be populated. Other settings may have been changed too.

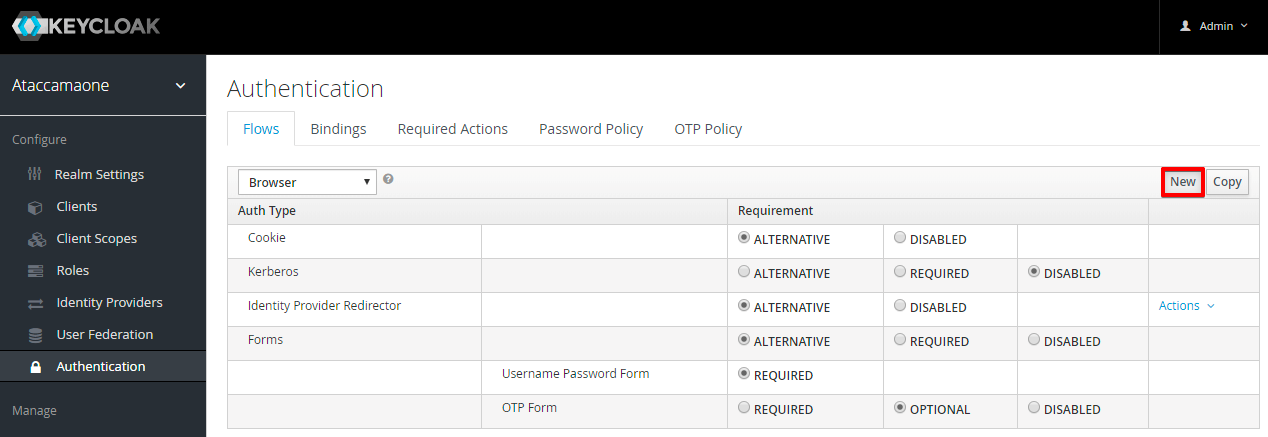
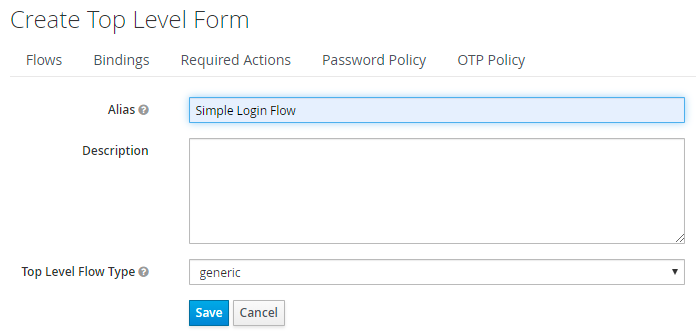
- Scroll to the top of the page, and at First Login Flow drop down, change the value to Simple Login Flow

- Click Save
-
Keycloak Mappers - Mappers
- Scroll to the top of the page, and click on Mappers, beside the Settings tab. Here, we will create the mappings for the different attributes discussed above.
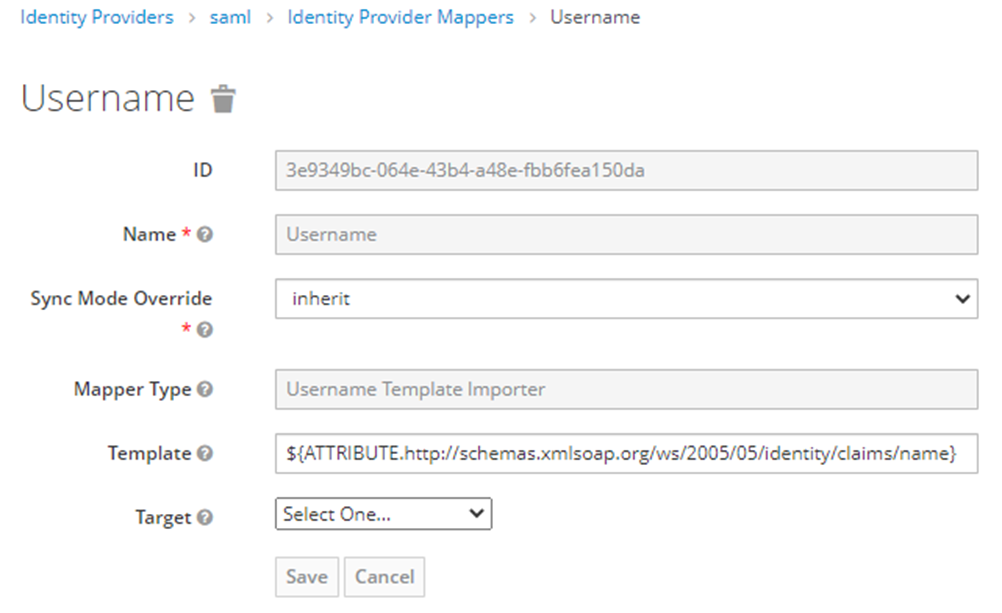
- Username
-
For this Mapper, the Mapper Type will be “Username Template Importer” from the drop-down menu
-
The template will be “${ATTRIBUTE.http://schemas/xmlsoap.org/ws/2005/05/identity/claims/name}”
-
- First Name
-
For this Mapper, the Mapper Type will be “Attribute Importer” from the drop-down menu
-
The Attribute Name will be the AD schema (http://schemas.xmlsoap.org/ws/2005/05/identity/claims/givenname) for first name and for Okta “firstName”
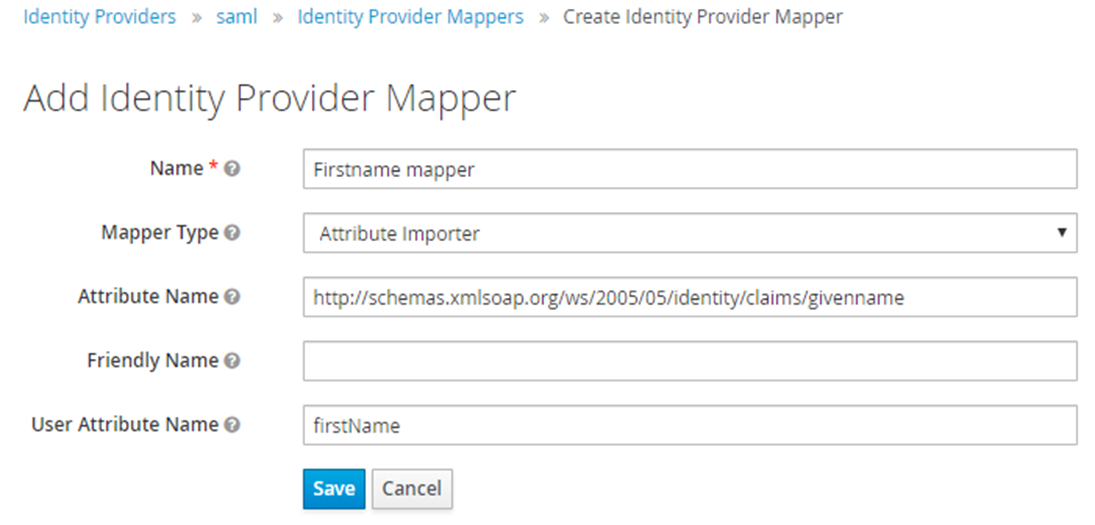
- The User Attribute Name will be “firstName”
-
-
Last Name
- For this Mapper, the Mapper Type will be “Attribute Importer” from the drop-down menu. The Attribute Name will be the AD schema (http://schemas.xmlsoap.org/ws/2005/05/identity/claims/surname) for Last Name and for Okta “lastName”

- The User Attribute Name will be “lastName”
- For this Mapper, the Mapper Type will be “Attribute Importer” from the drop-down menu. The Attribute Name will be the AD schema (http://schemas.xmlsoap.org/ws/2005/05/identity/claims/surname) for Last Name and for Okta “lastName”
- Email
- For this Mapper, the Mapper Type will be “Attribute Importer” from the drop-down menu
- The Attribute Name will be the AD schema (http://schemas.xmlsoap.org/ws/2005/05/identity/claims/emailaddress) for email and for Okta “email”
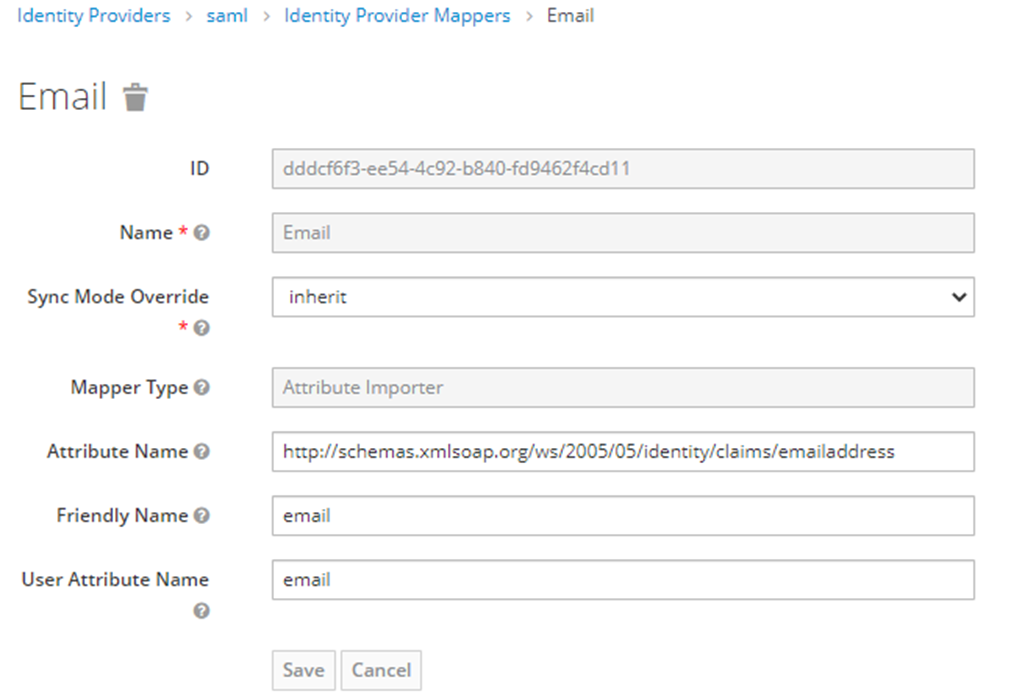
- The User Attribute Name will be “email”
- Groups
-
For this Mapper, the Mapper Type will be “SAML Attribute to Role” from the drop-down menu
-
The Sync Mode Override will be “force” to ensure that upon logging in, users are being verified that they are still a part of that group
-
The Attribute Name will be the AD schema (http://schemas.microsoft.com/ws/2008/06/identity/claims/groups) for groups and for Okta, the name of the attribute

-
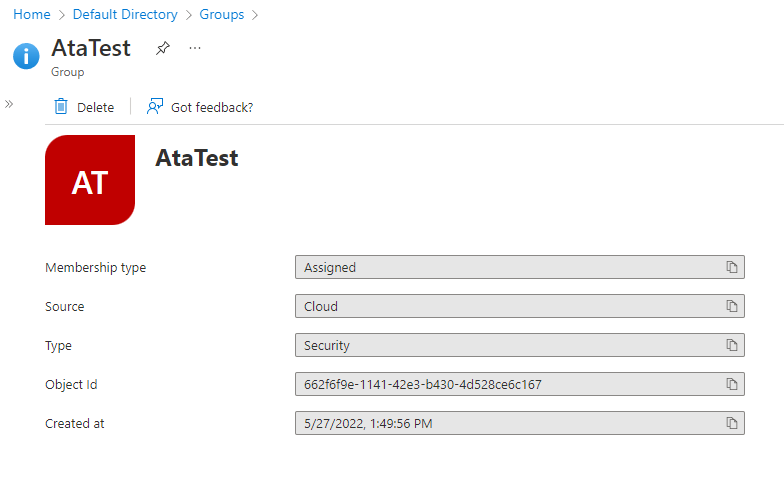
The Attribute Value for Azure AD, should represent the Object ID of the group. As you can see in the image below, the Object ID matches the Attribute Value shown in the image in step 3.
-
The Role represents the Keycloak role that you want the group to be assigned to
-
- Username
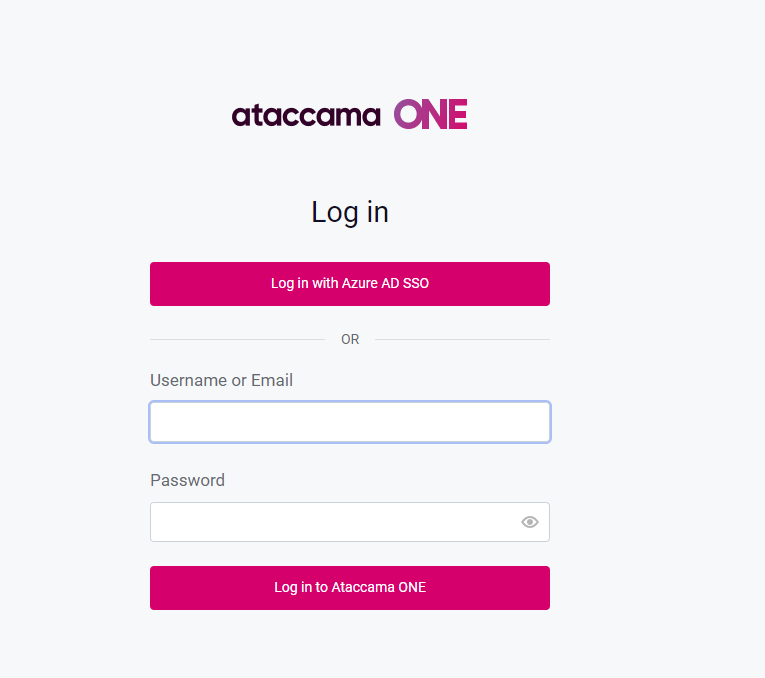
Test SAML Connection
- Once you have completed the steps above, you are just about done with setting up SAML in Keycloak. To validate that things are working as they should, please try to log in to the platform using the SAML button on the login page
💡 Have a look also at How to Set up Auto Login for Users in Keycloak