Hello everyone!
Welcome back to our Data Quality (DQ) series. Today, we're diving into component rules!
We're also excited to announce that we'll be hosting a live training session on component rules on July 27th. Don't miss the opportunity to learn from our certified trainer and engage in live Q&A. Register now here!
Component Rules, also known as components, are a powerful feature in the ONE Desktop application. They serve three key data processing purposes:
-
Post-processing components: These components allow you to perform various actions on your data after processing it based on predefined rules. You can easily apply transformations, validations, or any other required post-processing steps.
-
Transformation components: With transformation components, you can automate the process of transforming data records according to specific rules. For instance, you can standardize gender markers to "M" and "F" while transforming any other variations to these standard values.
-
Validation components: Validation components are designed to check whether loaded data meets the quality rule requirements. They help identify values that don't comply with the defined standards, enabling you to take appropriate actions or send notifications.
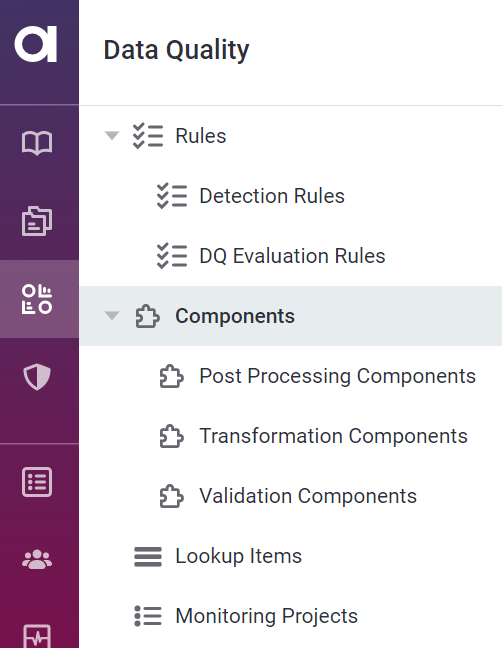
To access and manage these components, you can find them neatly organized in separate tabs under the Components section.
Now, let's explore the best practices for creating a component rule in the ONE Web Application:
- In the Data Quality section, navigate to Components. This page provides a comprehensive list of all components, and you can create new components exclusively from this page (not possible from other component-related pages).
- Click on the Create button located in the upper-right corner.
- Fill in the General Information section:
- Name: Provide a descriptive name for your component.
- Component Description: Add a clear and concise description of the component's purpose.
- Type: Select the appropriate component type from the provided list.
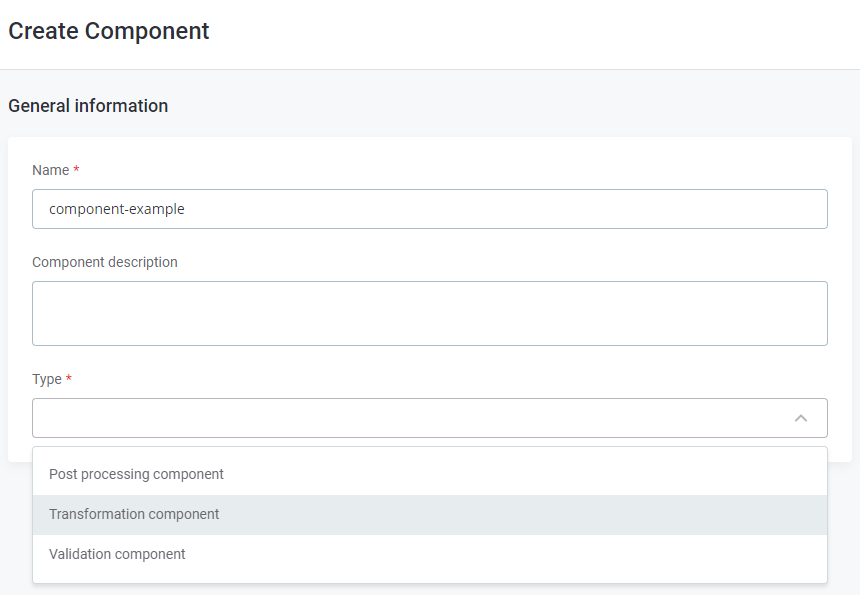
- Click Save to proceed.
- Switch to the Implementation tab.
- Define the input attributes by clicking on Add Input Attribute.

- Set the Workflow State to Ready for Implementation.
- Once you've implemented the changes, it's essential to publish them.
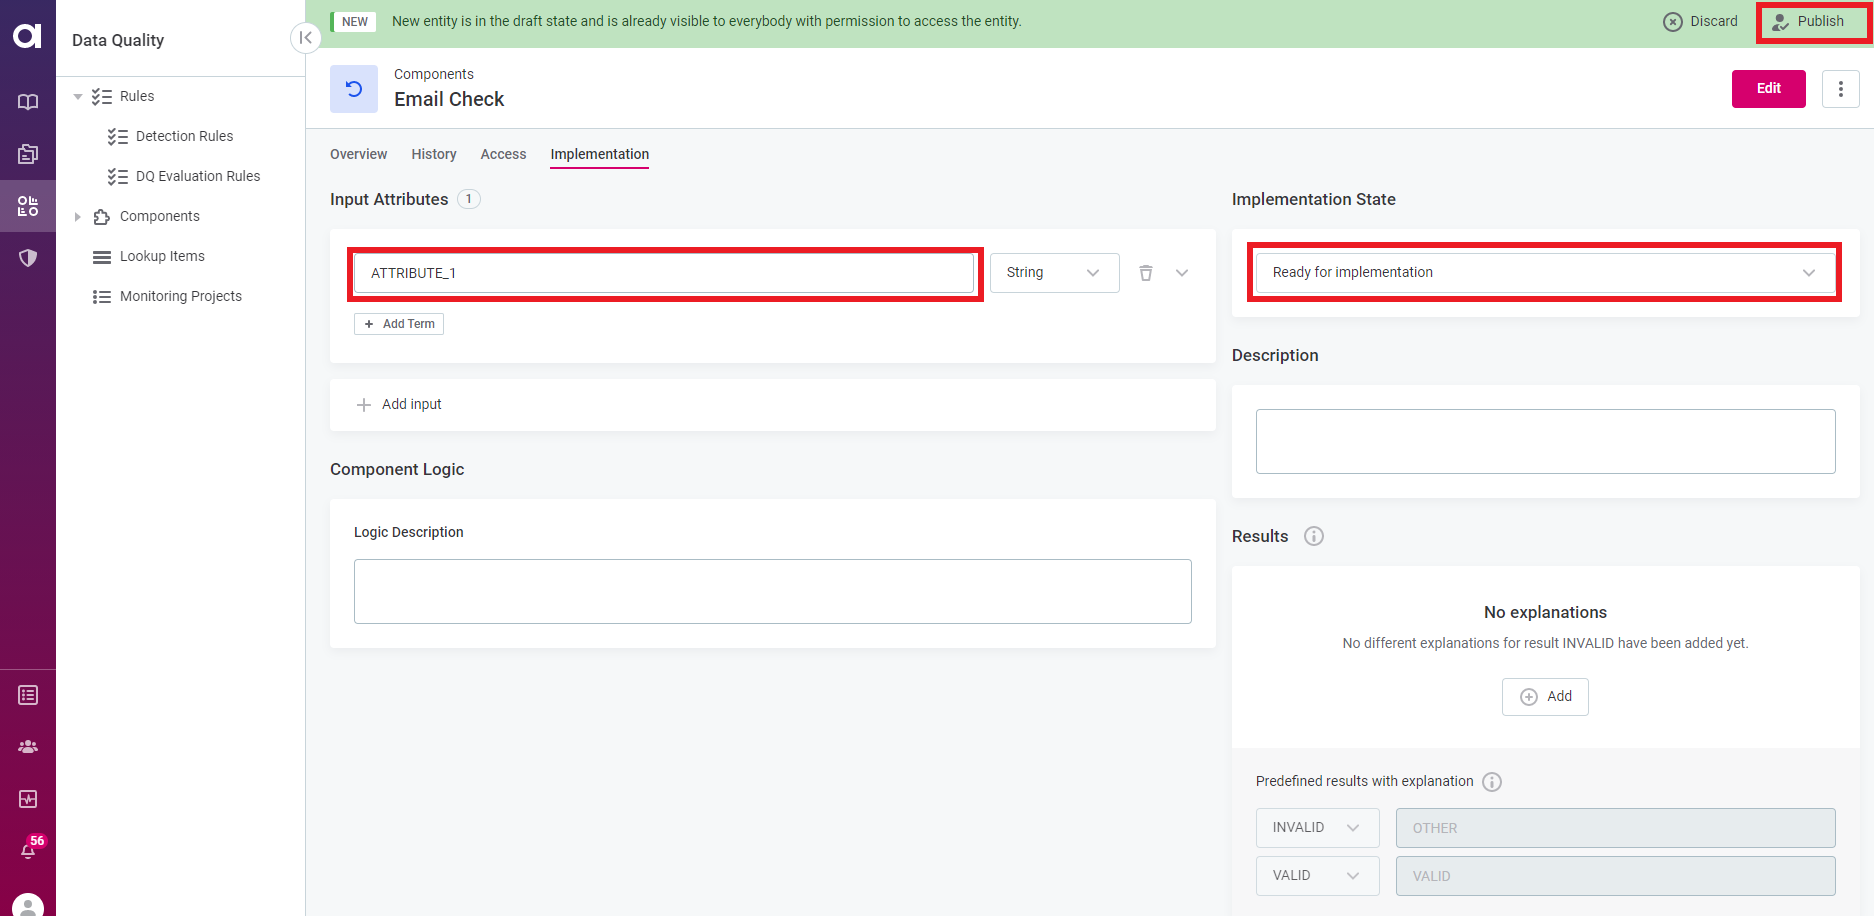
- After publishing, the component needs to be implemented in the ONE Desktop application.
For detailed instructions on implementing component rules, please refer to the ONE Component Rules in the Development Guides.
- Verify that the State of your component changes to IMPLEMENTED.
- Navigate to the Rules tab in the Knowledge Catalog and create a new rule corresponding to your component.
- Move to the Implementation tab of the newly created rule.
- Click on + Add Input Attribute (ensure it has the same data type as used in the component).
- Change the Rule Logic to Validity (Select a logic type).
Note: Prior to this step, make sure you have the Validity DQ Dimension defined.
- Click the indicated icon below to switch to component logic.

- Confirm the Change Type.
- Click Select a Component and choose your component from the list.
- Map attributes from the component to the rule. Once implemented, remember to publish the changes.
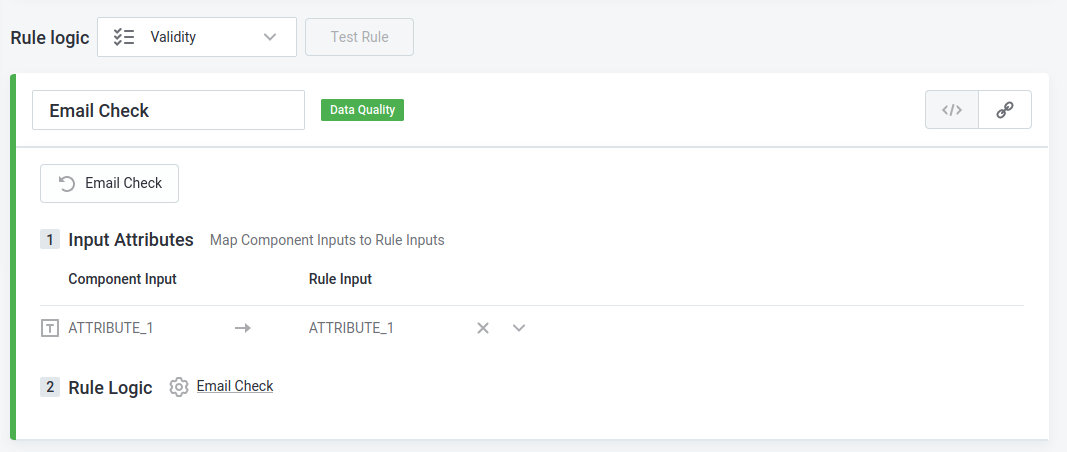
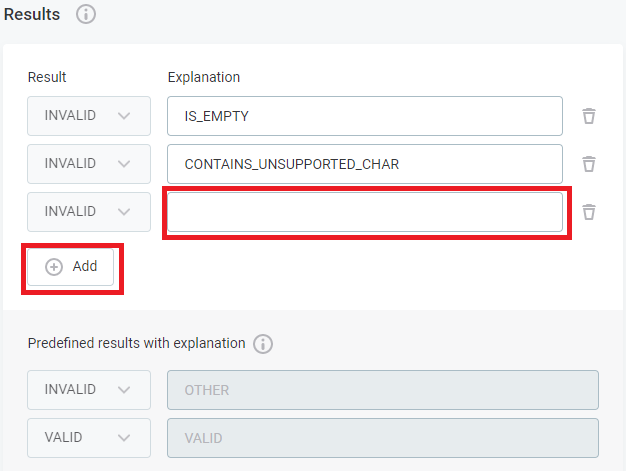
- Configure the Results by adding explanations for the invalid values produced by the component:
-
In the Results widget, click on Add to create a new explanation for the invalid results. Use simple logic-based explanations such as "is_empty," "contains_unsupported_char," "missing_char_at...", etc.
Note: The logic for result evacuation is predefined, but power users can configure the explanations.
-
To remove unnecessary result logic, click on the bin icon next to the reason and confirm deletion.
-
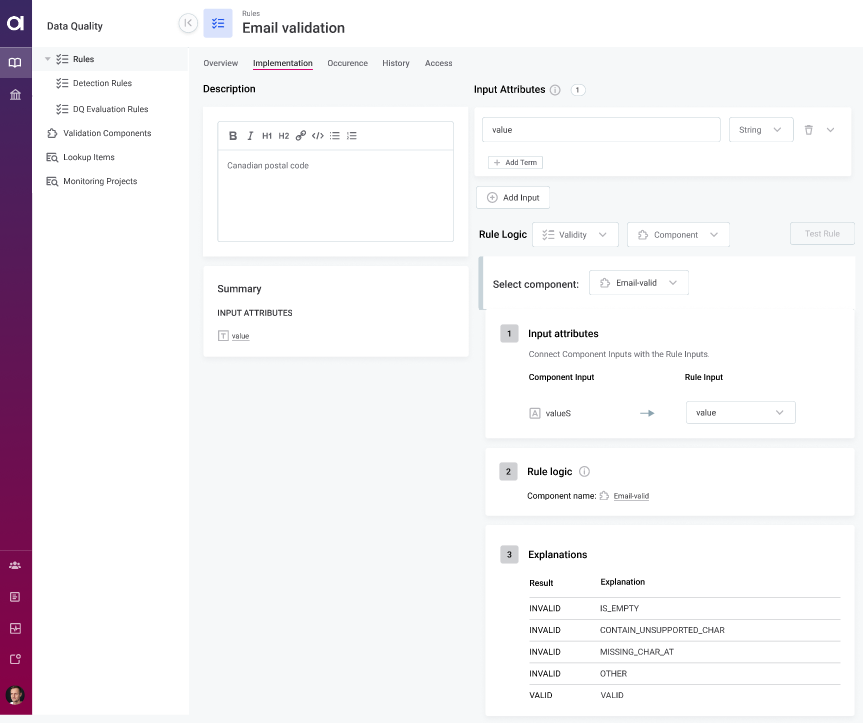
- After implementing the changes, publish them. The implemented explanations for invalidity can now be viewed in the rule's Implementation tab.
That's it! By following these steps, you can create a component rule in the ONE Web. If you have any questions or best practices on working with components please share them in the comments 👇


