


Hi community!
In this post, we will explore how to create and implement DQ rules effectively. Rules play a crucial role in ensuring data quality, and understanding the process is essential for data management. So let’s get started!
Creating Rules Manually
To create a rule from scratch, follow these steps:
- Navigate to the Data Quality > Rules page.
- Click on Create in the upper-right corner.
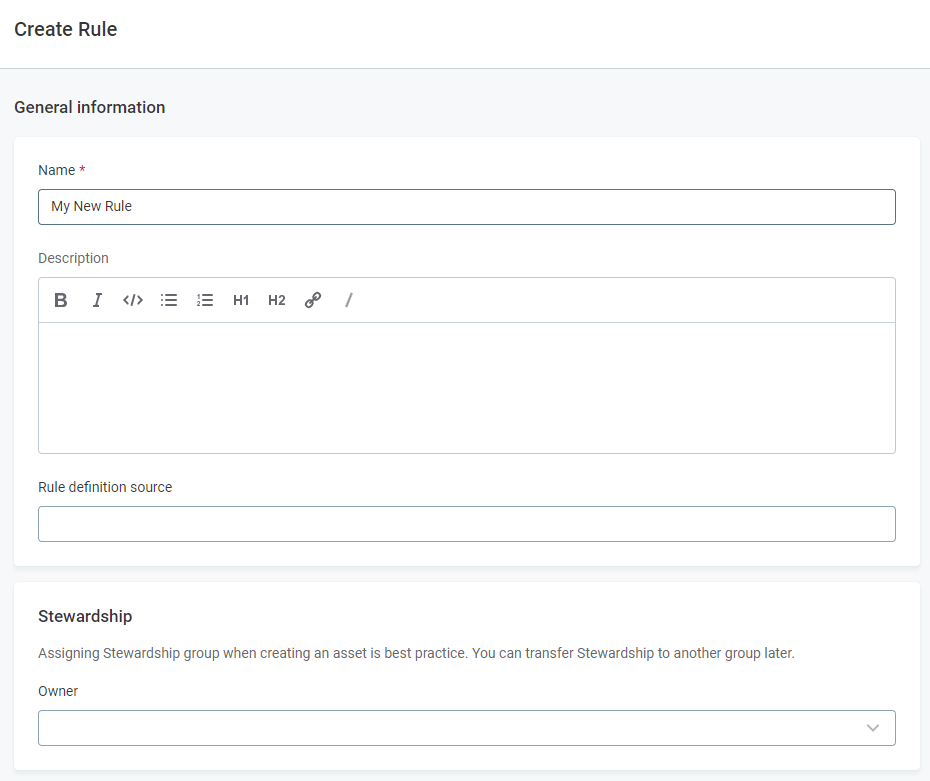
- Provide the necessary information:
- Name: Give your rule a descriptive name.
- Description (optional): Add a brief description of the rule and its purpose.
- Rule definition source (optional): Specify the associated data source for the rule.
- Stewardship: Select the owner group responsible for the rule's accuracy and approval.
- Click Save to create a draft of the rule.
Before publishing or submitting for approval, you need to define the rule logic. Proceed to the Implementation tab for further steps.
Implementing Rule Logic
On the Implementation tab, you can perform the following tasks:
- Add a description to the rule logic.
- Verify that changes are saved.
- Select the type of rule you want to create: DQ evaluation rule or detection rule.
If you choose a DQ evaluation rule, proceed to the Inputs section. For a detection rule, refer to the Rule Logic for Detection Rules section.
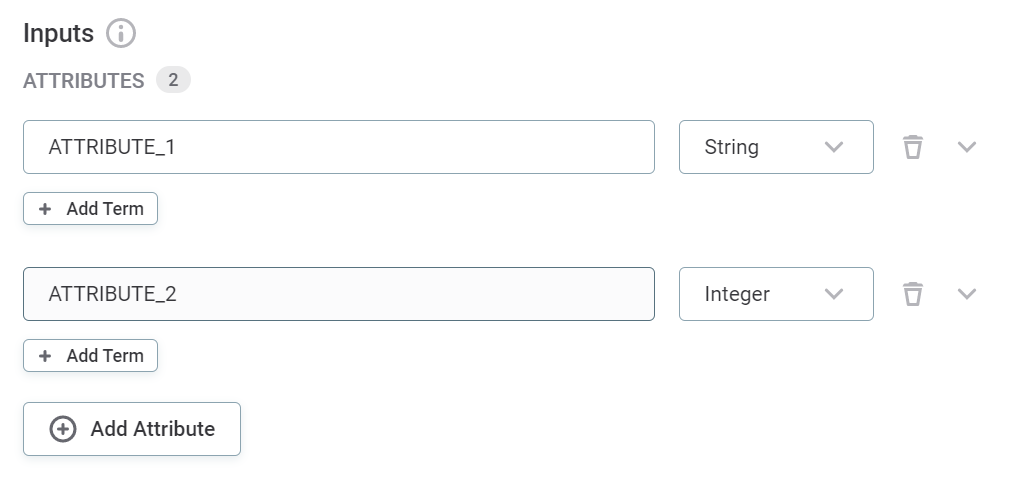
Inputs
The input section is relevant for DQ evaluation rule configuration. It specifies the attribute types participating in the rule logic. Follow these steps:
- Add input attributes and select their data types.
- Assign terms to the attributes if needed.
- Create variables from the inputs to apply transformations.
- Apply transformations to the input attributes using the available options based on their data types.
Rule Logic for DQ Evaluation Rules
- Select the dimension that the rule should validate: Validity, Completeness, Uniqueness, Accuracy, Timeliness, or Detection.
- Define the rule type: Rule, Aggregation rule, or Component.
- Component rules need to be created first in ONE Desktop by power users.
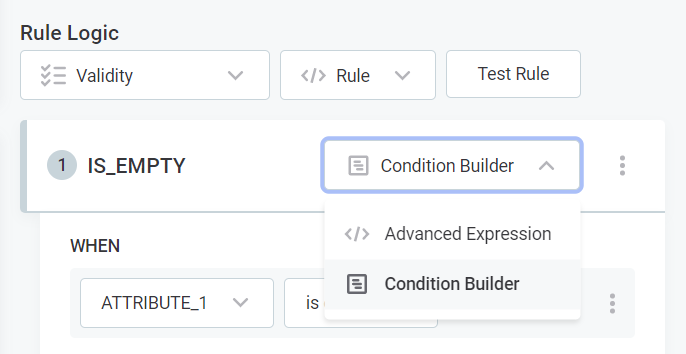
- Specify the rule conditions and explain the result using either the Condition Builder or Advanced Expression.
- Assign scores to results for evaluation purposes.
- Define the condition when none of the specified conditions are met.
Rule Logic for Detection Rules
- Choose the mode for working: Condition Builder or Advanced Expression.
- Follow the same steps as in DQ evaluation rules to specify the rule conditions and modifiers.
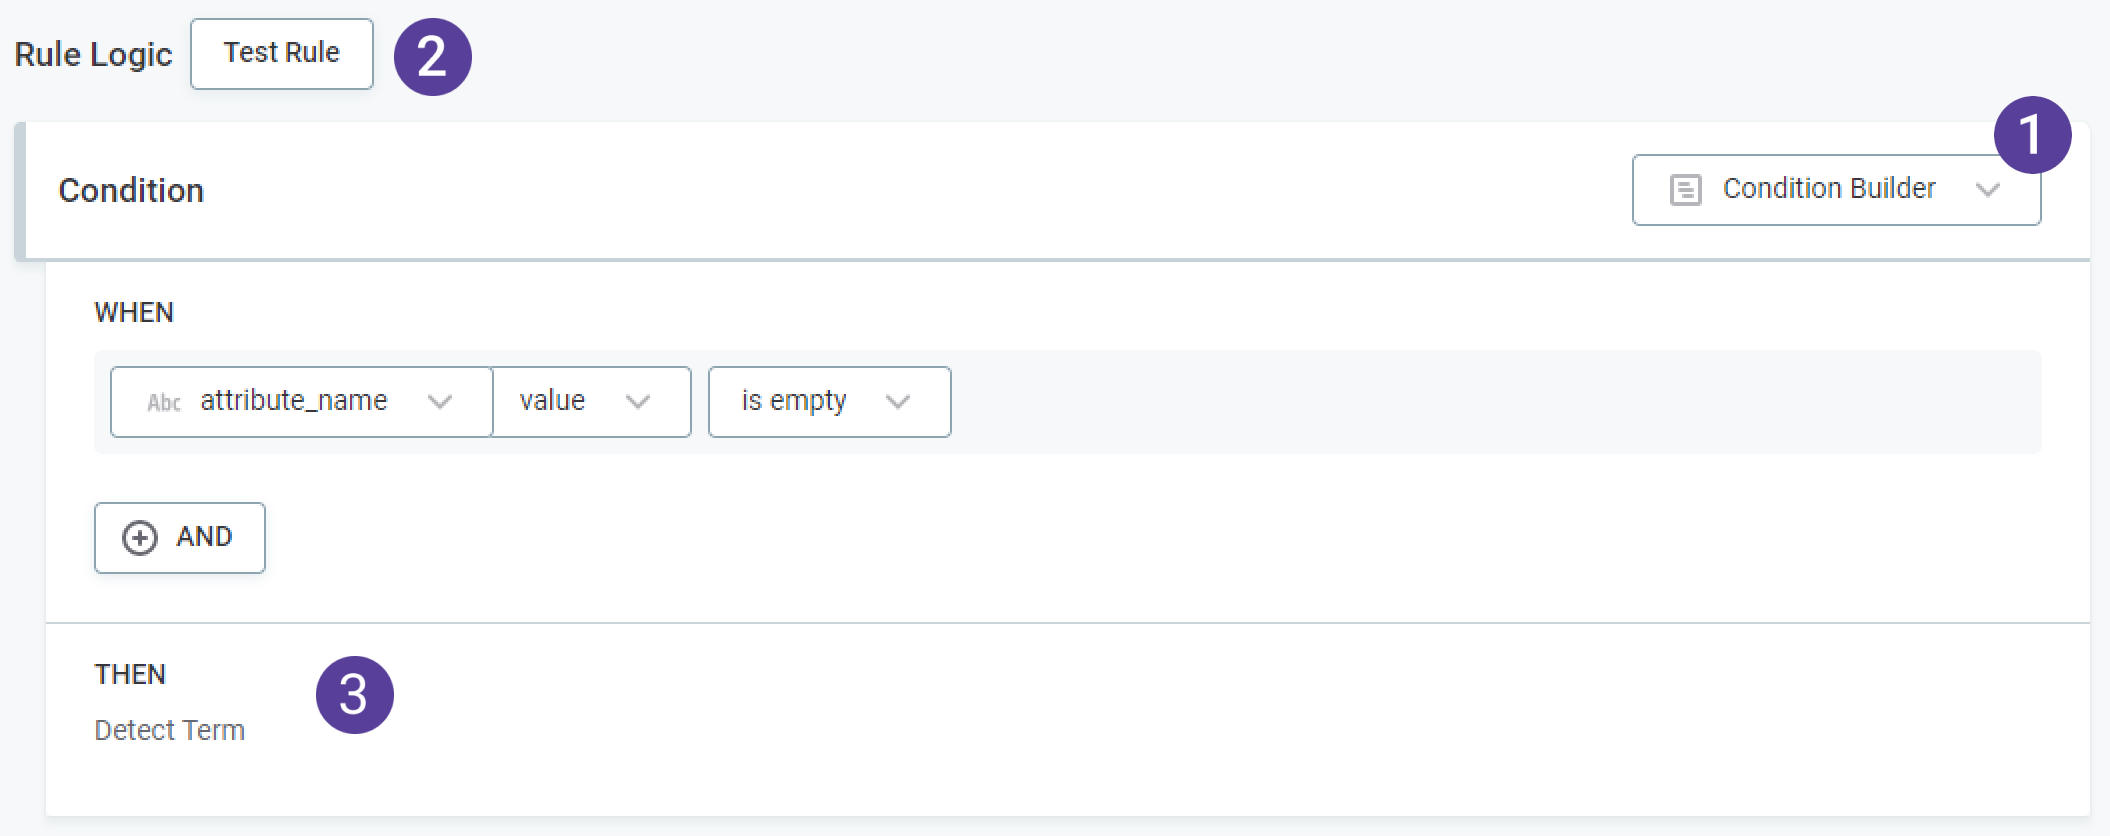
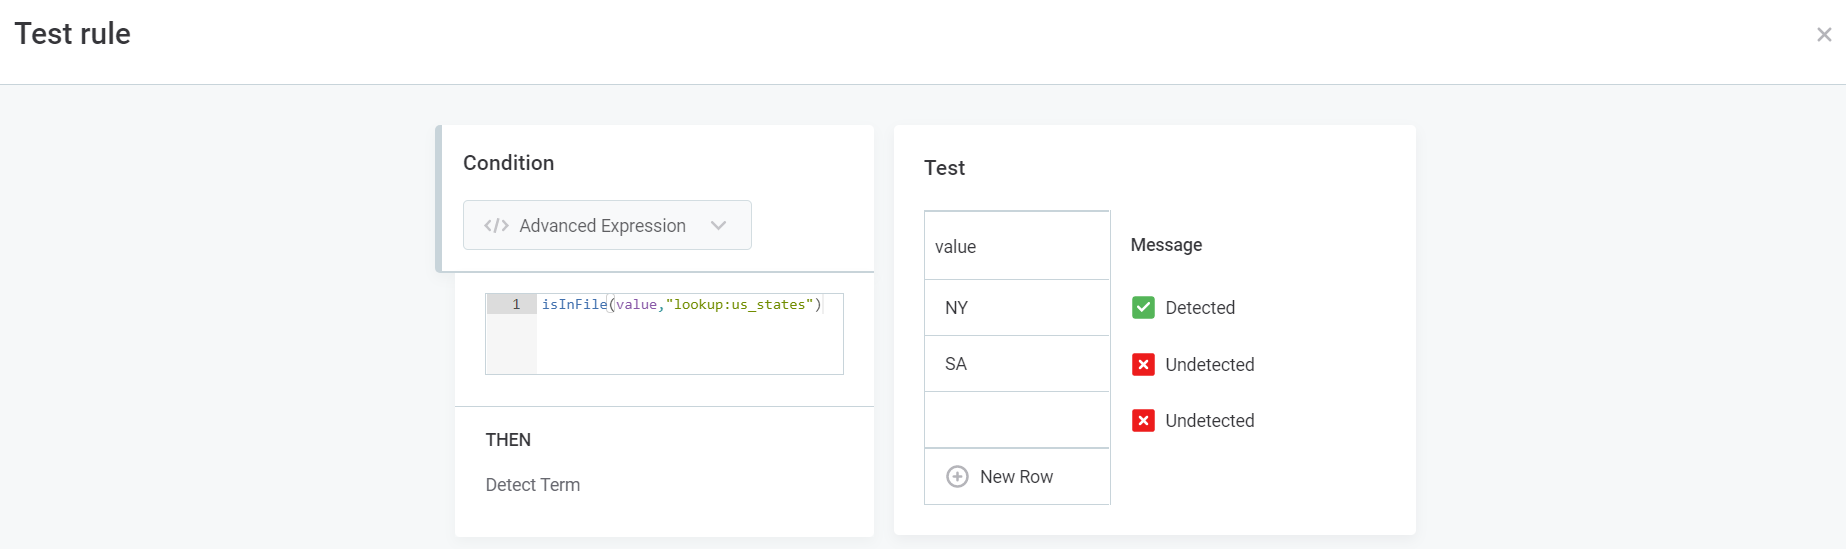
Don’t forget to always test your rule logic before publishing the rule. You can test the rule by clicking the Test Rule button and trying different inputs in the Test section. The results for each input are shown automatically in the Message next to the test input row.
By following these best practices, you can create and implement data quality rules efficiently.
If you’d like to delve deeper check out our documentation on Working with Rules.
In the next post, we will continue sharing some best practices on working with DQ rules. Stay tuned!


