


Hi, I’m Oliver. a Solutions Consultant here at Ataccama.
Workflows and governance are integral to any form of modern data management, be it MDM or RDM. But with so much to do in a typical workday, how do you respect the time of your end users and ensure they are informed when their input is required?
Out of the box, Ataccama MDM and RDM include useful functionality to send emails to defined roles (i.e. groups of users) whenever records are moved through C(R)UD workflows. But what if we need to:
- Create consolidated, routine summaries for cases where data changes often and frequently?
- Allow users (e.g. project managers) who are not directly involved in the workflow to see progress?
- Notify users in different ways (e.g. Microsoft Teams, Slack, or Amazon SNS)?
- Create dashboards of daily workflow progress to report against?
Once again, we can turn to Ataccama Plans & Scheduled Workflows!
Notification Workflows
In this example, consider a pretend client using RDM, with a custom workflow whenever new referential data is created. To complicate matters, there are a large number of users split across 4 different business departments, each owning different parts of the workflow, but all wanting to know what the other is doing.
In this case, it is clear that the inbuilt email notifier does not quite best fit the business need.
Instead, we can send a daily message to Microsoft Teams updating all users on where the bottlenecks are and support them accordingly.
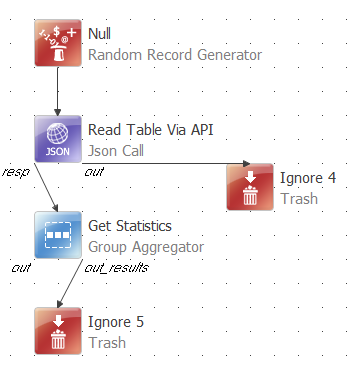
Reading RDM Workflow & Making A Plan
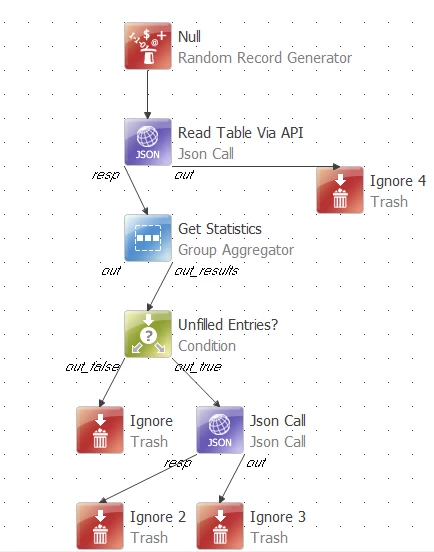
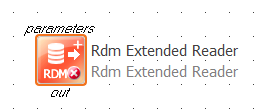
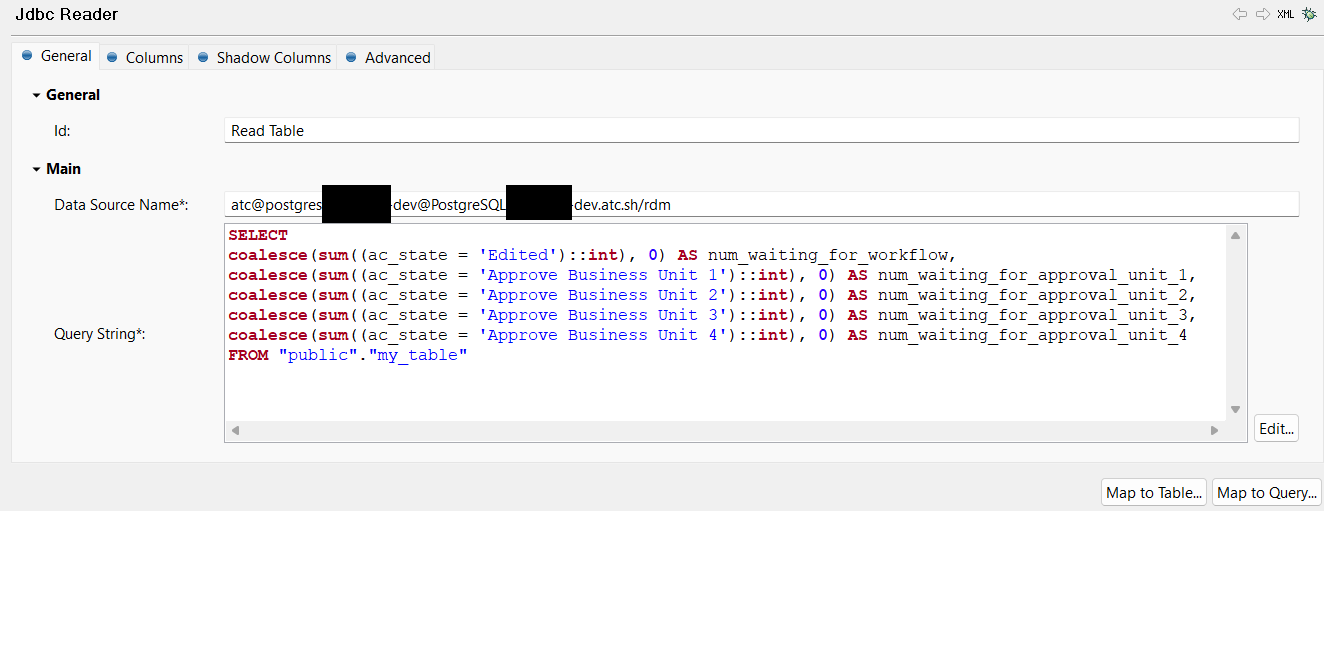
To read from RDM, we would typically use the RDM Extended Reader step. However, this step is designed to read exclusively from the “Published” state, containing data that has already passed through workflows, and is therefore confirmed to be referentially integral.
To get the state of our workflows, we therefore need to read from the Edited (and potentially even History) tables. There are two ways to do this:
- Via API (14.3+, recommended) and a “JSON Call” step
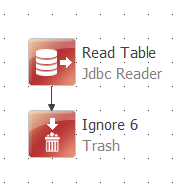
- Directly from the RDM database and the “<table_name>e” table (with “e” standing for “edited”) and a “JDBC Reader” step
In particular, we want to read the “ac_edit” column, which contains the workflow state of the table in question.
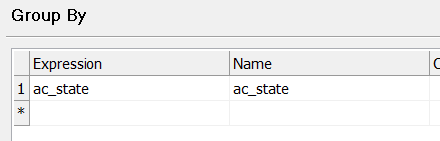
From here, we can then use common steps like “Alter Format”, “Column Assigner” or “Group Aggregator” (or even calculate directly in SQL if reading directly from the RDM Postgres Database) to compute some summary statistics.
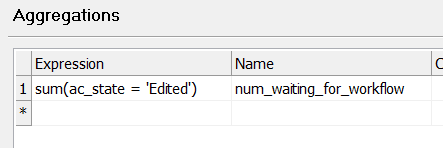
For our pretend client, we count:
- ac_state == “Edited” (Record is in the edited state and is yes to enter a workflow via the “Move to Publish” button
- ac_state == “” (Record is fully approved and published)
- ac_state == “Waiting for confirmation” (Generic waiting for approval/publish step)
- ac_state == “<my_custom_workflow_status>” (Record is in a specific status of a custom workflow)
In our case, we have 4 different custom workflow states, with 1 for each business unit. We will therefore produce a number of columns (e.g. num_waiting_for_workflow, num_waiting_for_approval_unit_1, num_waiting_for_approval_unit_2, num_waiting_for_approval_unit_3, num_waiting_for_approval_unit_4)
Our plan now looks something like this:
| 
|
(for JDBC reader < 14.3), or
| 
|  |
(for API calls ≥ 14.3)
Now that we are reading in workflow statuses from RDM and have calculated our statistics, we want to send out a notification based on them.
Building a Notification
In this example, we will be working with MS Teams and its Webhooks API to send a message directly into a Teams channel. it should be noted that Slack, SNS, etc, all work extremely similarly.
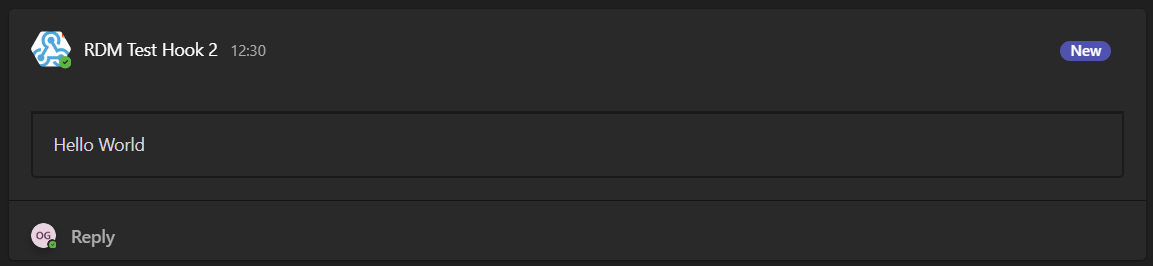
First, we need to create an incoming webhook. In Teams, this is done by right clicking on the channel, selecting “Connectors”, “Webhooks”, and creating a custom Webhook to the channel. You’ll receive a very long URL back in response, which you can test by opening up a console, and running the following command:
curl.exe -H "Content-Type:application/json" -d "{'text':'Hello World'}" <YOUR WEBHOOK URL>
With some luck, we will see this in Teams!
Now, we can populate this with nicely formatted content. I would suggest using the Microsoft Interactive Cards Designer. To test the output, you can use a tool such as Postman to test sending your JSON body as you build it.
Here’s an example I made earlier. Notice that I have written column names in enclosed ##. At the time of writing, you must also provide additional information at the top of the JSON body vs what the Card Designer provides you with.
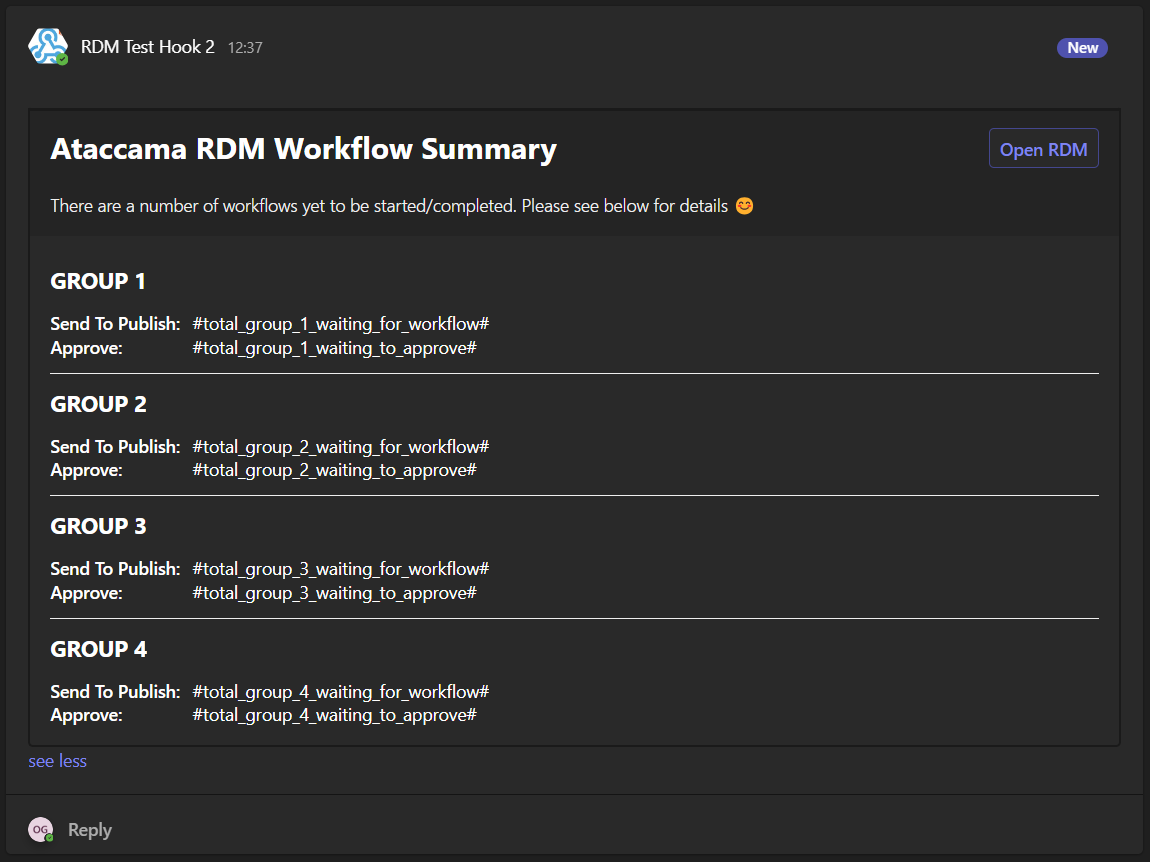
{
"type": "message",
"summary": "Ataccama RDM Updates",
"attachments": [
{
"contentType": "application/vnd.microsoft.card.adaptive",
"contentUrl": null,
"content": {
"$schema": "<http://adaptivecards.io/schemas/adaptive-card.json>",
"type": "AdaptiveCard",
"version": "1.5",
"msteams": {
"width": "Full"
},
"body": [
{
"type": "Container",
"style": "emphasis",
"bleed": true,
"items": [
{
"type": "ColumnSet",
"bleed": true,
"columns": [
{
"type": "Column",
"width": "stretch",
"items": [
{
"type": "TextBlock",
"text": "**Ataccama RDM Workflow Summary**",
"wrap": true,
"spacing": "None",
"horizontalAlignment": "Left",
"style": "heading",
"size": "ExtraLarge"
}
]
},
{
"type": "Column",
"width": "auto",
"horizontalAlignment": "Right",
"items": [
{
"type": "ActionSet",
"actions": [
{
"type": "Action.OpenUrl",
"title": "Open RDM",
"url": "https://rdm.<account>.prod.ataccama.online/"
}
]
}
]
}
]
},
{
"type": "TextBlock",
"text": "There are a number of workflows yet to be started/completed. Please see below for details 😊",
"isSubtle": true,
"weight": "Lighter",
"wrap": true,
"spacing": "Large",
"style": "default",
"size": "Medium"
}
],
"spacing": "None"
},
{
"type": "Container",
"visible": true,
"items": [
{
"type": "Container",
"items": [
{
"type": "TextBlock",
"text": "**GROUP 1**",
"wrap": true,
"style": "heading",
"size": "Large",
"spacing": "None"
},
{
"type": "Container",
"items": [
{
"type": "FactSet",
"facts": [
{
"title": "Send To Publish:",
"value": "#total_group_1_waiting_for_workflow#"
},
{
"title": "Approve:",
"value": "#total_group_1_waiting_to_approve#"
}
]
}
]
}
],
"separator": false
}
],
"spacing": "ExtraLarge",
"separator": false
},
{
"type": "Container",
"visible": true,
"items": [
{
"type": "Container",
"items": [
{
"type": "TextBlock",
"text": "**GROUP 2**",
"wrap": true,
"style": "heading",
"size": "Large",
"spacing": "None"
},
{
"type": "Container",
"items": [
{
"type": "FactSet",
"facts": [
{
"title": "Send To Publish:",
"value": "#total_group_2_waiting_for_workflow#"
},
{
"title": "Approve:",
"value": "#total_group_2_waiting_to_approve#"
}
]
}
]
}
],
"separator": true
}
],
"spacing": "ExtraLarge",
"separator": true
},
{
"type": "Container",
"visible": true,
"items": [
{
"type": "Container",
"items": [
{
"type": "TextBlock",
"text": "**GROUP 3**",
"wrap": true,
"style": "heading",
"size": "Large",
"spacing": "None"
},
{
"type": "Container",
"items": [
{
"type": "FactSet",
"facts": [
{
"title": "Send To Publish:",
"value": "#total_group_3_waiting_for_workflow#"
},
{
"title": "Approve:",
"value": "#total_group_3_waiting_to_approve#"
}
]
}
]
}
],
"separator": true
}
],
"spacing": "ExtraLarge",
"separator": true
},
{
"type": "Container",
"visible": true,
"items": [
{
"type": "Container",
"items": [
{
"type": "TextBlock",
"text": "**GROUP 4**",
"wrap": true,
"style": "heading",
"size": "Large",
"spacing": "None"
},
{
"type": "Container",
"items": [
{
"type": "FactSet",
"facts": [
{
"title": "Send To Publish:",
"value": "#total_group_4_waiting_for_workflow#"
},
{
"title": "Approve:",
"value": "#total_group_4_waiting_to_approve#"
}
]
}
]
}
],
"separator": true
}
],
"spacing": "ExtraLarge",
"separator": true
}
]
}
}
]
}
Now we can connect this up to another JSON call step to send the payload, leaving us with a final plan that looks like this - schedule it and we’re done!