


Hi everyone,
One of the core capabilities of ONE Desktop is metadata handling through ONE Metadata Reader and ONE Metadata Writer Steps. These steps allow users to read and write data from the Web Application, enabling a range of use cases and implementations. In this post, you’ll find out how to read & write metadata using the steps in ONE Desktop 👇🏽👀
ONE Metadata Reader
The ONE Metadata Reader Step serves as a tool to read data from the Web Application, offering flexibility in usage:
Common Implementations:
- Enriching data for external Business Intelligence tools (e.g., Tableau, Cognos) to create customized reports with additional attributes such as description, owner, and custom properties.
- Easily incorporating DQ rules into DQC plans, simplifying the process of finding and integrating rules based on name and input attributes.
- Constructing DQC plans with data transformations by utilizing data sources from the Metadata Management Module (MMM).
- Generating comprehensive HTML documentation for your data catalog, combining physical object information with profiling results.
Detailed help information with available properties for the ONE Metadata Reader Step can be found in the ONE Desktop Help.
Follow this example to see how to read metadata from MMM using ONE Metadata Reader Step.
Prerequisites:
- ONE Desktop
- Connection to ONE Ataccama Platform Server (For connection setup, refer to Creating a New Server Connection)
Follow along 👣
- Launch ONE Desktop.
- Create a new plan.
- Add the ONE Metadata Reader Step to your plan.
- Configure the ONE Metadata Reader Step.
- In the General tab, specify the Server Name, Entity Type, and Workflow State.
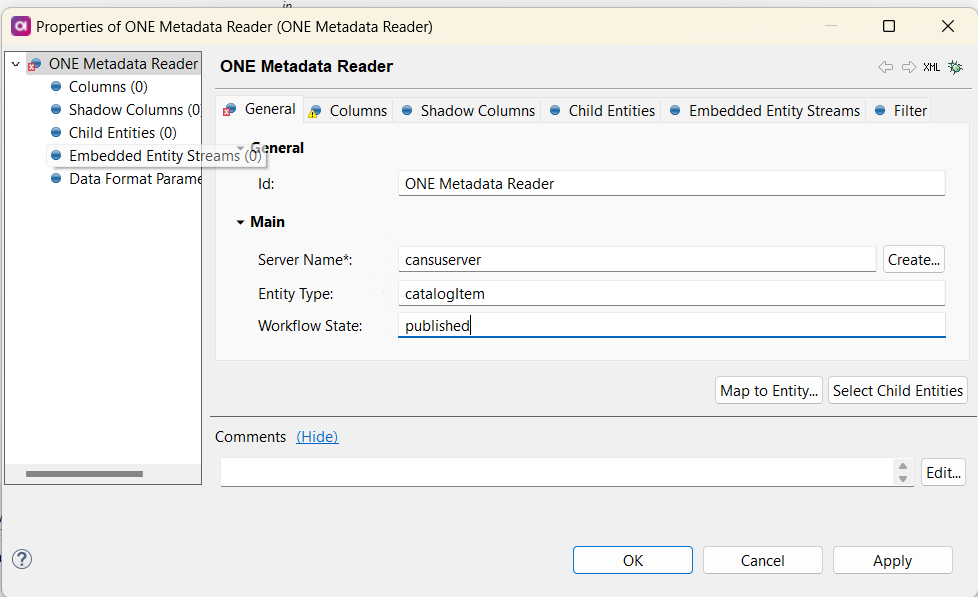
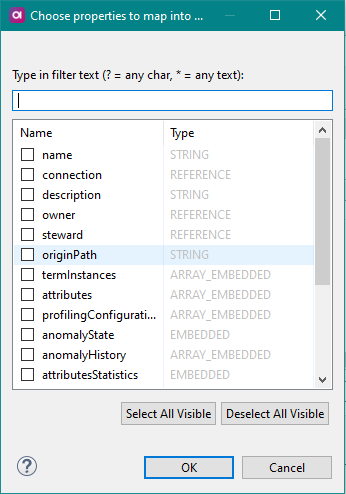
- In the Columns tab, select the columns you want to read by clicking Map to Entity.
- Choose specific columns.
- Click Select Child Entities to reveal more columns from child entities like VCIs and file catalog items.

- Optionally, refine your search by entering a Filter Query using AQL expressions.
- Add a Text File Writer as the output step.
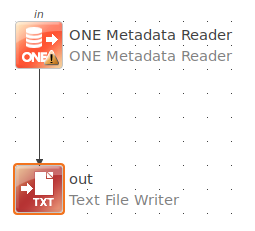
- Connect the ONE Metadata Reader and Text File Writer steps using the Connection tool.
- Run your plan.
As a result, you should be able to retrieve data from the selected entity in ONE Desktop, enabling you to access and utilize your metadata effectively.
Metadata Writing with ONE Metadata Writer
The ONE Metadata Writer Step complements its counterpart by facilitating the writing of data (entities) from the Web Application. This function has various implementations, let’s see some common examples.
Common Implementations:
- One-time migrations, where the Web Application manages metadata imports.
- Integration with external tools for metadata entity management, leveraging the ONE Web Application for scheduling, version control, potential changes in MMD, and attribute mapping.
- Dynamically creating elements based on data processing, such as automatically generating rules to prevent recurring data issues.
You can find comprehensive help information on the available properties for the ONE Metadata Writer Step in the ONE Desktop Help.
Here's a practical example to illustrate how to write metadata to MMM from ONE Desktop, including the creation of a data source and its connection:
Prerequisites:
- ONE Desktop
- Connection to ONE Ataccama Platform Server
Follow along 👣
- Open ONE Desktop.
- Create a new plan.
- Add a file that contains data you want to write.
- Include the ONE Metadata Writer Step in your plan to write name and description values into the
sourceentity. - In the General tab, specify the Server Name, Entity Type, Workflow State, Parent Type, and Parent Property.
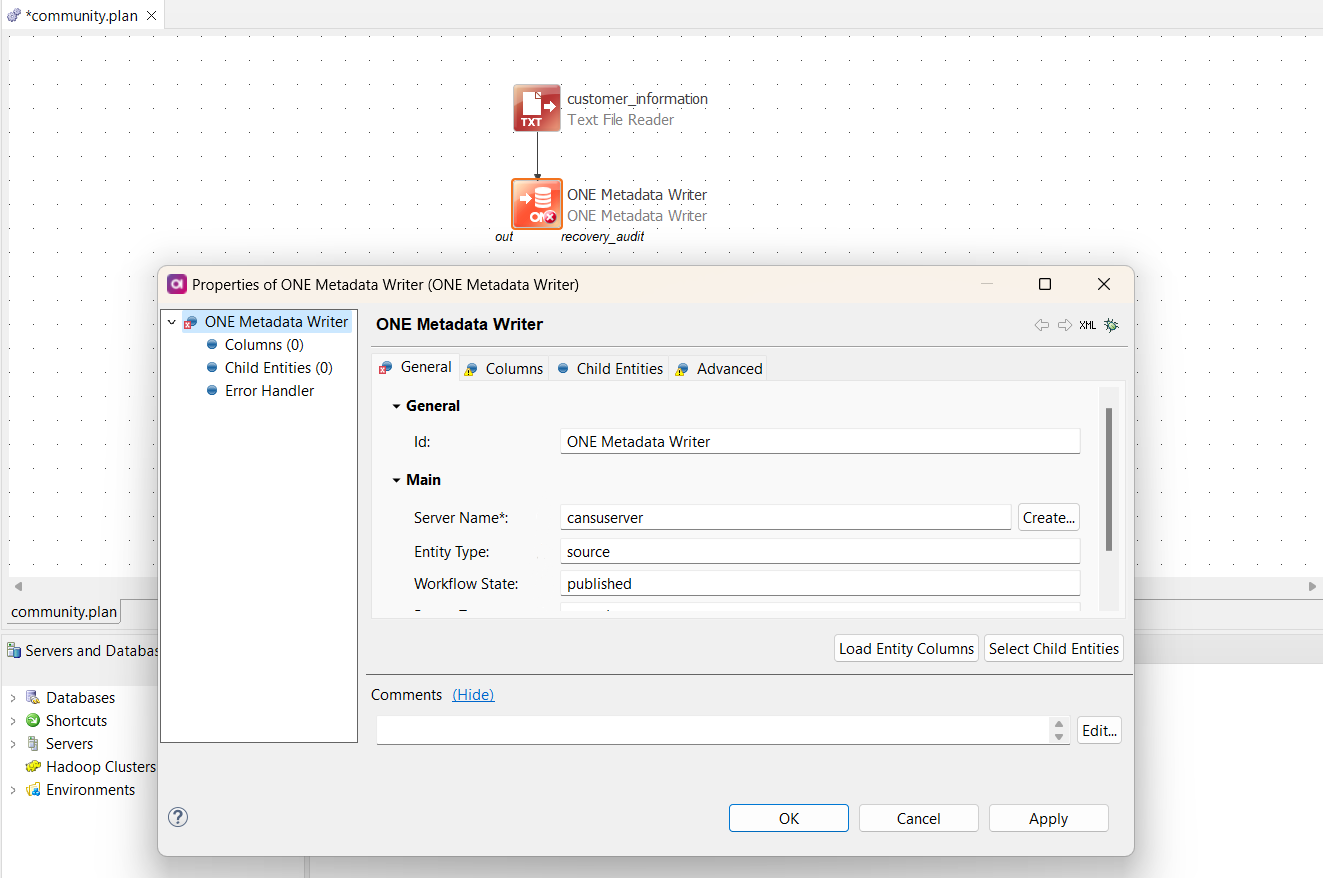
- In the Columns tab, define the columns you wish to write (e.g.,
name,description). - Include another ONE Metadata Writer Step in your plan to create the
connectionentity.Connectionis a child entity to thesourceentity, requiring two steps to establish both entities. - Configure the second ONE Metadata Writer Step by specifying the Server Name, Entity Type, Workflow State, Parent Type, and Parent Property in the General tab.
- In the Columns tab, specify the columns you want to write (e.g.,
connection). - Utilize the Connection tool to connect the two ONE Metadata Writer Steps.
- Finally, run your plan.
Following these guidelines, you should be able to retrieve data from the selected entity in ONE Desktop and also in the Web Application. Do you have any best practices or tips to share with the community? Let us know in the comments below 👇🏽