


Hi everyone!
This week’s last best practice is also the final post on components! Check out yesterday’s post to catch on if you have missed the series so far:
Nested components are like puzzle pieces that fit together to create sophisticated data transformations within a single entity. In this guide, we'll explore how to work with nested components in Ataccama ONE Desktop, focusing on their creation, import, configuration, and use cases.
Understanding Nested Components
Imagine having a main (parent) component that uses multiple component files to achieve complex data transformations. Nested components enable you to do just that. This approach allows you to maintain the original data while applying intricate logic to your datasets. For instance, you can use predefined components provided by Ataccama ONE Desktop to cleanse, filter, or standardize specific data attributes, all while preserving the integrity of your original data.
Configuring a Nested Component in ONE Desktop
In Ataccama ONE Desktop, configuring nested components is a breeze. Here's how to do it:
-
Right-click on a ONE component in ONE Explorer and select "Configure."
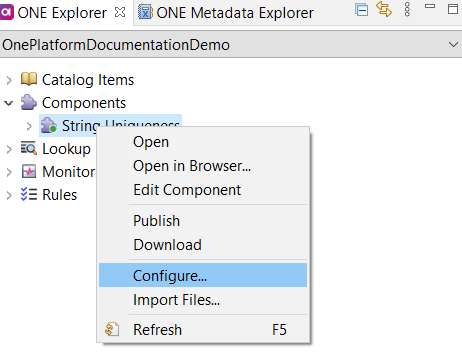
-
Within the configuration menu, you can edit the "Implementation state" and specify which component file should serve as the main file for the nested component. This determines which components are nested within the parent.
Keep in mind that currently, nested components can only be used within transformation components. These transformation components, like Virtual Catalog Items, are where you'll harness the power of nested components for your data operations.
Creating a Nested Component
Let's walk through creating a nested transformation component with a practical example:
Scenario: We have a catalog item with an attribute containing email addresses that need cleansing. However, we want to apply this transformation without altering the existing catalog item.
Prerequisites:
-
Create a virtual catalog item following the guide in Virtual Catalog Items. For this example, we'll use a virtual catalog item named vci_test generated based on the emailaddress catalog item.
-
Ensure that the desired component, named
___email_complex.comp, is installed. If not, refer to How to Install Paid Components and Modules. -
Verify that you're working in the correct environment: a. Configure an environment compatible with ONE Platform for ONE Data Processing Launch. Details can be found in Environments. b. In your workspace, switch to this environment from the toolbar.
Steps to Create a Nested Component:
-
Open the virtual catalog item you created earlier (vci_test).
-
In ONE Desktop, go to ONE Explorer > Components, right-click the component name, and select Edit Component. Alternatively, access the component through File Explorer (Servers > one20 > Components).
-
To import a component, right-click the component name in ONE Explorer > Components and select Import Files.
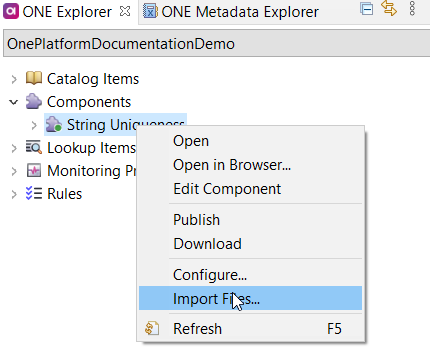
Currently, dragging and dropping actions are not supported for nested components. -
In the dialog that appears, navigate to
DQ Projects/___email_complex/components. -
Select
___email_complex.compand click Ok. -
Confirm the import of external files to the virtual catalog item.
-
Import additional files used in the components by repeating steps 2-5. Select all files from the following locations:
DQ Projects/___email_complex/components/data/ext/build: ONE plans used in the component.DQ Projects/___email_complex/components/data/ext/lkp: Lookup files used in the component.DQ Projects/___email_complex/components/data/ext/src: Component test data.
-
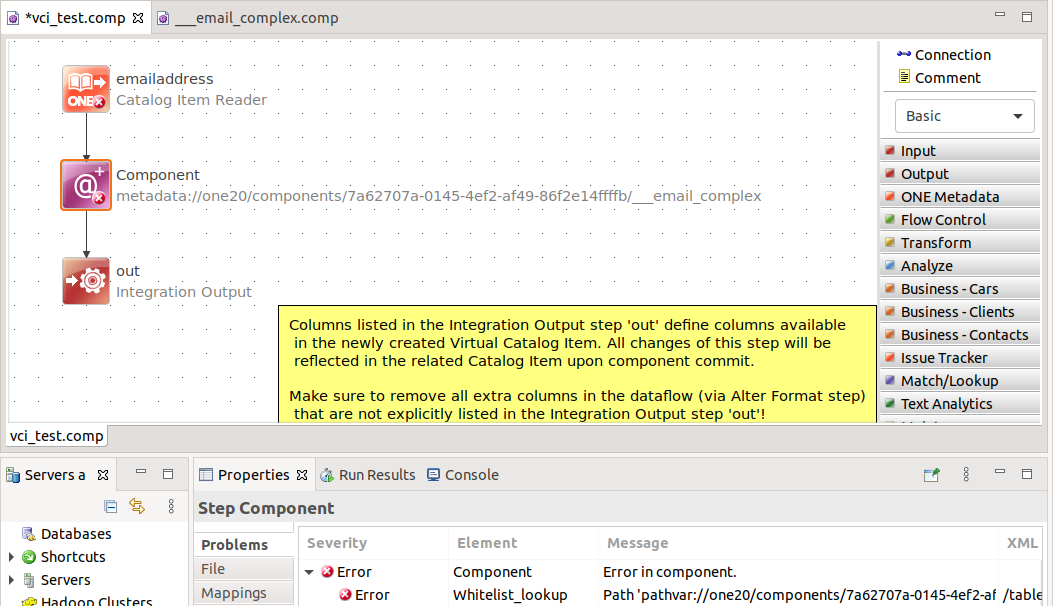
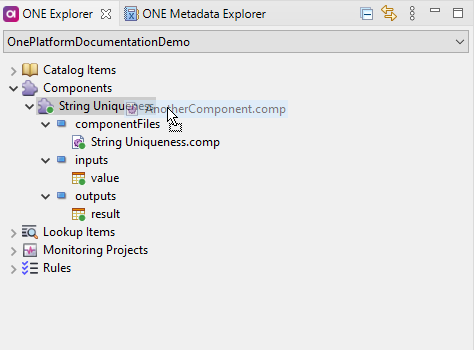
From ONE Explorer > Components > vci_test > componentFiles, drag
___email_complex.compto the canvas of the virtual catalog item. -
Connect the component to the existing Catalog Item Reader and Integration Output steps.
-
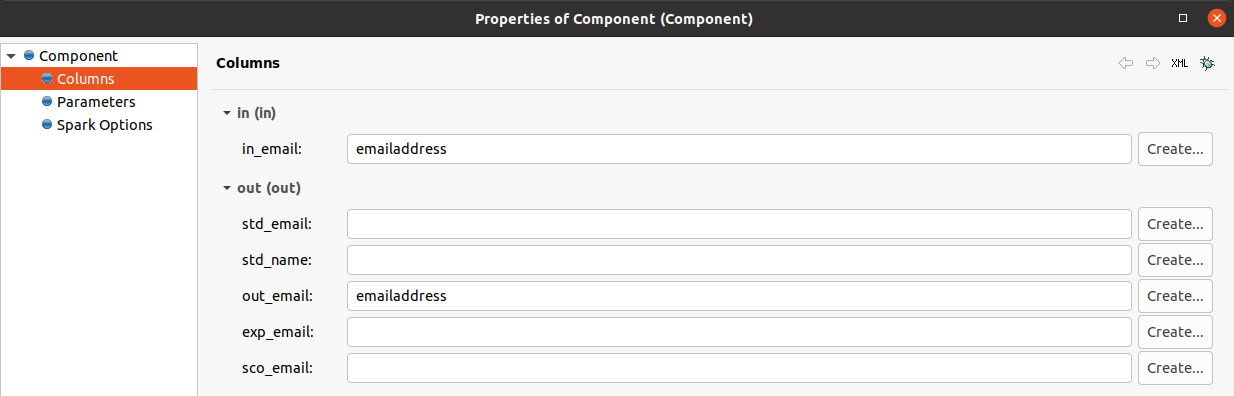
Edit the
___email_complexcomponent:
a. Map the component columns by double-clicking the component name and going to the Columns tab. For this tutorial, we're mapping: -in_email:emailaddress-out_email:emailaddress
b. Update the paths in the steps used within the component. This ensures that unresolved paths are resolved correctly.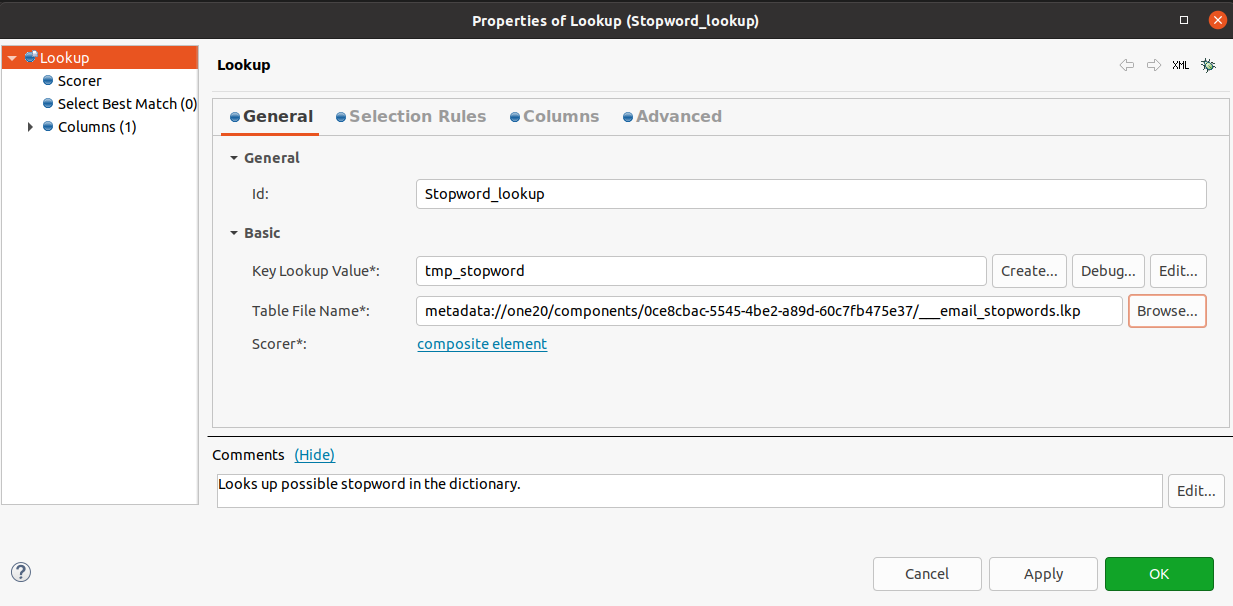
Note: Repeat these steps for each affected step until no issues are reported in the Status panel > Properties. -
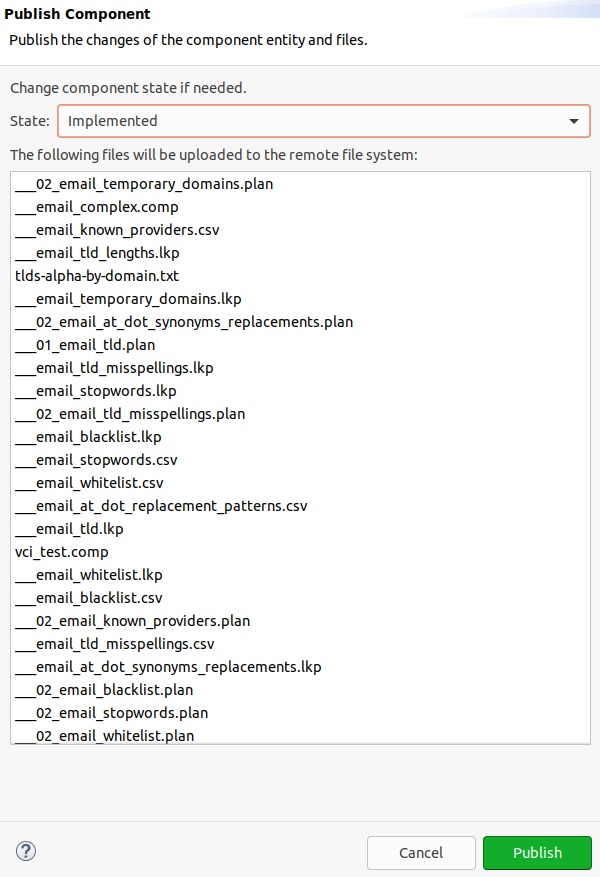
To publish the nested component, go to ONE Explorer > Components, locate the vci_test component, right-click it, and select Publish. Ensure that the component state is set to "Implemented," then click Publish. Your nested component is now ready for use.
Importing Nested Components into ONE Platform
You can easily import and convert nested components into ONE components in ONE Platform. Here's how:
-
Drag a component from File Explorer and drop it onto any ONE component in ONE Explorer.
-
If the imported component refers to external files, those files will be imported automatically. All paths to external files are adjusted during import to ensure the component functions correctly.

You can also import nested components by dragging them directly onto a ONE component's canvas area:
-
Double-click the ONE component in ONE Explorer that you want to edit in the canvas.
-
Drag and drop any files and components you want to nest in the component and import to the ONE Platform server.
-
Once you're ready, save your changes, right-click your ONE component, and click Publish to apply the changes to the server.
Path Conversion: When you drag and drop a file or component onto a ONE component canvas, the file paths may appear local until you publish the changes to the server. During publishing, all paths in the component are converted to relative paths, ensuring they work seamlessly, independent of your local naming conventions.
And that’s all for components! Questions, comments share them below 👇


