


Hi community!
We are almost halfway into our Monitoring Project Best Practice series, today we are going to talk about Lifecycles 🎢Let’s dive in!
Introduction to Monitoring Project Lifecycles
The introduction of Monitoring Project Lifecycles allows you to simulate a multi-environment process (Configure > Test > Send for approval > Make public, and repeat) within a single physical environment. While you can create two physical environments, the non-production environment should primarily be used for specific purposes, such as testing new sources, integration plans, model changes, and service re-configurations.
It's important to note that non-production environments are not intended for developing data quality monitoring projects and migrating between environments. For the best results, we recommend having one production environment for all metadata and a non-production environment for model changes, API work, and testing. This setup differs from other modules like RDM and MDM, where two non-production environments are suggested.
Optimizing Project Configuration with Monitoring Project Lifecycles
By using Monitoring Project Lifecycles, you can efficiently test projects on non-production data and later exchange them for production data. This allows you to test rules and configurations without affecting the production dashboard. No more repetitive project configurations!
Here's how you can achieve this:
- Create a project and use tables from the non-production data source to assign rules and perform testing.
- Create a second project and utilize the new Import configuration functionality to import the configuration from the first project.
- Map tables to their non-production instances:
- If catalog items haven't been assigned a purpose and it's the first import, you'll need to map items manually.
- If the configuration has been previously imported, the mapping will be automatic (user override possible).
- If catalog items have been assigned a purpose corresponding to the project, those items will be selected.
Step-by-Step Guide for Setting up Monitoring Project Lifecycles
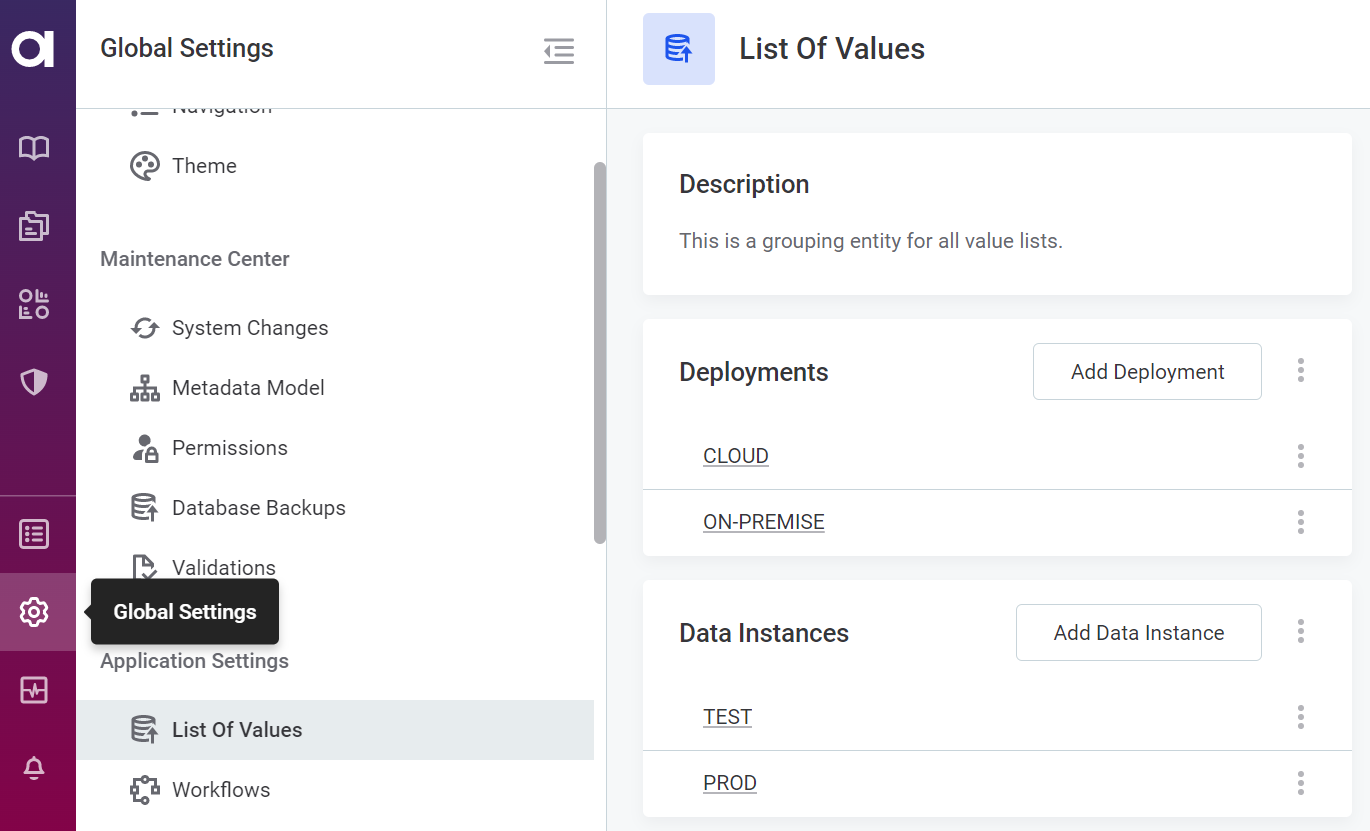
1. Add Purpose in List of Values
- Start by adding both DEV and PROD purposes in List of Values under Global Settings > List of Values. Provide a name and save the settings.
2. Configure a Monitoring Project
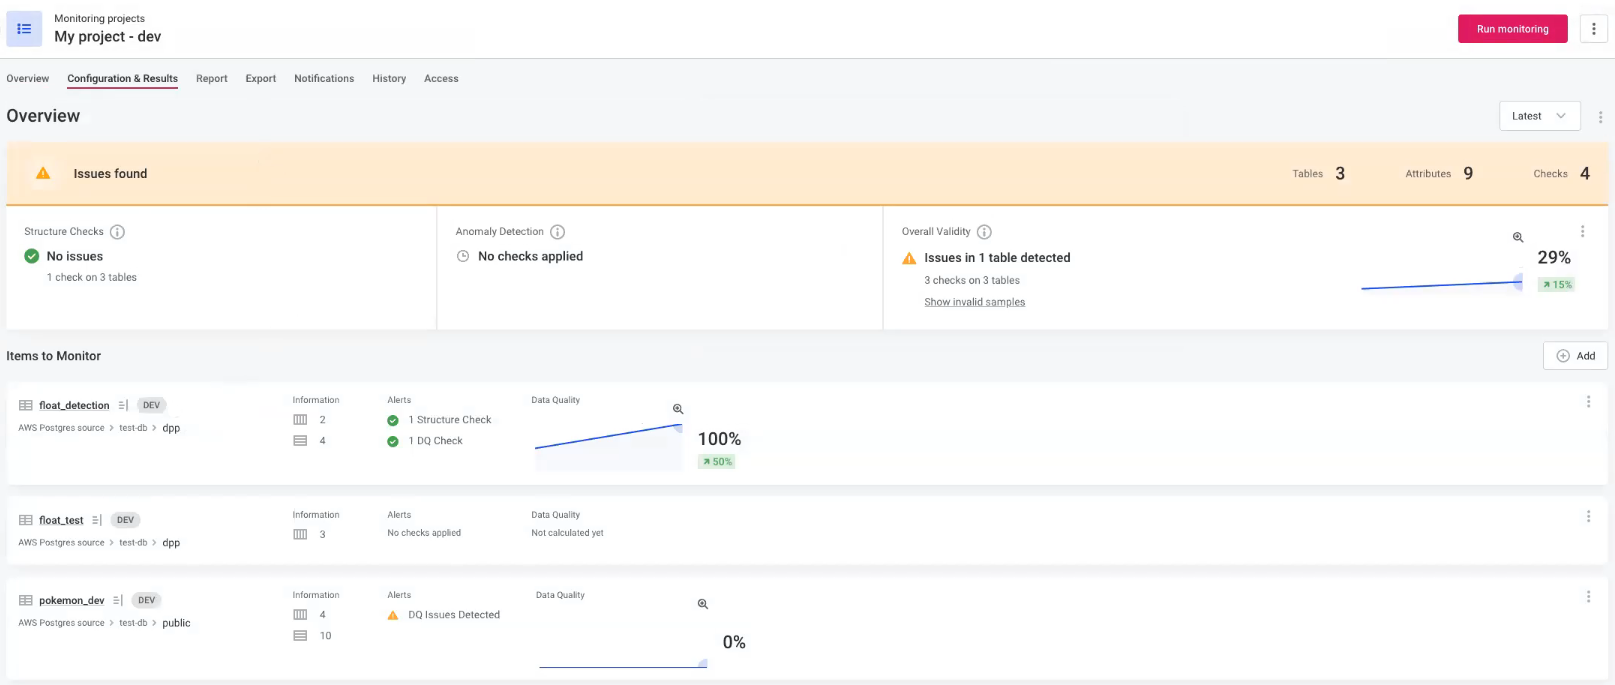
- Create a monitoring project, e.g., 'My project – dev'.
- Add a purpose for the monitoring project: DEV.
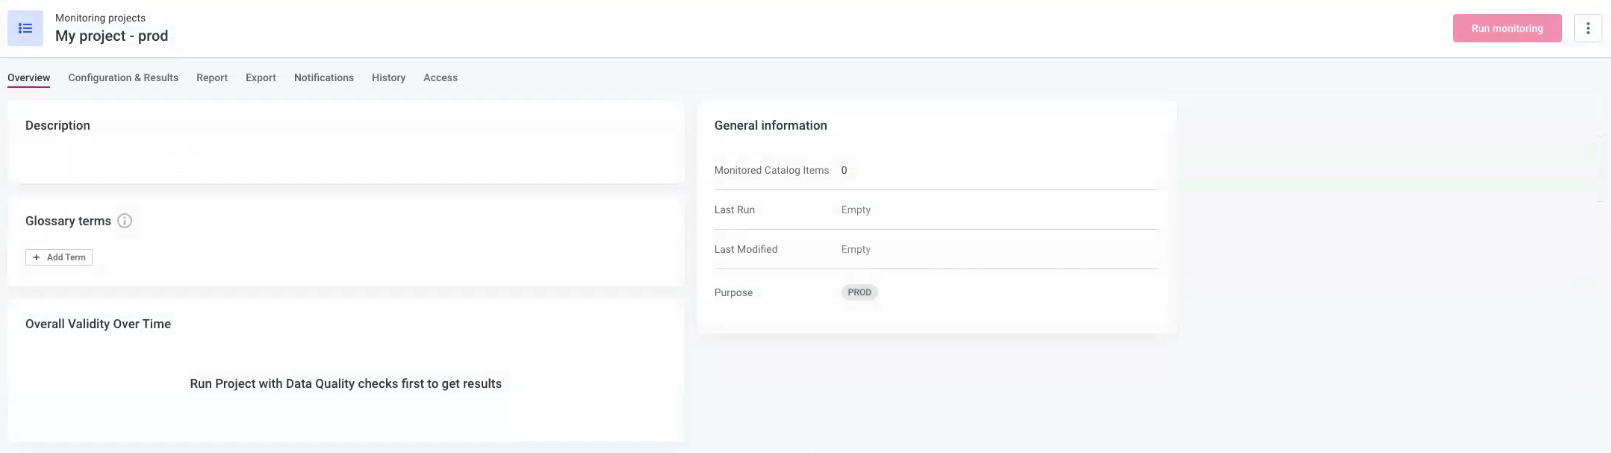
3. Create a Monitoring Project for Production
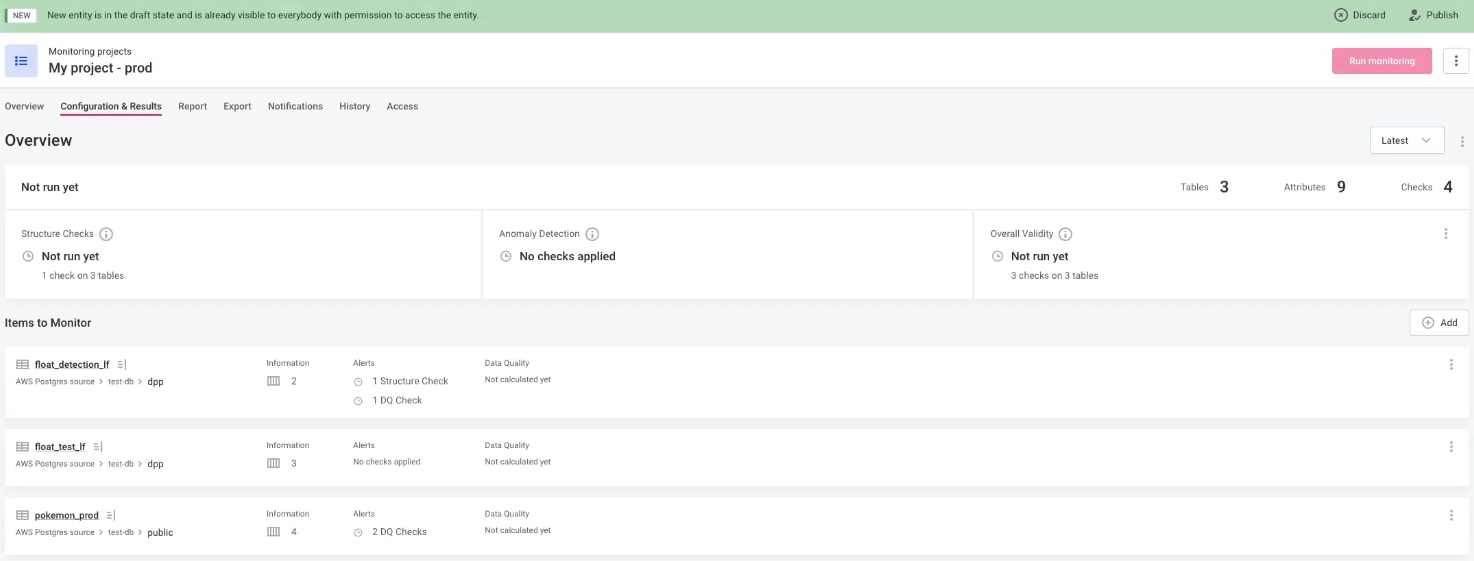
- Create another monitoring project for the production environment, e.g., 'My project - prod' (no need to configure this project).
- Add a purpose for the monitoring project: PROD.
4. Copy Configuration from DEV to PROD
- Navigate to the production monitoring project, expand the more options menu, and select Import configuration.
- Choose DEV as the source configuration project.
5. Link Tables for Development and Production
- Match the tables that correspond to the development and production environments.
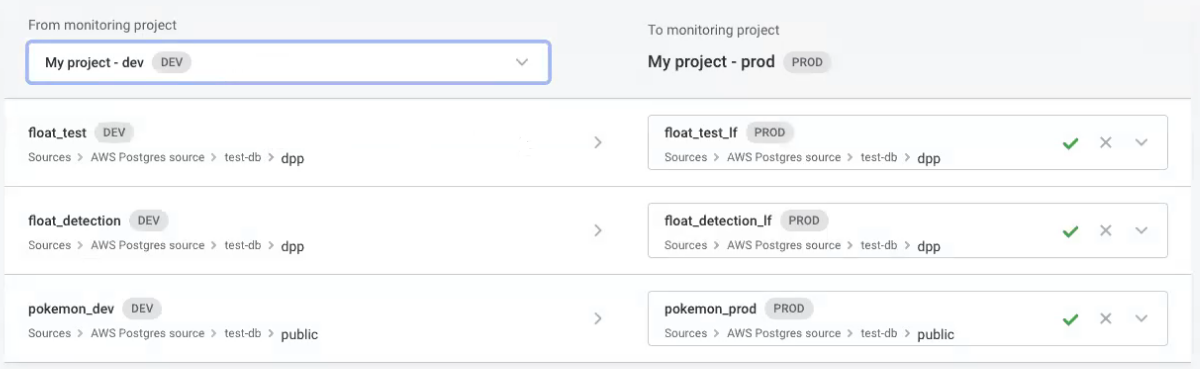
- Three possible scenarios:
- If you have assigned one version of a catalog item the DEV purpose and one the PROD purpose, they will be mapped accordingly.
- If you haven't added catalog item purposes and it's the first import, you'll need to manually select the corresponding tables.
- If the configuration has been previously imported, the application will remember the selection. If necessary, adjust the list of preselected catalog items for the PROD project.
6. Start Import
- After ensuring the structure of catalog items matches, click Start import at the bottom of the page.
- The configuration and report settings will be imported to the PROD monitoring project.
With Monitoring Project Lifecycles, you can streamline your workflow, minimize repetitive tasks, and ensure seamless data quality monitoring from development to production.
Let us know your best practices in the comments below 👇


