


Happy Monday everyone!
This week we are delving deep into one of the most important steps in working with data - profiling 🚀 We will start with the basics and move on to more advanced practices so don’t forget to follow the forum by hitting the Subscribe button to get the latest article in your inbox 🔔
When embarking on a data project, understanding your data's current state is paramount. It's the compass that guides you through the winding path of data cleansing and transformation. This understanding also serves as a yardstick to measure the effectiveness of your cleansing rules. Enter the Data Quality Profile – a snapshot of your data's health. It unveils duplicates, dependencies, business rule evaluations, data patterns, and much more.
In this post, we will cover how to create and configure a data quality profile, complete with additional analyses like masks, dependencies, and business rules.
Step 1: Select Data to Profile
-
Launch ONE Desktop.
-
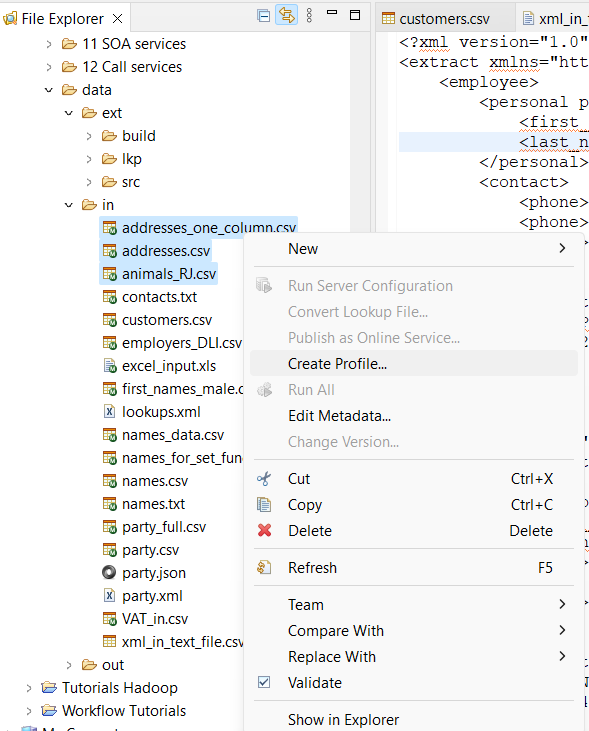
In the File Explorer view, pick one or several files (CSV, TXT, XLS, XLSX) or database tables. Right-click your selection, then choose Create Profile.
Notes:
-
To profile a database table, ensure you have a configured database connection (learn how to do this in the guide on Connecting to a Database).
-
For text files, you may need to describe their formatting by assigning metadata. More details can be found in the guide on Editing Metadata.
-
Selecting multiple inputs results in one profile file for each input (one per table/file). To learn more about reading profiles with multiple inputs, check out Reading a Data Quality Profile.
Selecting Multiple Database Tables to Profile
-
Step 2: Configure the Profile or Create a Profiling Plan
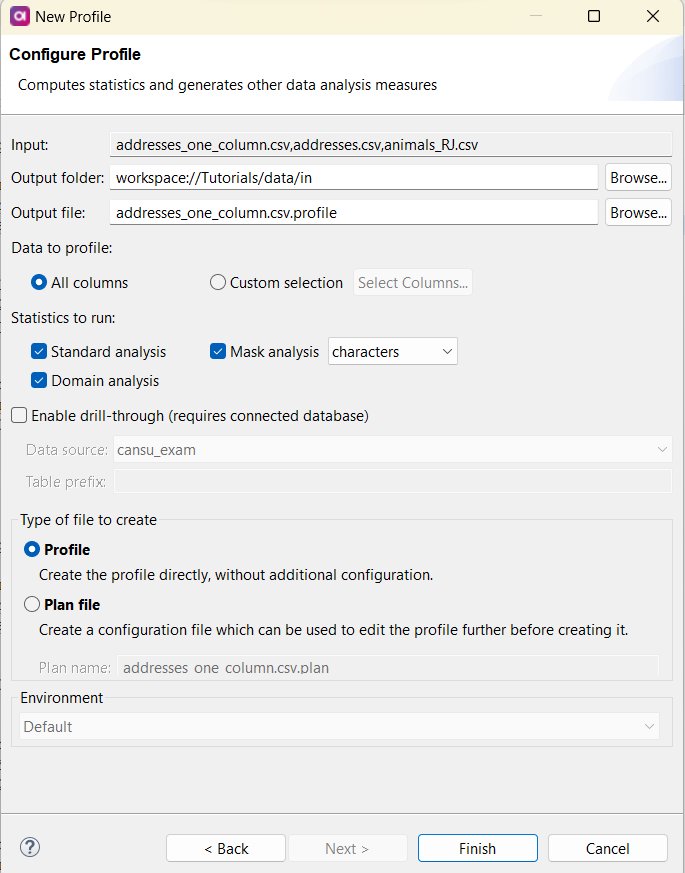
In the profile configuration dialog that pops up, you specify where to create the profile and which columns to profile. The drill-through functionality lets you inspect the individual records behind the statistics generated (requires a database connection). You also have the choice to create a profile or a plan file.
-
If you opt for the Profile and click Finish, the profile is instantly generated using your specified settings and opened in the Profile Viewer. Refer to Reading a Data Quality Profile to discover how to interpret the data within the profile.

-
Choosing the Plan file creates a plan for profile generation. This is handy if you intend to manipulate or filter data before profiling, or if you want to perform advanced profiling algorithm configurations (such as adding business rules or conducting primary key analysis, for instance).
Tomorrow we will cover how to configure profiling and go deeper into the topic so stay tuned 👀