


Hi everyone,
In this post, we will cover how to do Bulk Profiling 💾
Profiling vast databases with numerous tables can be a daunting task, but Ataccama's Bulk Profiling extension streamlines the process. This extension simplifies the profiling of database data sources with multiple tables. Instead of configuring analyses individually for each table, it enables you to import data structures directly from the database dictionary.
Bulk Profiling then automatically generates a profiling plan for each table. To top it off, the tool creates an execution batch file that can run the individual plans. This means you can perform the entire profiling process unattended, whether overnight or at a scheduled time using a task scheduler.
Step 1: Creating a Bulk Profiling Project
- In the Model Explorer view, click on New Model Project in the toolbar. This will open the New Model Project dialog.
- In the dialog, select the Bulk Profiling model template.
- Click Finish.
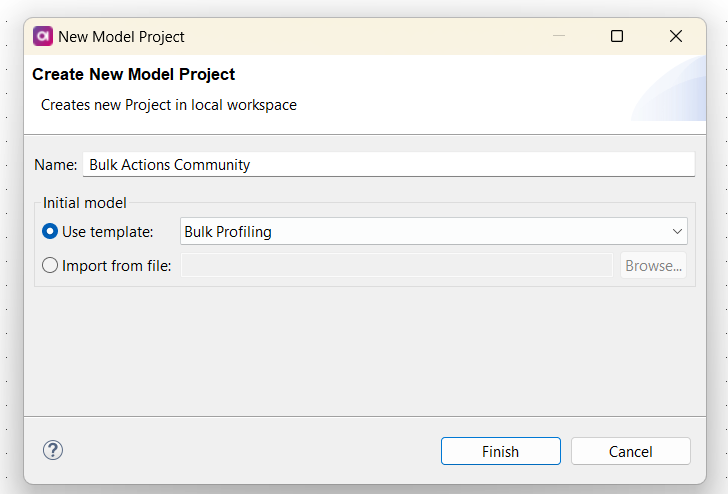
This initiates the process of creating a Bulk Profiling project.
Step 2: Setting up a Database Connection
- Switch to the File Explorer view.
- Right-click on Databases and select New Database Connection. For instance, if you are connecting to an Oracle database, make sure to use the Test Database Connection button to verify the correctness of your parameters. You can find detailed information about connecting to a database here.
Please note that drivers for certain databases might not come preconfigured with the product and may require separate configuration.
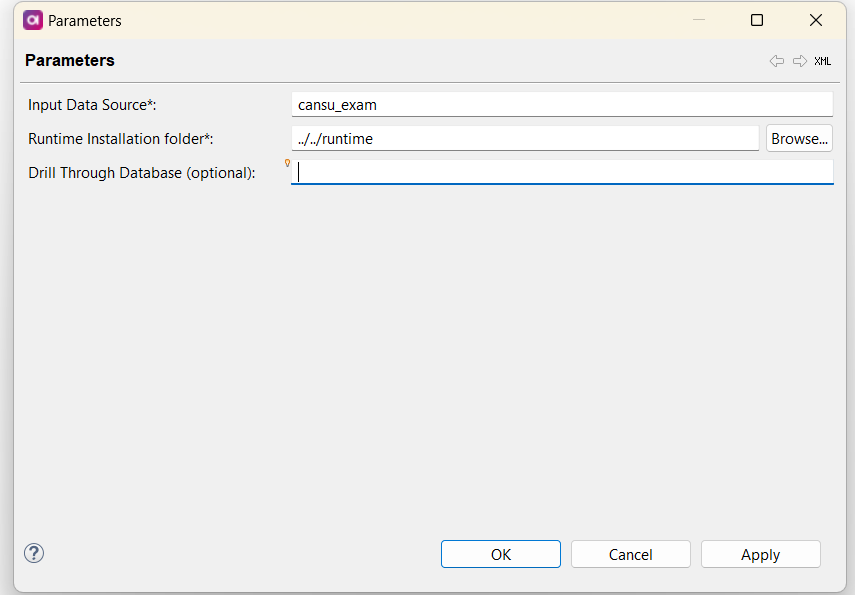
Step 3: Importing Tables
- Return to the Model Explorer view.
- Start by double-clicking on the parameters node and choose the data source you wish to profile (the database connection you created).
- If you want to store the drill-through information, select the appropriate data source.
- Right-click on the Tables node and choose Import Database Metadata. In the wizard's first step, select the tables you intend to profile.
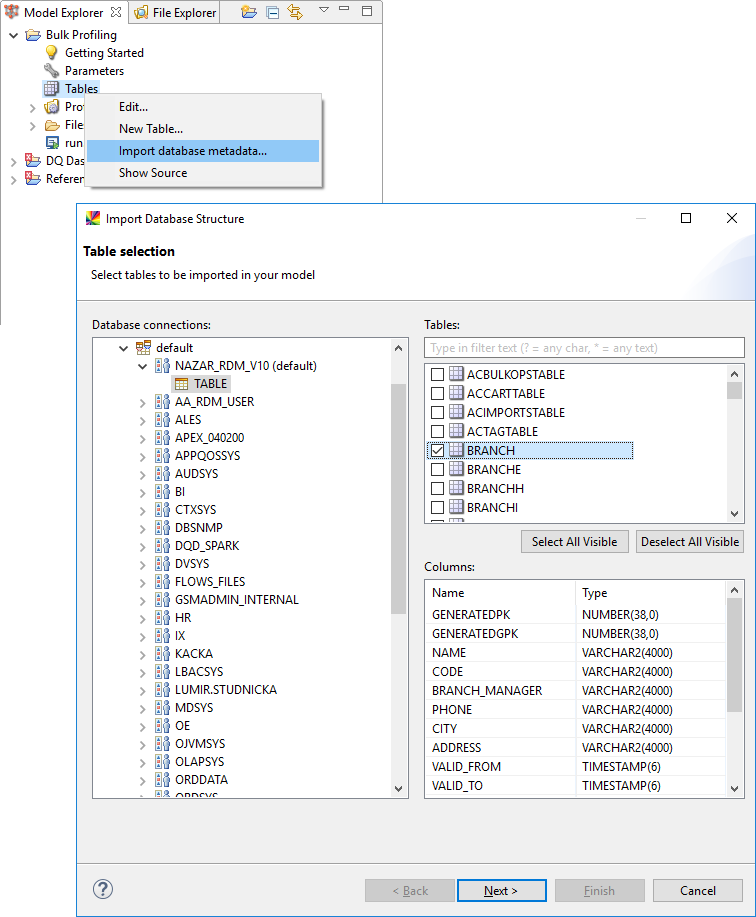
- The next step allows you to pick columns for import.
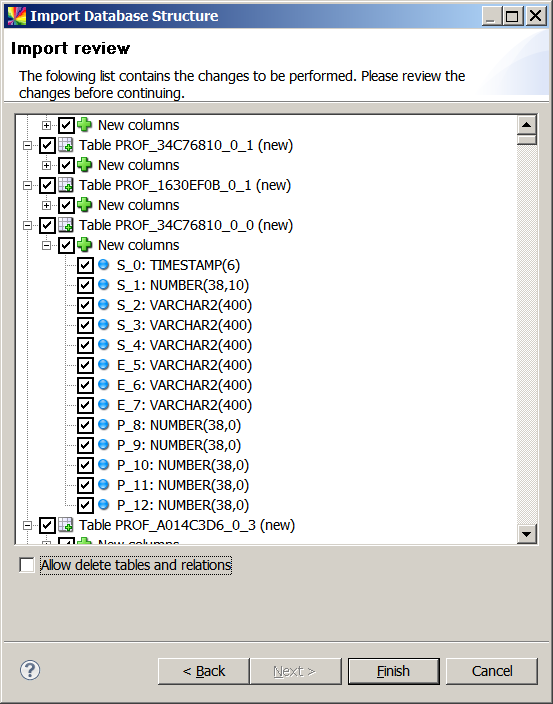
- Click Finish.
This step imports the necessary table metadata.
Step 4: Generating Profiling Plans
- Right-click on the Profiling Plans node and choose Generate.

This generates the profiling plans based on the imported metadata.
Step 5: Executing Profiling Plans
- The generation creates a folder labeled
Files, containing the profiling plans, and a batch file namedrun.bat. This batch file runs the profiling plans sequentially. - Double-click on
run.batto execute the plans.
The profiling plans will execute in a separate window. Once the execution is complete, you can close the window. Alternatively, you can run the batch file from a command prompt or a task scheduler.
Step 6: Browsing Profiling Results
- After the execution is finished, open the
Files/proffolder. - Either press F5 or choose Refresh from the context menu. This action will reveal the computed profiles.
- The generated profiles can now be viewed or exported as required.

And that’s all! Let us know if you have any questions in the comments 👇🏻


