Hi everyone!
This week we continue to explore different features of Monitoring Projects 
Each day this week, we will share a best practice post on Monitoring Projects. We are kicking it off with a popular feature - notifications 
General Notifications
There are two types of notifications available: General and Specific. General notifications cover various scenarios such as monitoring failures, critical structure errors, new results availability, data quality issues, and anomalies. Specific notifications offer even greater granularity, allowing you to set custom data quality thresholds and filter conditions for triggering notifications.
Adding General Notifications
To set up notifications for predefined scenarios:
- Navigate to the Notifications tab of your project.
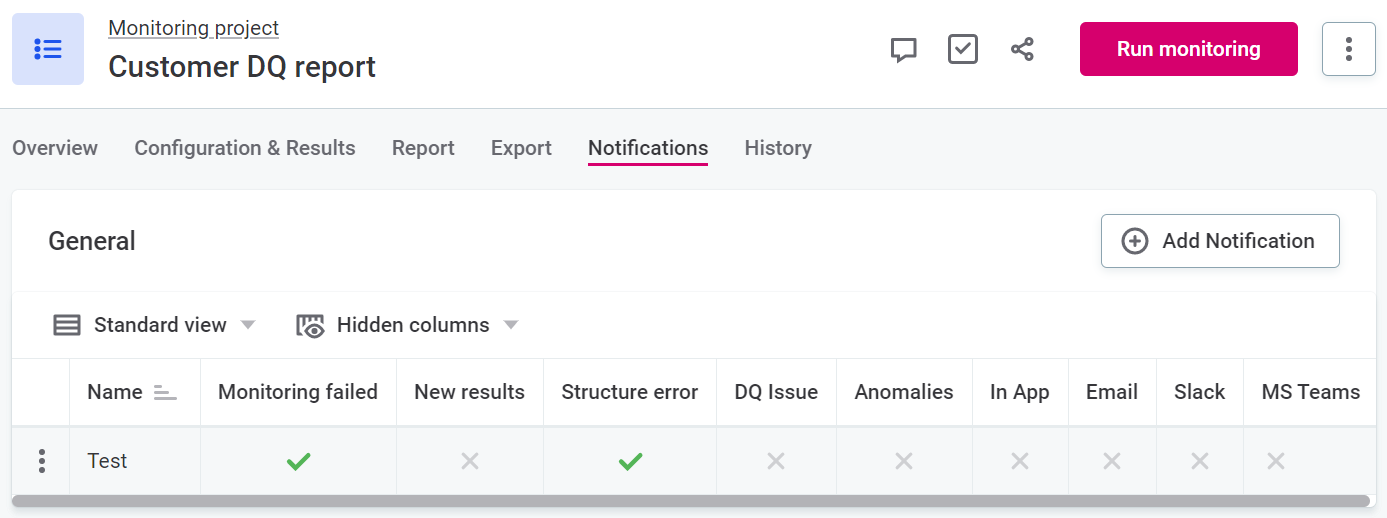
- Under General, select Add Notification to create a new notification or Edit an existing one.
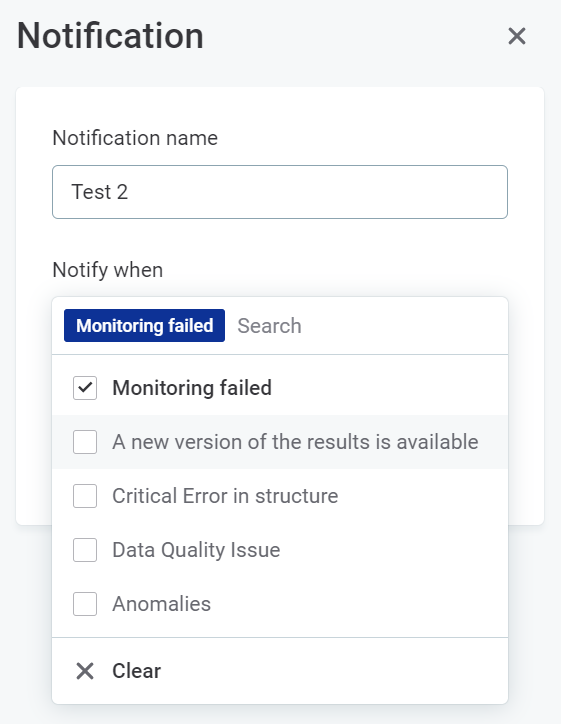
- Provide a name for the notification.
- Choose the events that should trigger notifications (e.g., Monitoring failed, New version of results available, Critical error in structure, Data Quality issue, or Anomalies) by selecting the appropriate checkboxes.
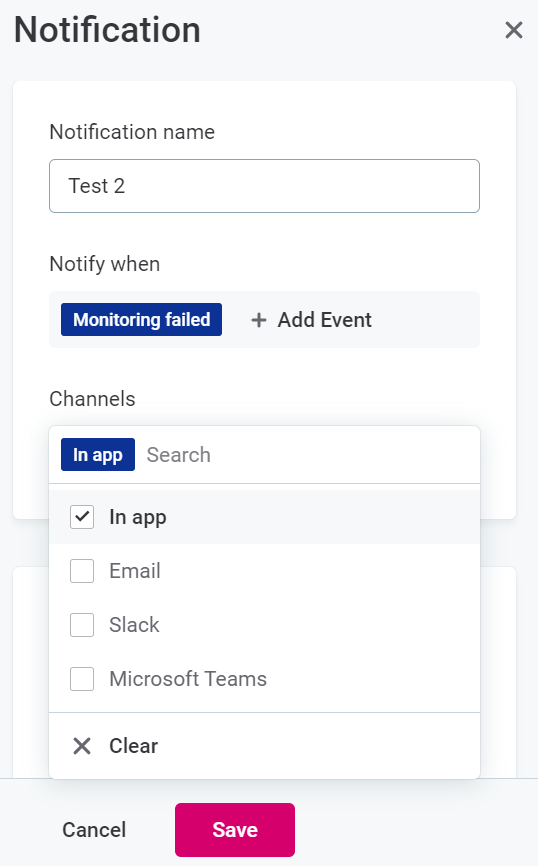
- Select the channels to receive the notifications:
- In-app: Notifications will appear within Ataccama ONE.
- Email: Configure SMTP server settings to receive notifications via email.
- Slack: If connected to Slack, notifications can be sent to selected channels.
- Microsoft Teams: Add a webhook to send notifications to Teams channels.
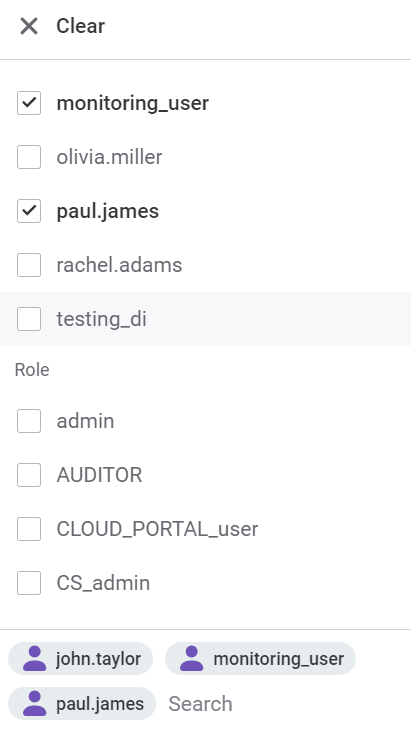
- Define the recipients who should receive the notifications by selecting from Groups, Roles, or individual Users.
- For Slack and Microsoft Teams, choose the specific channels or provide the webhook accordingly.
- Click Save to save the notification configuration.
Managing General Notifications
You can edit, enable, disable, or remove general notifications directly from the Notifications tab.
Specific Notifications
Specific notifications provide more flexibility and can be assigned to individual users, groups, or roles. You can set specific data quality thresholds and filter conditions to trigger notifications selectively.

Adding Specific Notifications
To add new specific notifications:
- Go to the Report tab of your project.
- Select the instance or rule for which you want to create the notification.
- Use the more options menu and select Add Notification.
- If notifications are already configured, select Open Notifications.
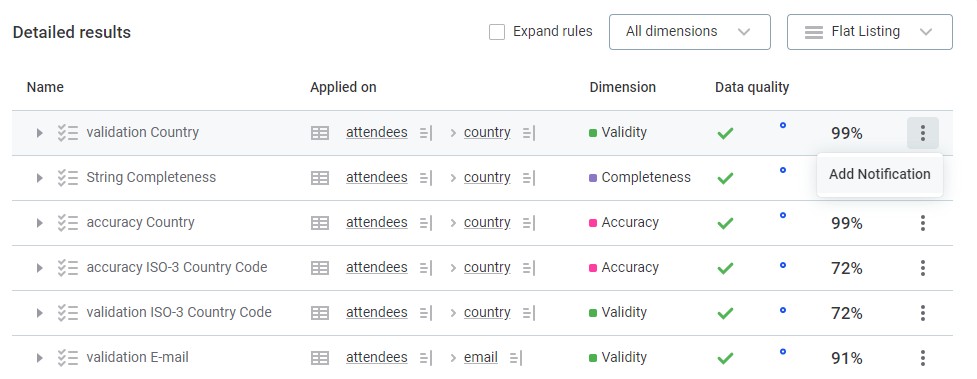
- If notifications are already configured, select Open Notifications.
- In the sidebar, you can create a new notification or edit existing ones.
- When adding or editing notifications, provide the following details:
- Name: Give the notification a custom name or use the default format.
- Thresholds: Specify the data quality percentage and the trigger condition (lower or higher).
- Filter conditions: Define filter conditions if applicable.
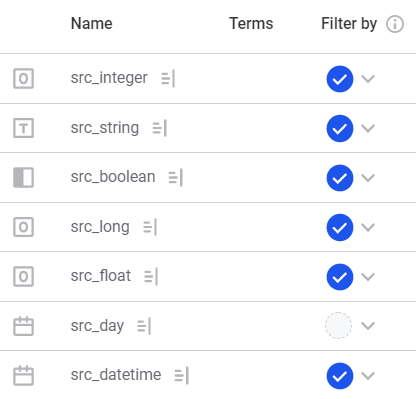
- Recipients: Choose the Groups, Persons, or Roles to receive the notification.

- Enable or disable the notification using the toggle.
- Click Save and Publish to finalize the notification.
Email Notifications
Notifications configured in this way will be delivered to users via email. The email template design includes information from both General and Specific notifications, along with direct links to items in the report.
A common reason to use Monitoring Project Notifications is to stay updated on critical events and ensure the success of your data quality initiatives. How do you use notifications in your monitoring projects? Share them in the comments!

 ♀️
♀️