


Hi everyone,
We are here with Part II of our VCIs best practice series and today we will delve deeper into two significant aspects of working with VCIs - connecting to natively supported data sources and non-natively supported data sources.
In the first post, we explored the creation and transformation of Virtual Catalog Items (VCIs) within Ataccama ONE. You can check it out here 👇🏻
Connecting to Natively Supported Sources
Ataccama ONE makes it simple to connect with data sources that are natively supported by following these steps:
-
Create a VCI, as explained in the previous section.
-
To read data from a natively supported source, add the "JDBC Reader" step to your plan.
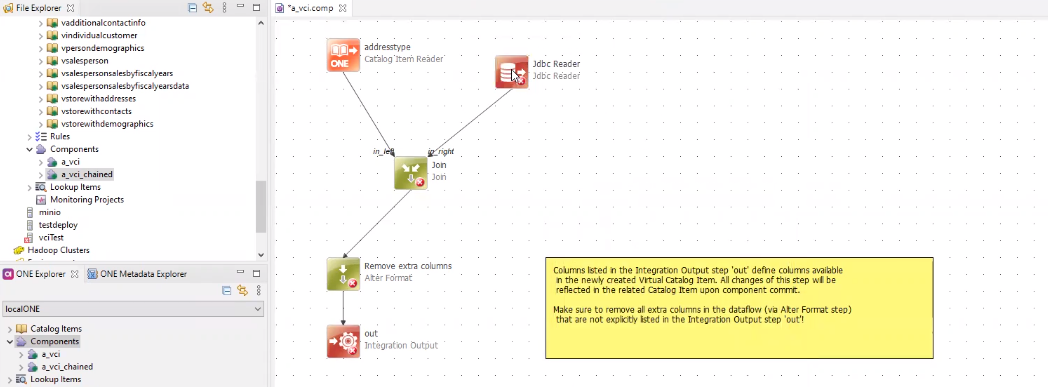
- Depending on your transformation requirements, you can use the JDBC Reader step alone or combine it with existing catalog items.
-
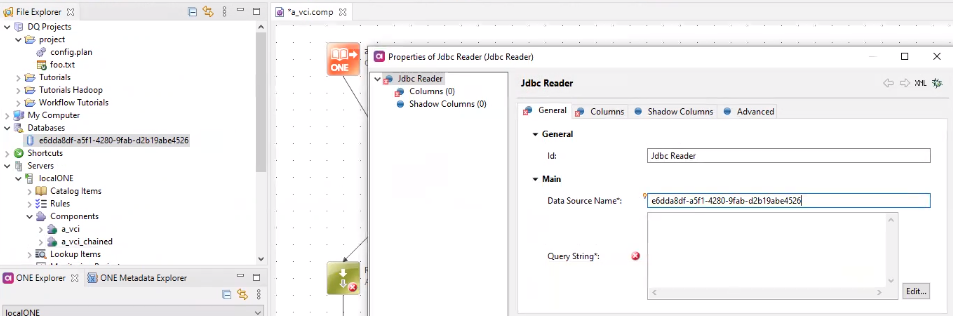
Configure the "JDBC Reader" step as follows:
-
On the "General" tab, in "Data Source Name," provide the source identifier of the connected database. You can find the source identifier in ONE under "Sources."
-
In "Query String," provide the SQL query for your transformation. To write the SQL query, check the data source structure in ONE under "Sources > [data source name] > [connection name] > Browse."
-
Specify "Columns" as needed and select "OK."
-
-
Publish the item following the steps outlined in Part 1.
-
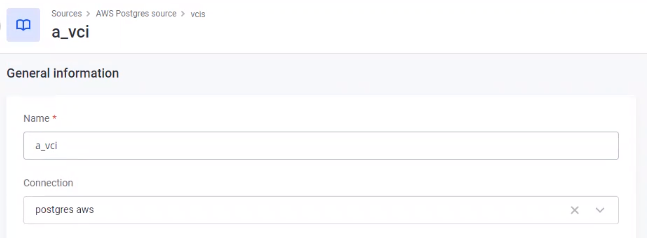
In ONE, open the VCI you are working with and select "Edit."
-
Specify the connection to the source in "Connection" and save your changes.
-
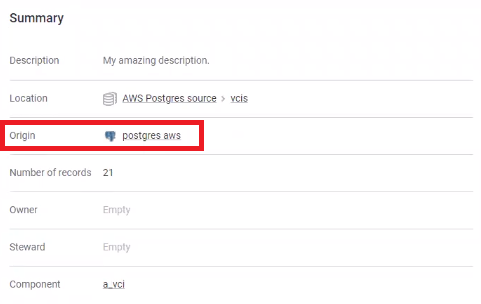
Publish the changes. Your catalog item now has the "Origin" specified.
Please note that data sources that are not set up as combinable in the Data Processing Engine cannot be combined in ONE. Make sure to check the Data Processing Engine's support for the connection before attempting to use non-combinable data sources.
Connecting to Non-Natively Supported Sources
When dealing with data sources not natively supported by Ataccama ONE, follow these steps:
-
Create a VCI, as explained in Part 1.
-
Add the necessary reader step to retrieve data from the source, which could be a "JSON Reader" step or "API calls," depending on the source.
- Ensure compatibility with different sources by checking how the source was configured in Data Processing Engine (DPE). Ensure that DPE supports the connection.
-
Configure the selected reader step.
-
In ONE, create a data source connection as described in the Ataccama documentation.
-
Open the VCI in ONE, select "Edit," and specify the newly created data source connection in "Connection." Save your changes.
-
Publish the changes. Your catalog item now has the "Origin" specified.
Using Global Runtime Configuration
You can also set up connections through the Global Runtime Configuration, which can be used for both natively and non-natively supported sources. However, note that this method cannot be used with the JDBC Reader step configured for Spark due to limitations regarding driver paths.
To set up a connection using the Global Runtime Configuration:
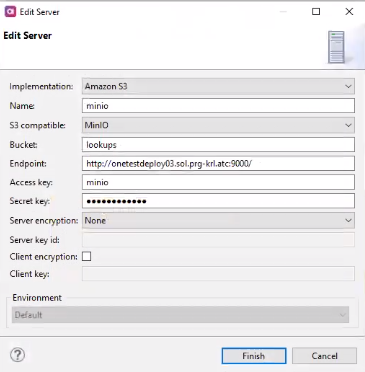
- Connect to the source you want to read data from, and obtain the connection details.
- Export the runtime configuration from ONE Desktop.
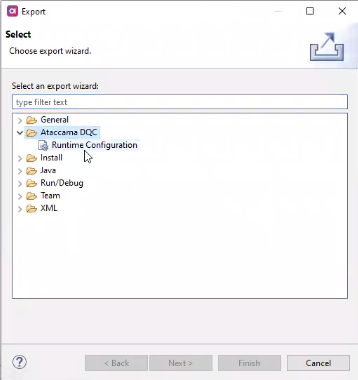
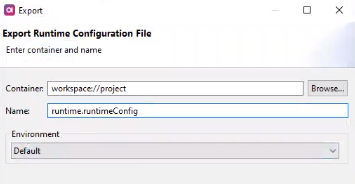
- Specify the container and name for the runtime configuration export.
- Open the exported runtime configuration file in ONE Desktop.
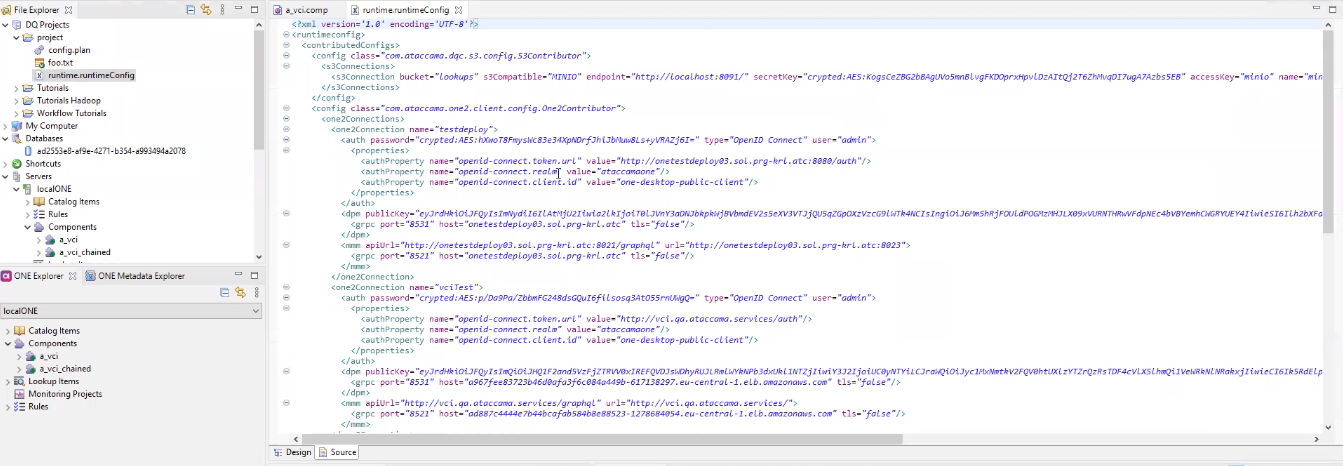
- Delete lines that do not refer to the necessary connection.

- In the DPM Admin Console, copy and save the modified runtime configuration.
- Publish the component in ONE Desktop with the connection to the source.
Notes and Limitations
While working with VCIs, keep these important notes and limitations in mind:
- Viewing data from virtual catalog items is not supported at this time.
- You can assign terms to virtual catalog items the same way you would with other catalog items.
- Virtual catalog items can only be processed using full profiling (not sample or custom).
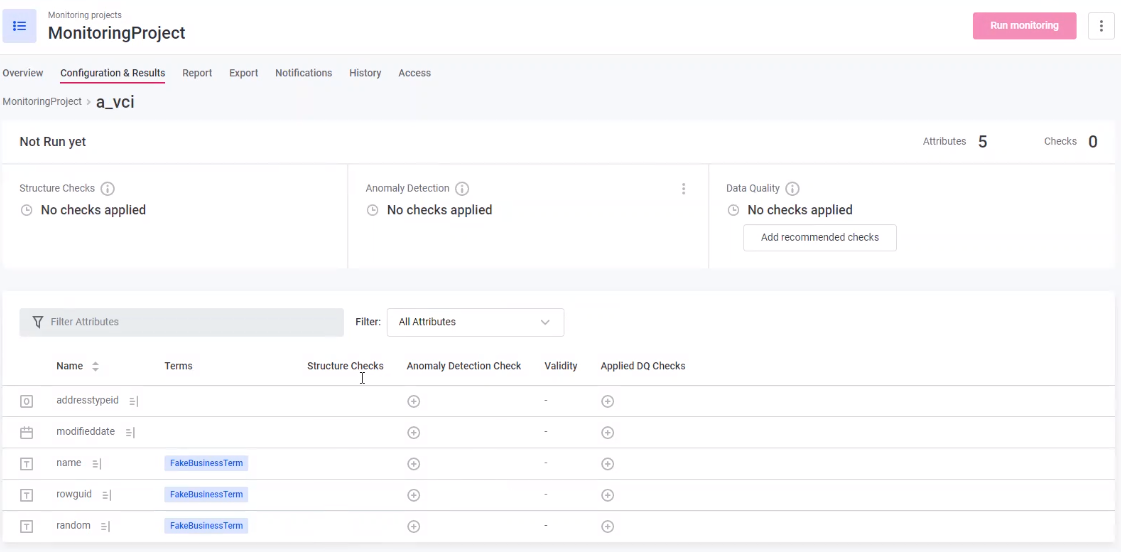
- Structure checks in monitoring projects cannot be set on virtual catalog items.
- Policies can be applied to virtual catalog items in the same way as with other catalog items.
- Permissions for virtual catalog items apply to the entire workspace, so changes should be made for the entire workspace.
- Lineage and relationships tabs are not added automatically, but you can set relationships manually using the "Relationships" widget.
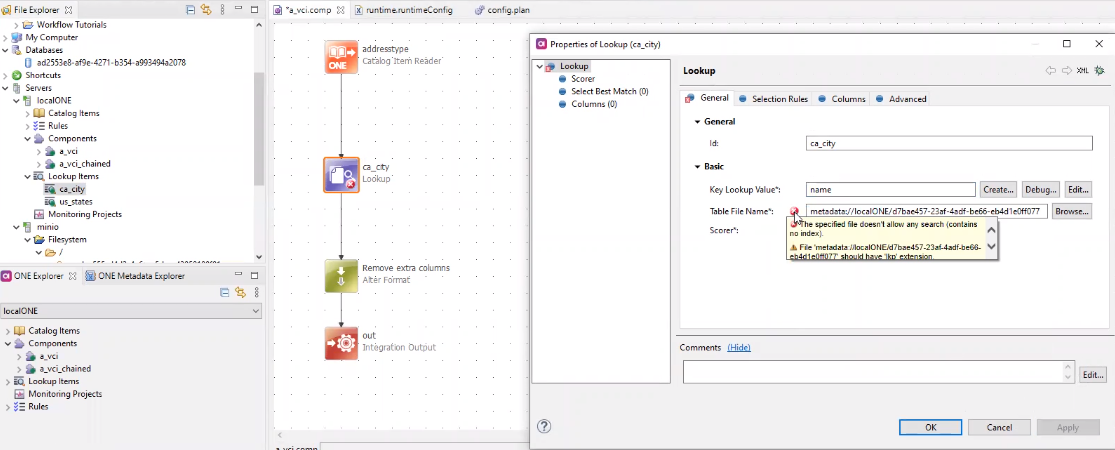
- You can use lookup files in components. Simply upload the file to ONE and access it through ONE Desktop.
And that’s all for the VCIs (at least for now 👀)! How do you use VCIs in your day-to-day role? Share it with the community in the comments below 👇🏻


