


Happy Wednesday Community!
We are halfway into the week and ready with Part 2 of Component Steps. If you have missed Part 1 don’t worry, check it out on the link below 🔽
In the second part of our journey into Component Steps, we will delve deeper into their creation, configuration, parameter mapping, running from the command line, and working with nested components.
Creating a Component
Building a component step is akin to constructing a plan, but certain rules dictate its placement within a plan:
-
At the Beginning: A component at the start of a plan should commence with an input step connected to actual data, not Integration Input.
-
In the Middle: For components in the middle of a plan, they must have at least one input endpoint with Integration Input and one output endpoint with Integration Output.
-
At the End: Components concluding a plan must start with an input endpoint with Integration Input and conclude with an output step that isn't Integration Output (ensuring data is written somewhere).
Building Plans provides comprehensive information on constructing plans.
Creating a Component While Building a Plan
Components can be conveniently fashioned during the plan-building process. Imagine you discover that a portion of the solution can be reused elsewhere or that dividing a large plan into smaller parts would be beneficial.
-
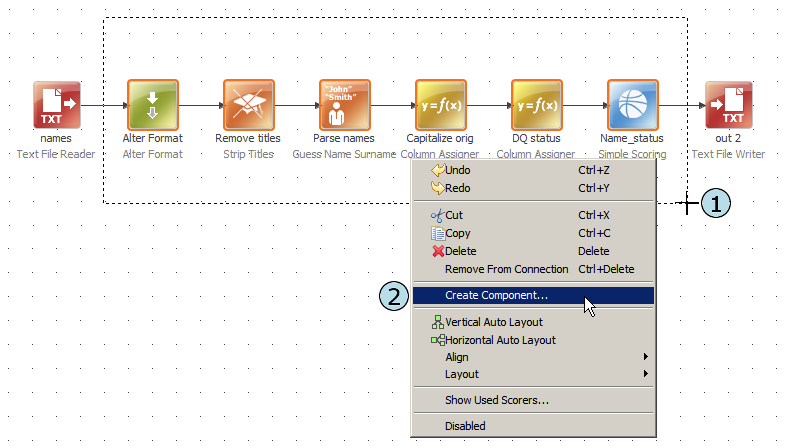
Select the steps within the plan that should constitute the component.
-
Right-click on one of the chosen steps and pick Create Component.
-
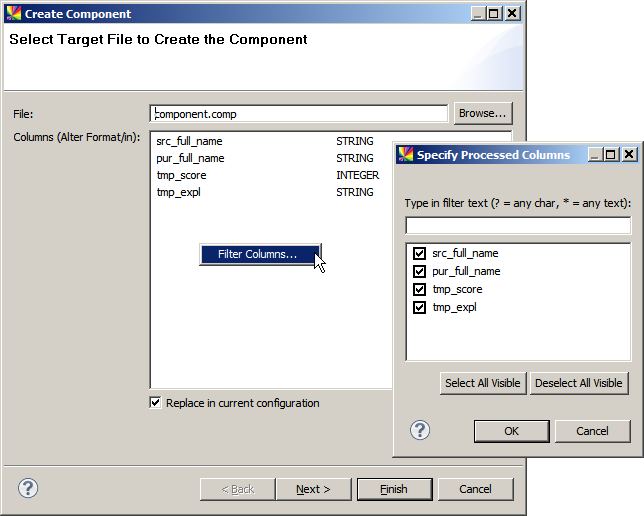
Configure the component by:
- Specifying the component's path and name.
- Choosing the columns to create in the Integration Input step of the component (these columns exist in the flow before the first step). If the initial steps in the original plan involve Alter Format, columns will be created there.
- Optionally, checking Replace in current configuration to substitute the step with the component within the current step. Otherwise, the selected steps will remain in the plan, and the component will be established in the designated location.
-
Optionally, proceed to choose an icon image for the component (must be a 48 x 48 PNG, JPG, or GIF image).
-
Click Finish.
-
If you've selected the Replace in current configuration option in step 3, the plan will now feature a component in place of the original steps.

Configuring a Component in ONE Desktop
In ONE Desktop, configuring the state and main file for ONE components is straightforward:
-
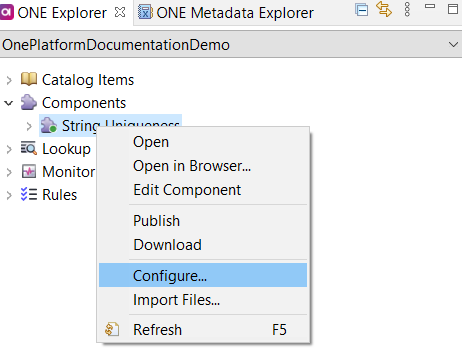
Right-click on a ONE component and choose Configure.
-
Edit the Implementation state and select the main file to determine which components are nested.
Mapping a Property as a Parameter
Mapping a step property as a parameter empowers you to set different values for that property each time a component is used. Here's a practical example:
Imagine using the Ataccama Derive Name of Day from Date component. You can specify values for two parameters:
- The language for generating output day names.
- Whether to use abbreviated or full day names.
Here's how it works:
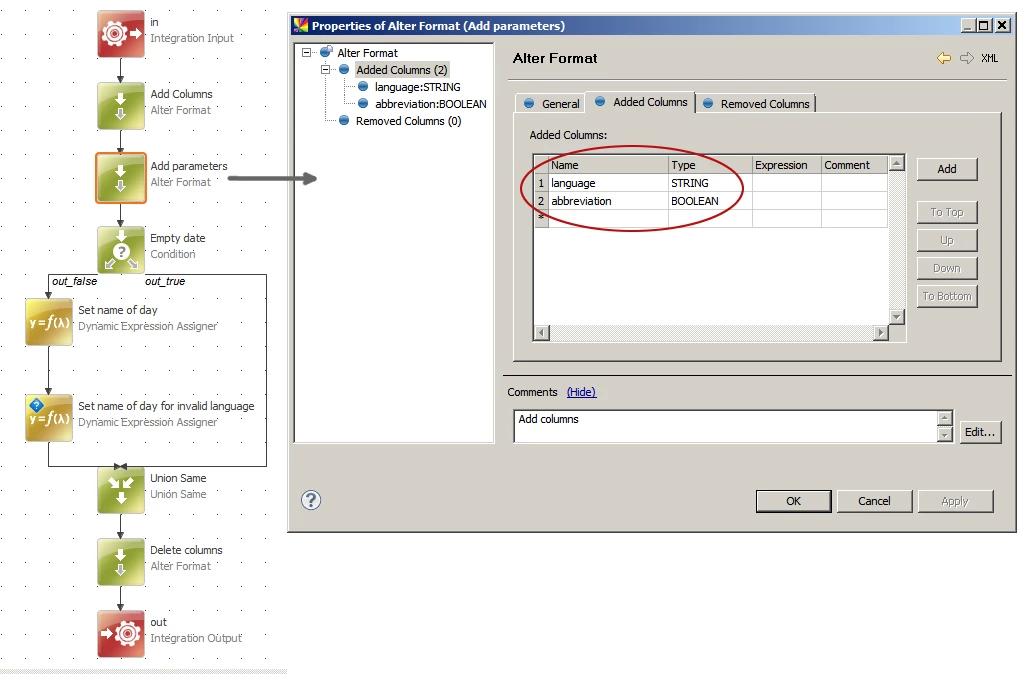
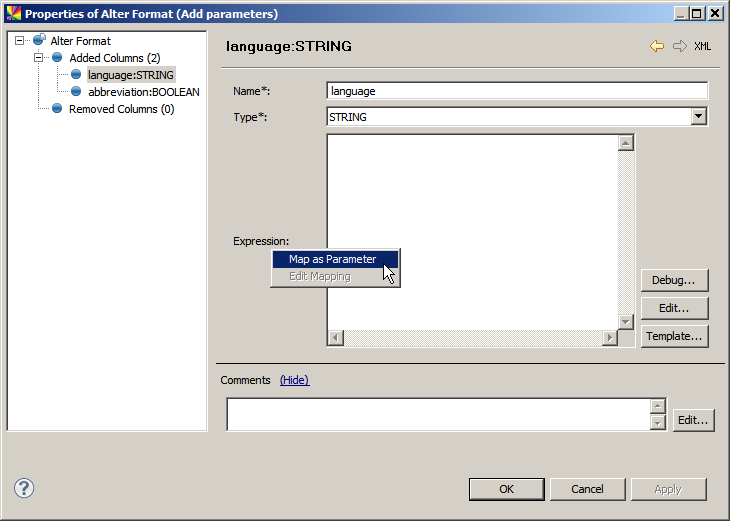
In the component, an Add parameters Alter Format step introduces two columns as parameters. To map the language column as a parameter, you:
-
Access the step properties and map the Expression property as a parameter by right-clicking Expression and selecting Map as Parameter.
-
Specify the parameter name and description, which aids when using the parameter in an external plan or another component.
After mapping a property as a parameter, you can assign a value to the property, serving as the default if no parameter value is provided.
When you use the component with a parameter in a plan, the parameter name will be displayed capitalized, accounting for multiple capital letters as different words.
Example:
- ABCParameter → ABC Parameter
- myPar → My Par
- myABCPar → My ABC Par
Why Some Components Do not Have Mappable Output Columns
At times, when attempting to use a component in a plan (or another component) and map output columns, you may encounter a scenario like this:
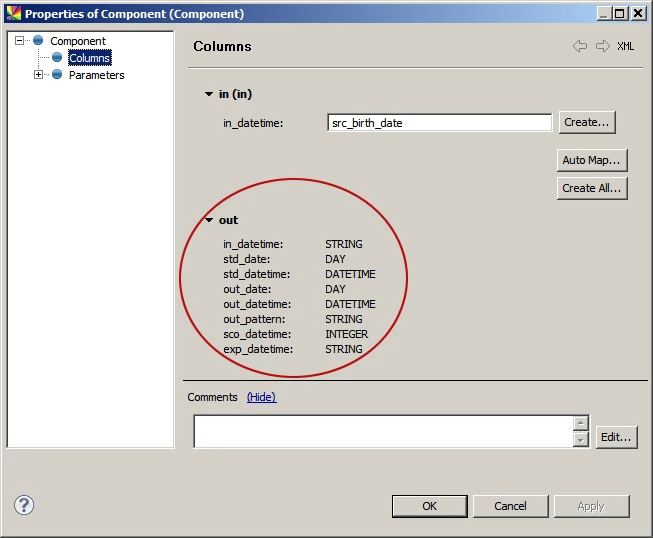
This arises because the data format within the component undergoes a change. In simpler terms, new records are created from input data, resulting in columns created inside the component. These columns differ from the ones before entering the component.
Steps like Join, Representative Creator, Group Aggregator, and Union are examples of actions that can impact data in this way.
Running a Component from a Command Line with a Parameter
Components with mappable attributes offer the advantage of independent parametrized launches. You can run a component directly from the command line, passing parameters as needed. This feature proves invaluable when parameterizing attributes like File Name in Reader steps (e.g., Text File Reader), allowing components to function independently, without being included in plans.
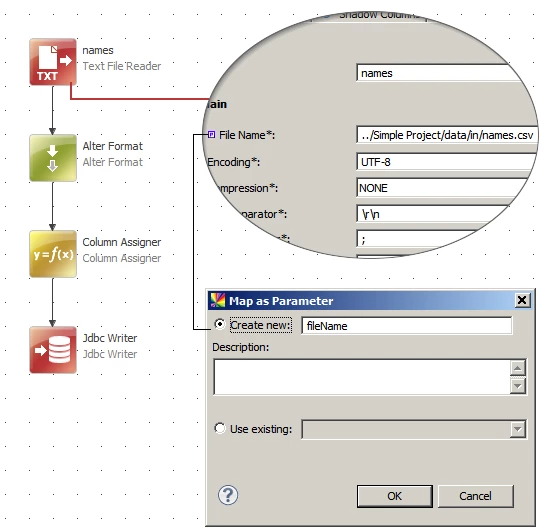
For instance, consider a component that starts with Text File Reader and uses the File Name attribute mapped as the fileName parameter. Following some data transformations (Alter Format, Column Assigner), it concludes with JDBC Writer, writing data to a database table upon each launch.
The command for launching the component would resemble:
runcif.bat -runtimeConfig "../server/etc/default.runtimeConfig" -params.fileName="data/in/names.csv" "../../workspace/project/component.comp"
The -runtimeConfig option is essential because the component employs a database, which must be defined in the Runtime Configuration file. You can also parameterize the File Name attribute of a Writer step, such as Text File Writer, to include, for instance, today's date in the file name.
Working with Nested Components
Nested components are advanced components where the main (parent) component utilizes multiple component files. This approach allows for complex logic definition within a single entity. For example, you can use predefined components delivered with ONE Desktop to cleanse, filter, or standardize specific data while preserving the original data.
Currently, nested components can only be used in transformation components (e.g., Virtual Catalog Items).
Any tips you use to create components? Share them in the comments 👇