


Happy Tuesday community 🙋♀️
This week we have a series of best practices on all things components on ONE Desktop. Component steps, often referred to as simply "components," are instrumental tools that come with unique capabilities. Here, we'll explore what makes components special and how to make the most of them in your data projects.
What Sets Components Apart
Components are akin to plans but with distinctive attributes:
-
Reusable: Components can be employed repeatedly, functioning like steps within other plan files.
-
Parameterization: Components can have properties within their constituent steps mapped as parameters, allowing external plans to interact with them (learn more in the section on "Mapping Properties as Parameters").
-
Console Launch: Components can be executed directly from the console, with parameters for added flexibility.
Example: The Component in Action
Component files are identifiable by their ".comp" extension and can play pivotal roles within your data workflows. Consider this example of a component designed to validate input email addresses:
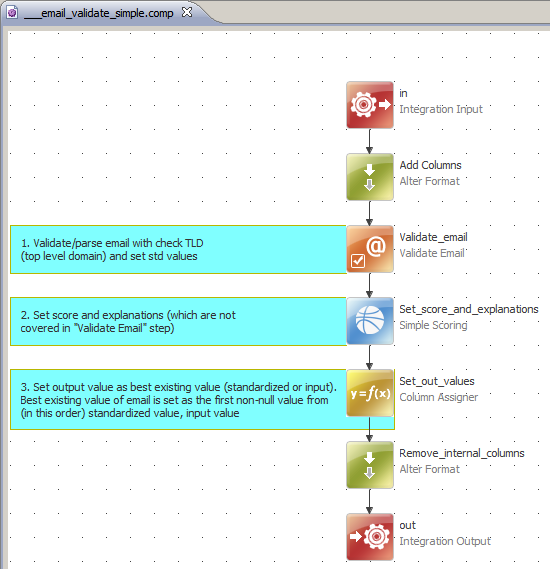
Component Example
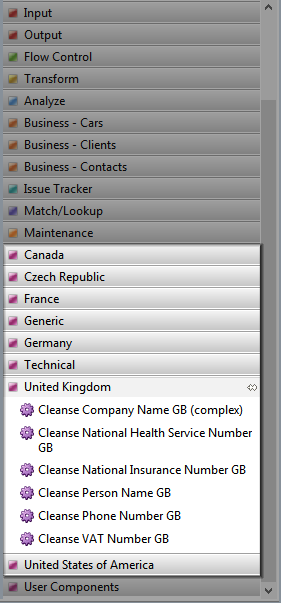
Ataccama provides an array of ready-made components, with 76 in total, 54 of which are freely available. These components cover data cleansing, validation, and standardization, including country-specific solutions like the validation and standardization of US phone numbers. For comprehensive information on each component or module, refer to the Components and Modules documentation.
Finding Components
Free Components: You'll find the free components bundled with Ataccama products in the Palette, alongside the standard steps.
Paid Components and Modules: Paid components and component modules, which bundle multiple components, require separate installation.
Installing Paid Components and Modules
To install a module, follow these steps:
-
Extract the ZIP archive to
[product_installation_folder]/templates/projects/. -
Restart the Ataccama IDE.
-
In File Explorer, right-click DQ Projects > New > Project > Project from template.
-
Choose the package to deploy, such as the Data Masking Module (CA), and click Finish.
-
If components in the module require a database connection, set it up as per the component documentation in the "doc" folder.
Installing a standalone component involves these steps:
-
Extract the ZIP archive to your project folder.
-
Set up folder shortcuts if they are not already configured (see the table below for shortcut details).
| Shortcut Name | Folder | Description |
|---|---|---|
| COMPONENTS | /[your project folder]/components | All components folder |
| TESTS_ROOT | /[your project folder]/unit_tests | All unit tests folder |
| DATA | /[your project folder]/data | Lookups, e.g., Data/ext/src |
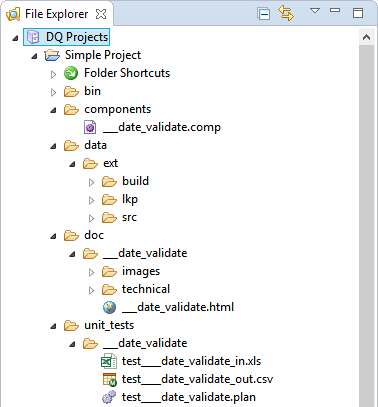
Understanding Ataccama Components Folder Structure
Ataccama components usually come bundled in packages with the following structure:
-
components: Contains the components themselves (with ".comp" file extensions).
-
data: Holds lookups used by the component, lookup build plans, and source data for lookups.
-
doc: Contains comprehensive documentation for each component.
-
unit_tests: Includes test plans, test input, and output data.
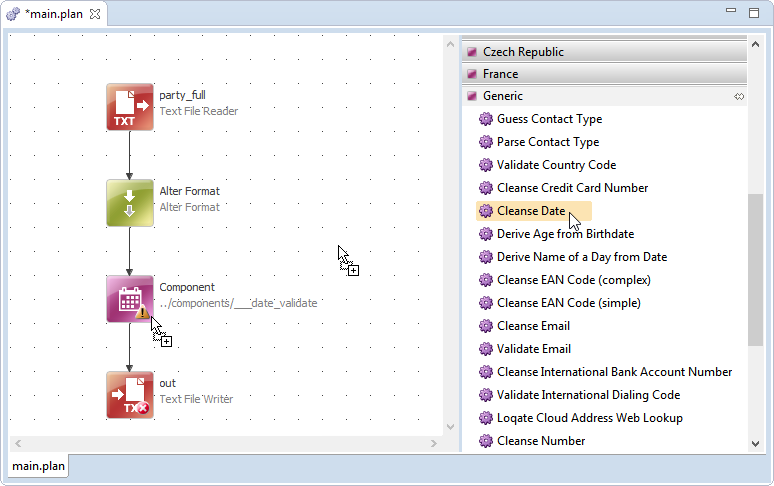
Incorporating Components into Your Plans
Integrating component steps into a plan is as straightforward as adding any other step:
-
Drag the component from the Palette (or from File Explorer for manually installed or custom components) and connect it to other steps, just like you would with any standard step. All required files will be automatically copied into your project, and essential folder shortcuts (DATA, COMPONENTS, TESTS_ROOT) will be configured.
-
Double-click the component to map input and output columns created within the component to the columns in your plan. This step is crucial for aligning the data flow between the component and the plan. Depending on your use case, you may use "Create All..." or other mapping options.

-
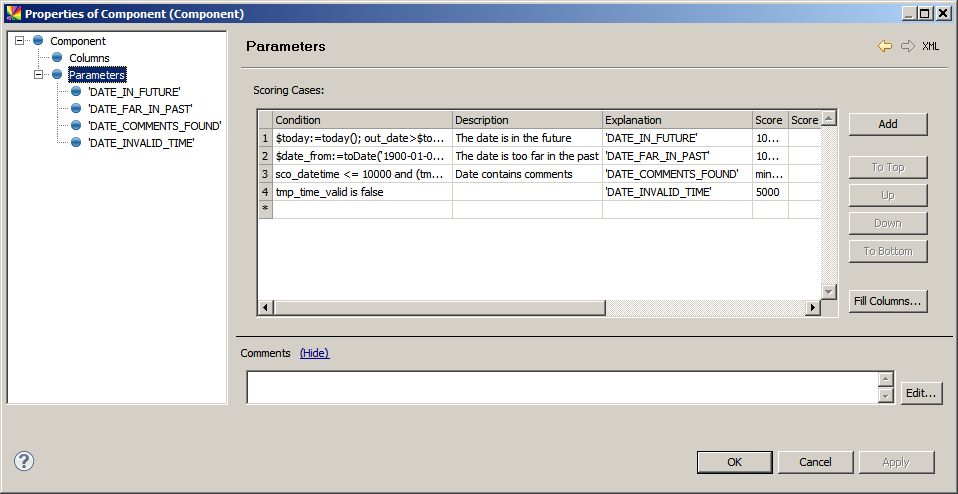
If the component includes properties within its steps mapped as parameters, these will appear in the "Parameters" node of the component properties. Adjust parameter values as needed to fine-tune the component's behavior.
With these steps, your component is fully configured and ready to enhance your data projects. Tune in for part two tomorrow 👀


