


Hi Community!
In the last few months the focus of our articles was majorly on features of ONE Web platform, from the basics to more complicated practices and now it’s time to move on to the next step. From next week we are moving on to ONE Desktop🖥️
Today we will focus on Data Reconciliation, and cover how you can utilize this feature effectively for seamless data consistency across multiple sources. Let’s get to it!
In a nutshell, the Data Reconciliation feature confirms that your migrated data from one database to another is intact and accurate, without any data leaks or glitches. It conducts high-level checks on data consistency by comparing attribute profile statistics and even attributes fingerprints (except for Snowflake data).
Step-by-Step Guide to Data Reconciliation
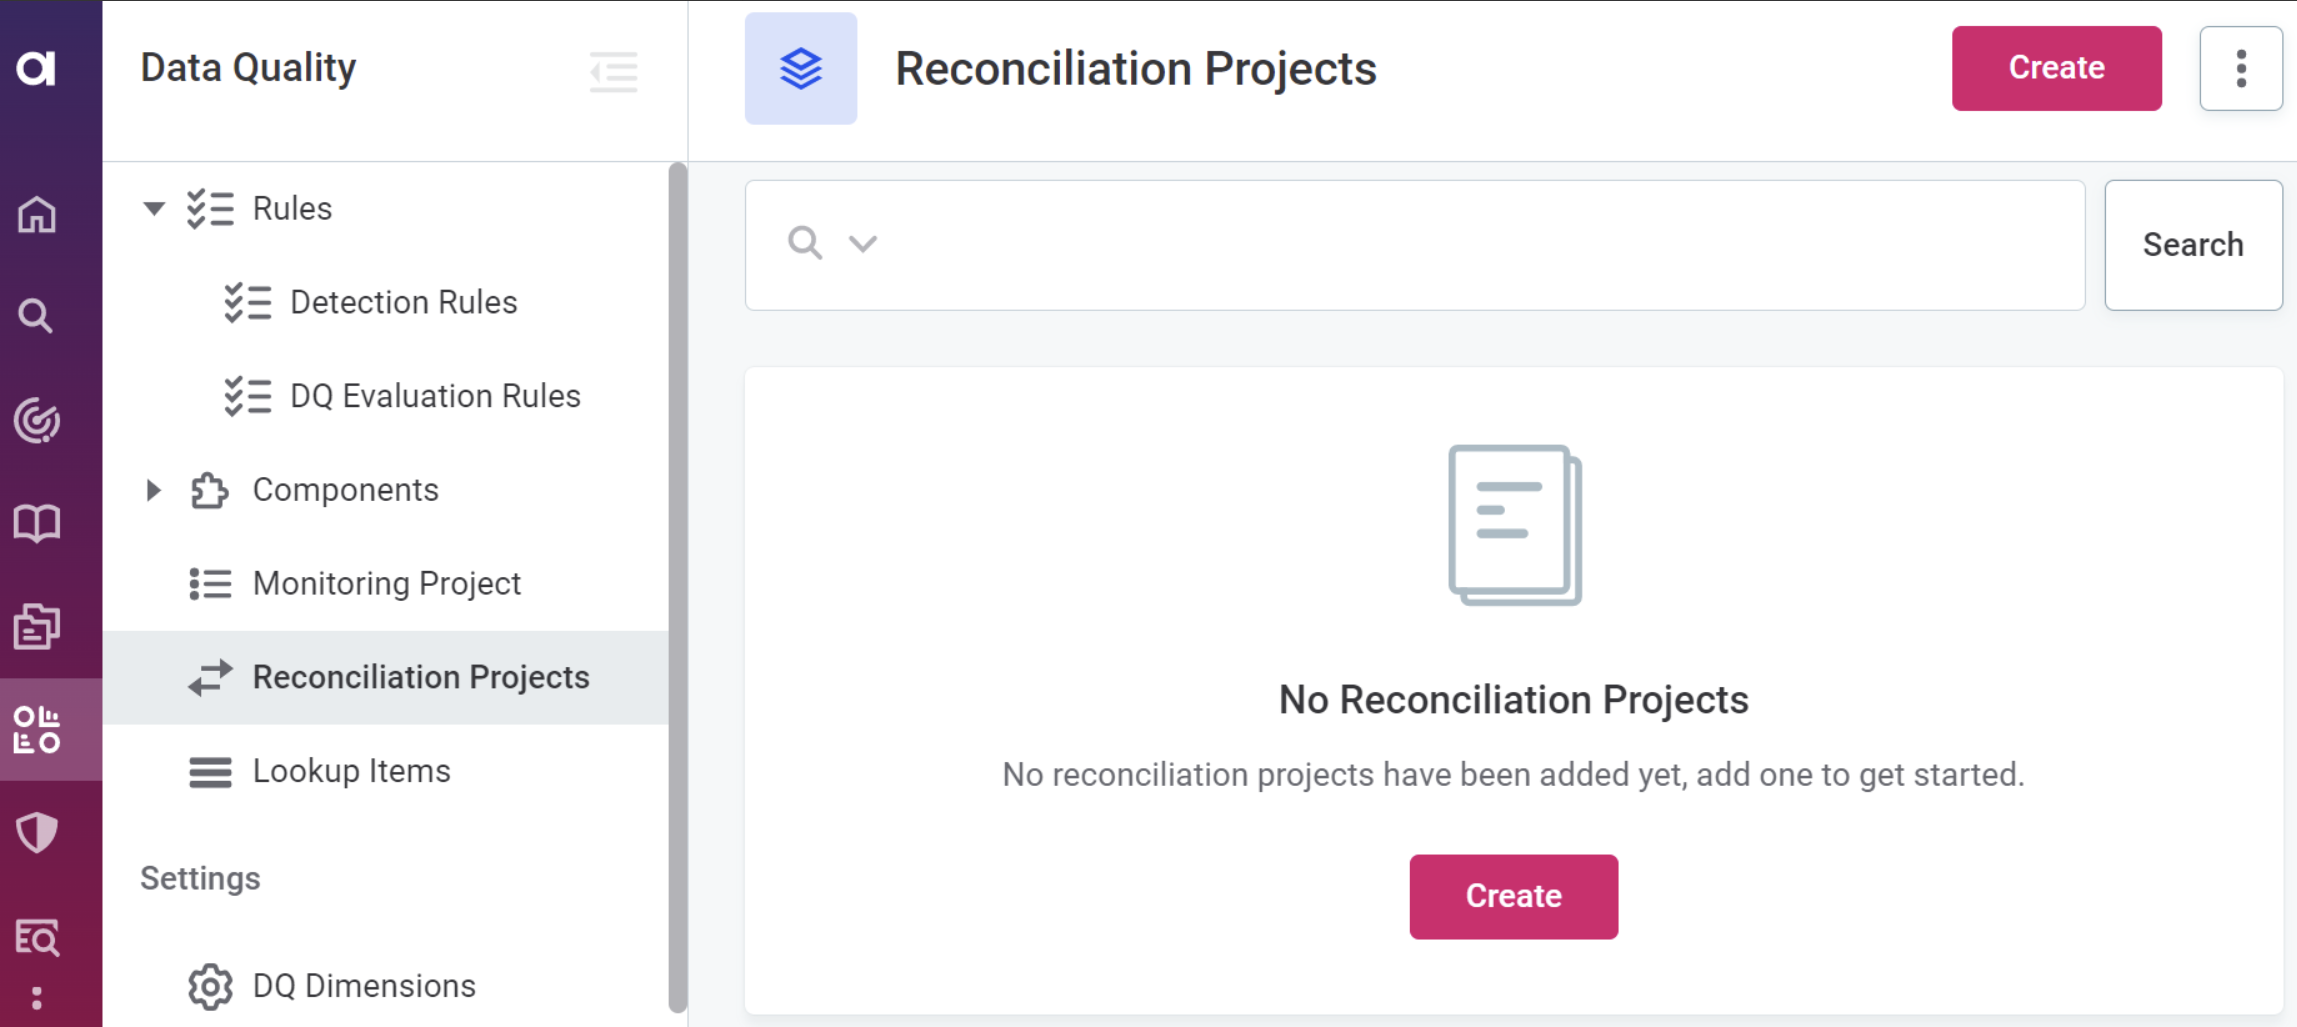
1. Create a Reconciliation Project in Data Quality:
To kick off your data reconciliation journey, navigate to Data Quality and then select Reconciliation Projects. Here, you can either create a new project or edit existing ones. This is your control center for all things data reconciliation.
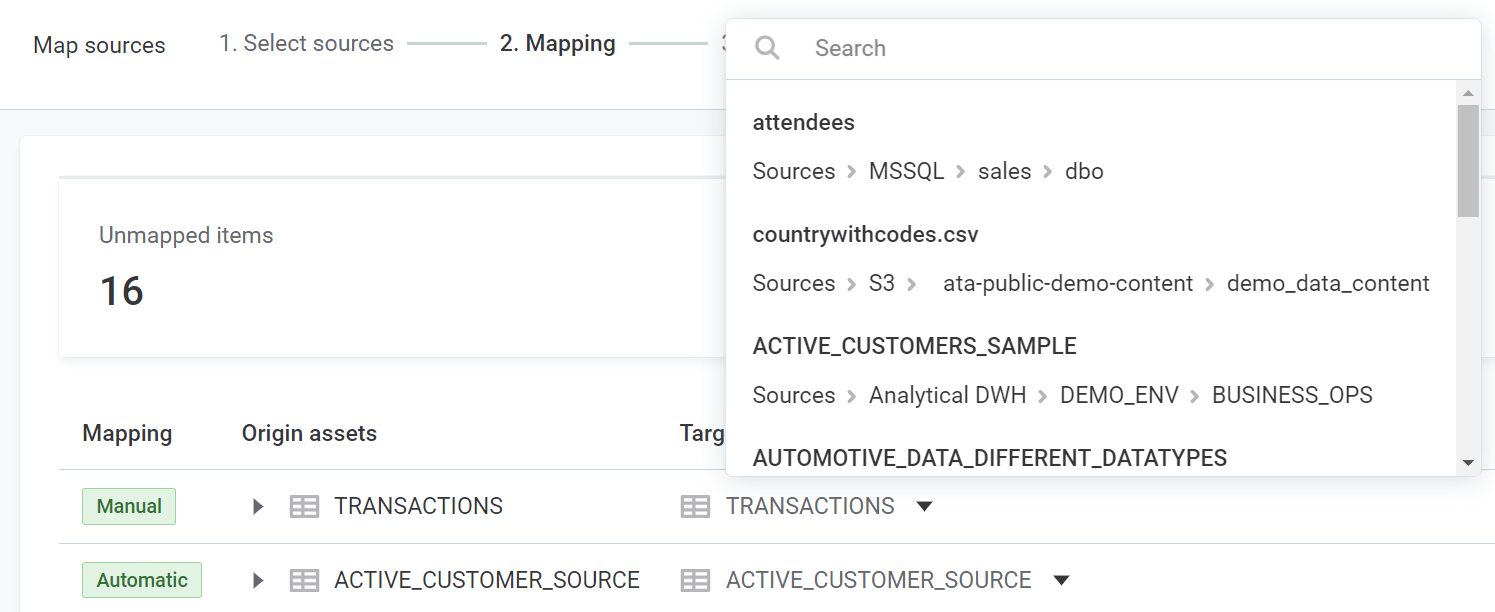
2. Choose Data Origin and Target:
The heart of data reconciliation lies in mapping data between origin and target sources. You can select entire sources, specific locations, or even catalog items for comparison. Ataccama ONE helps you match as many catalog items as possible based on names and data structures. Unmapped data can be manually mapped, and automatic mappings can be overridden if needed.
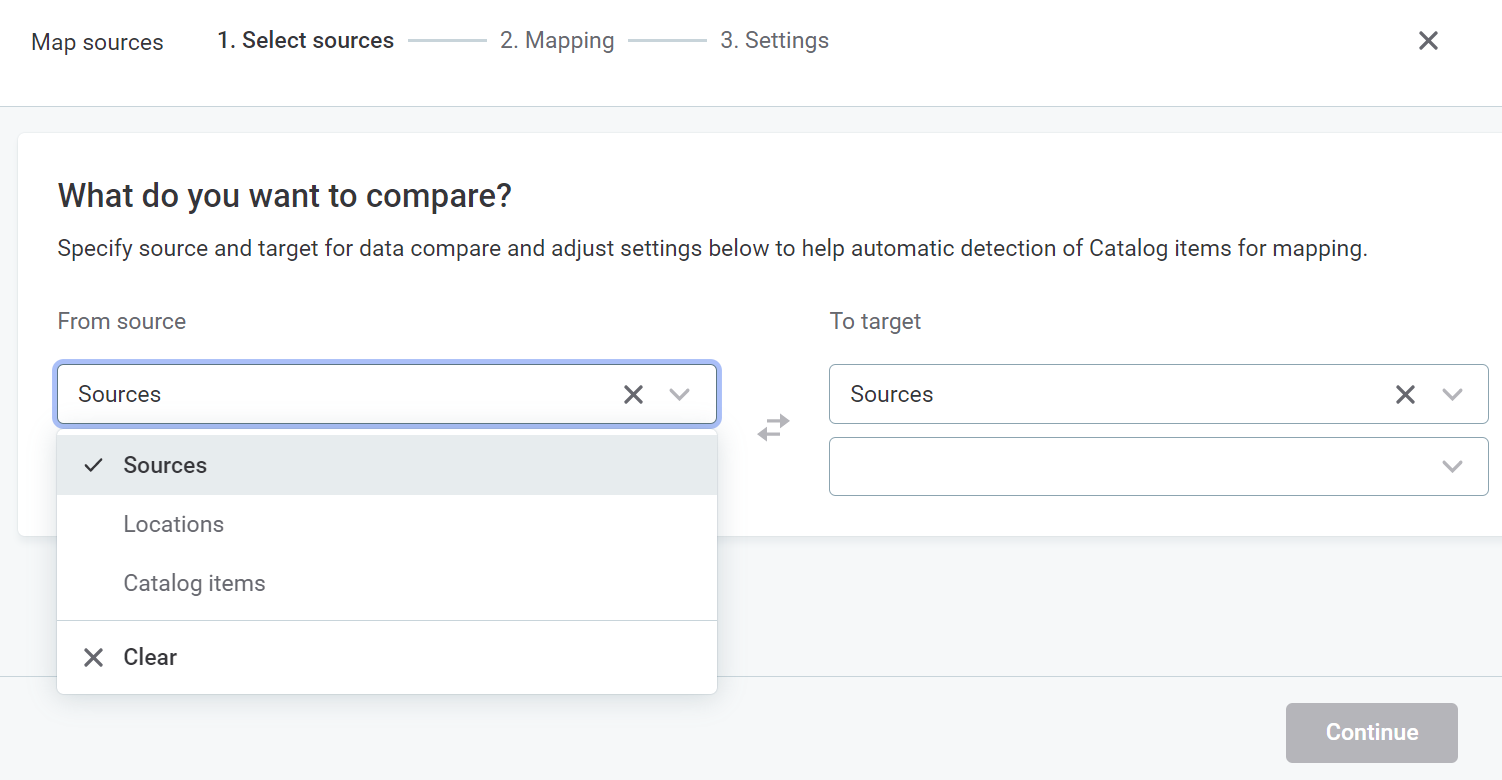
3. Explore Mapping Possibilities:
You can compare single or multiple data sources, multiple locations, catalog items, or various combinations. Remember, locations and catalog items should belong to one origin and one target data source. For comparing data from more than two sources, you'd need to create multiple mappings.
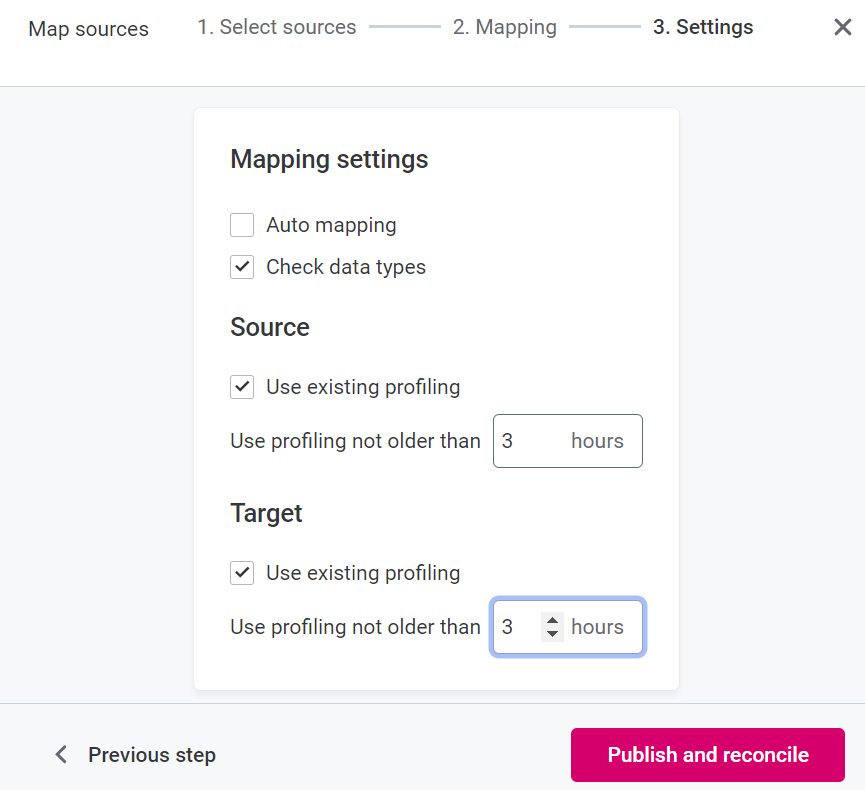
4. Tweak Settings for Optimal Results:
Fine-tune your data reconciliation settings. Consider enabling or disabling options like auto-mapping, data type issue detection, and use of existing profiling, based on your specific requirements.
5. Run Data Reconciliation and Get Notified:
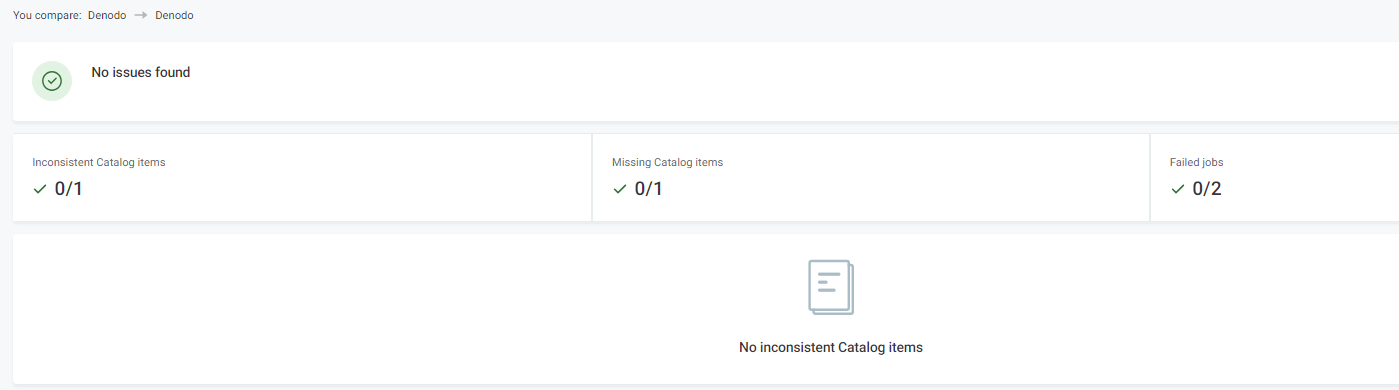
Initiate data reconciliation by selecting Publish and reconcile after mapping or by choosing an existing project and selecting Compare data.
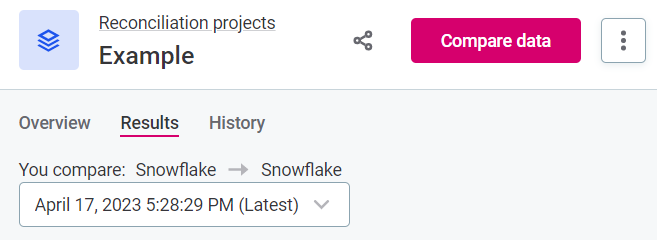
Once done, results can be viewed in the Results tab, where you'll find a comprehensive listing of issues. Configure notifications to keep you informed about any data reconciliation glitches via channels like in-app messages, email, Slack, or Microsoft Teams.
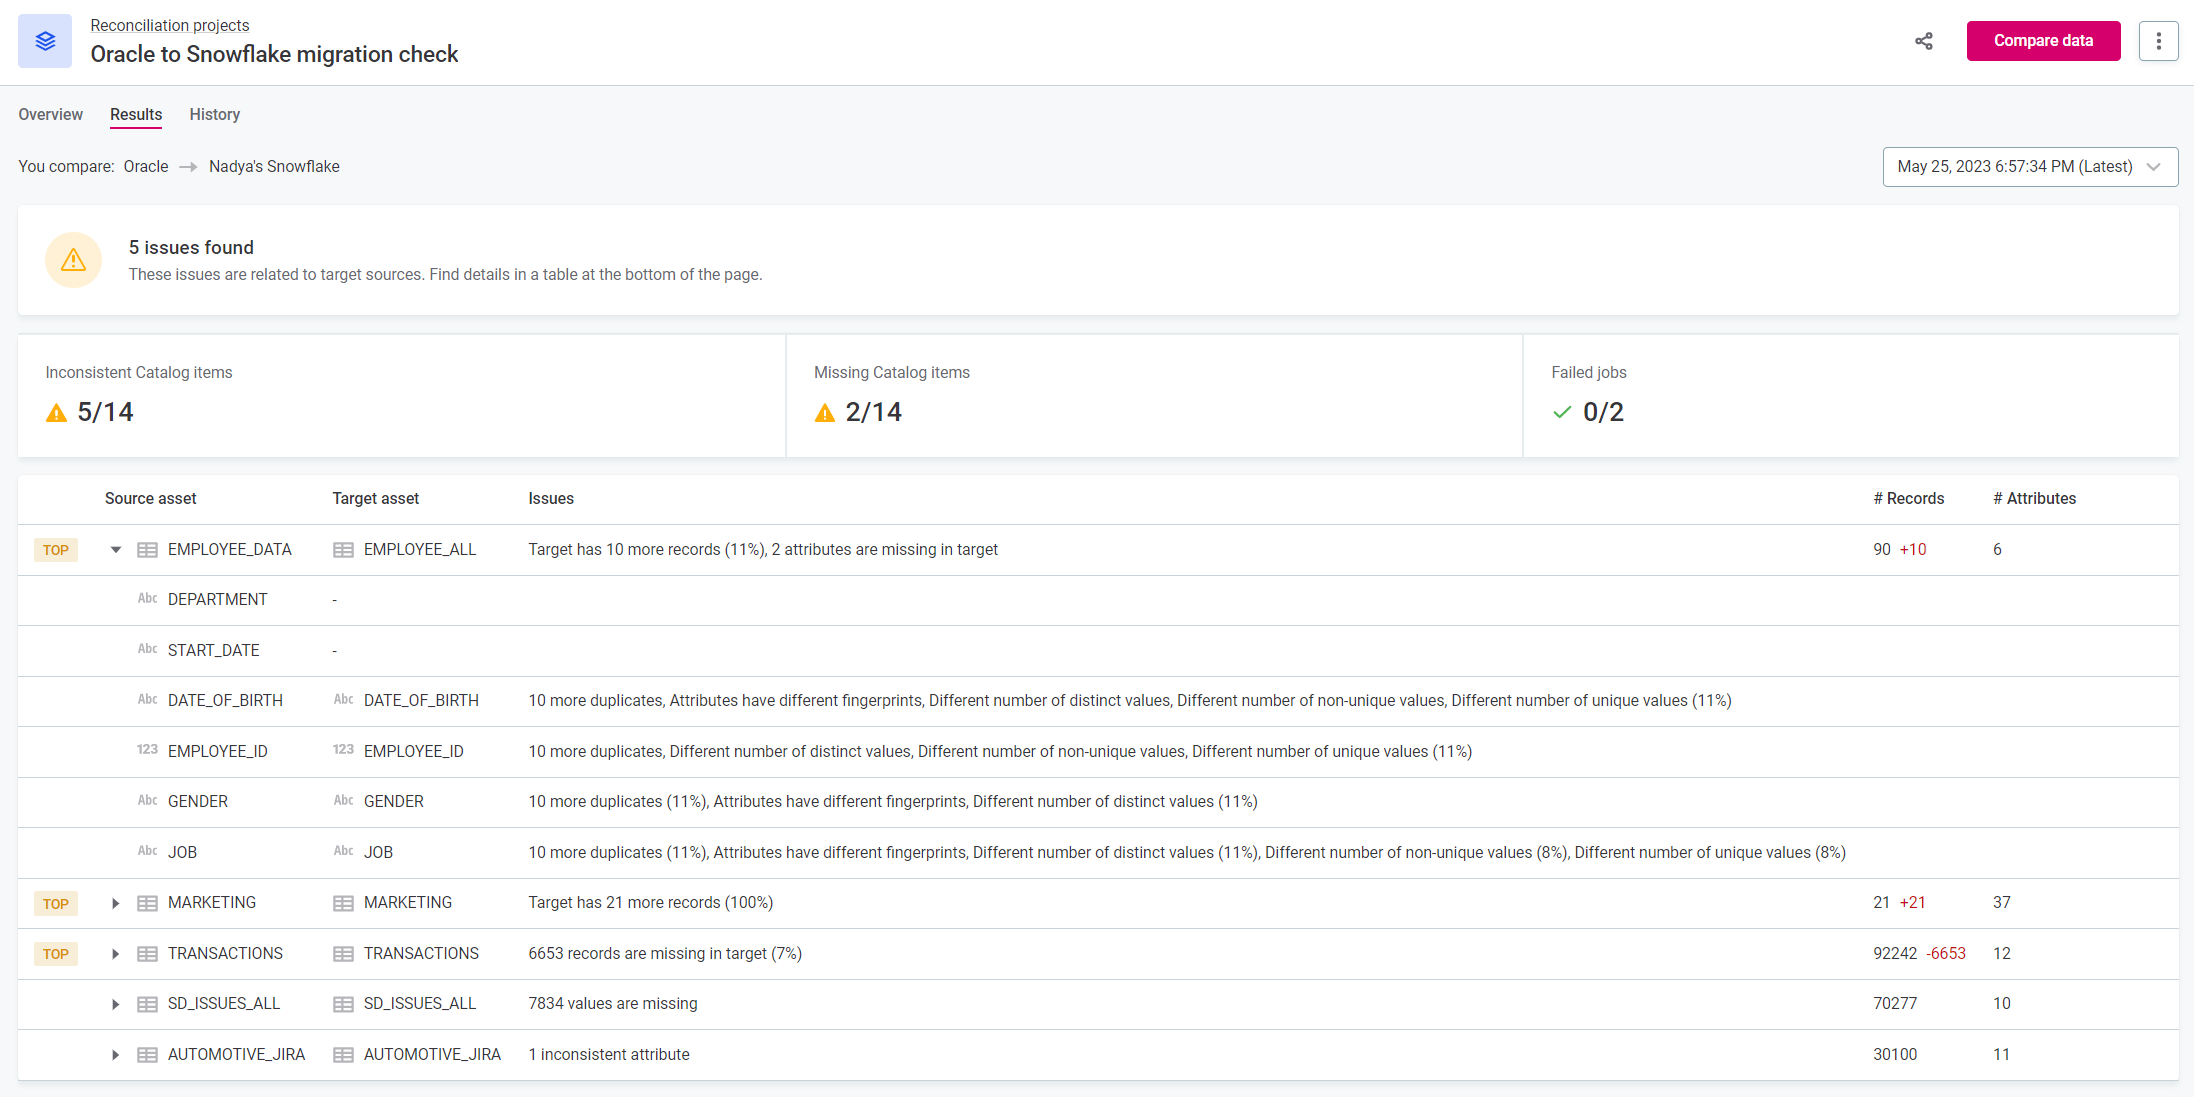
Data Reconciliation data consistency checks are easier and ensure your data migrations are flawless, accurate, and transparent.
Share your experiences, insights, and discoveries with the community in the comments 👇