Hi everyone, I’m Srija Piratla, Solutions Consultant here at Ataccama.
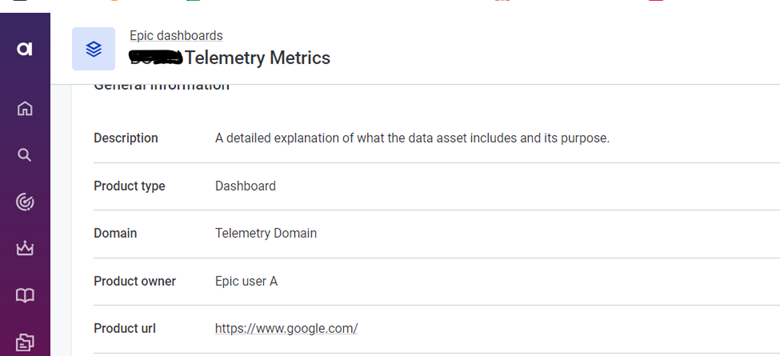
In this post I’m going to talk about how to create a hyperlink for an attribute column in the ONE Web App. Curious? Follow these steps. This example demonstrates how to make a column, such as "Product URL," in the catalog item "Epic Dashboard" clickable, redirecting to the respective web page.

Steps to Create a Hyperlink for an Attribute Column
- Create Metadata Model: First, ensure you have a metadata model set up. You can find detailed instructions for creating a metadata model here. If you need to create a new entity, use the metadata writer step to load the data.
- Edit the Page Template:
- Navigate to the page where you want to create the URL hyperlink.
- In the top right corner of the page, click on the Edit Page Template option.
-

- Add Renderers for Hyperlinks:
- In the page template editor, add the necessary renderers for hyperlinks. This involves specifying the renderer type for the attribute you want to make clickable.
Use the following JSON configuration to define renderers for your entity:
{
"_type": "entity.controller",
"children": {
"_type": "entity.page.detail",
"showViolations": true,
"children": {
"_type": "entity.entity",
"renderers": {
"ProductURL": {
"_type": "entity.link.view"
},
"Producturl1": {
"_type": "entity.link.view"
}
},
4. Renderer Explanation:
- entity.link.view: This renderer type is used to make an attribute clickable, turning it into a hyperlink.
By configuring your page template with these settings, you ensure that the specified columns (e.g., ProductURL, Producturl1) are rendered as clickable links, allowing users to be redirected to the respective URLs.
Hope this helps. If you have any questions or need further assistance, please feel free to share them in the comments
