
Imagine the scenario where you have Ataccama ONE Data Quality Monitoring Projects running regularly. Any Data Quality (DQ) issues are already exported to our DQ Issue Tracker (DQIT) module. You can also see trends of DQ over time within the Ataccama ONE Web application.
You start noticing that the score for some DQ rules has had a sharp drop in quality, and you want someone to investigate this.
One of our customers decided that they want to integrate Ataccama with Jira at this point. Have Ataccama raise a ticket into Jira when this happens automatically.
In this article, we will explore:
- Preparing to integrate with Jira
- The Json Call step
Preparations
Business
- Understand your end users. What do they expect to see in their Jira ticket?
- Know which fields in the Jira ticket are mandatory
- Have an idea of what extra information you should supply in the detailed description of the ticket. Think about formatting and presentation.
- Good to understand Jira markdown notation (link)
Jira
- Know which version of Jira and Jira API you are working with. Different versions differ in functionality and API call specifications. In this example we are working with Jira API v3.
- Have the Jira API documentation to hand, that corresponds to the instance of Jira you are using. I found mine here.
- Your Jira admin should be able to provide you with:
- A Jira project key, against which you can raise your tickets. If the tickets raised out of the project is e.g. DQ-123, then DQ is your Jira project key
- Service account username and password for Ataccama, with rights to raise tickets for your Jira project
- The URL of the instance of Jira you will be using
Ataccama
- In some DQC plan or component, you will analyse your data and have a list of potential issues that you need to create tickets for. 1 record in this data flow should result in 1 ticket being raised. How you arrive at this list is not covered in this article.
- ONE Desktop installation
- ONE DQC / Runtime server / Orchestration server installation (for when you are ready to let the server do the work!)
Building your solution
Check the Jira Project
Let’s say our Jira Project has a Project Key of DQ
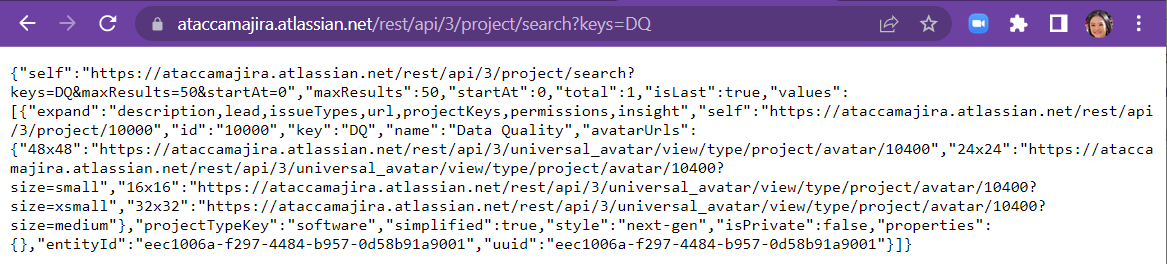
- Login to your Jira instance in your browser
- This should return some basic information of the project, including the Project Id
- https://<your-site-url>/rest/api/3/project/search?keys=DQ
- This call should return the issue types associated with the project
- https://<your-site-url>/rest/api/3/project/search?keys=DQ&expand=issueTypes
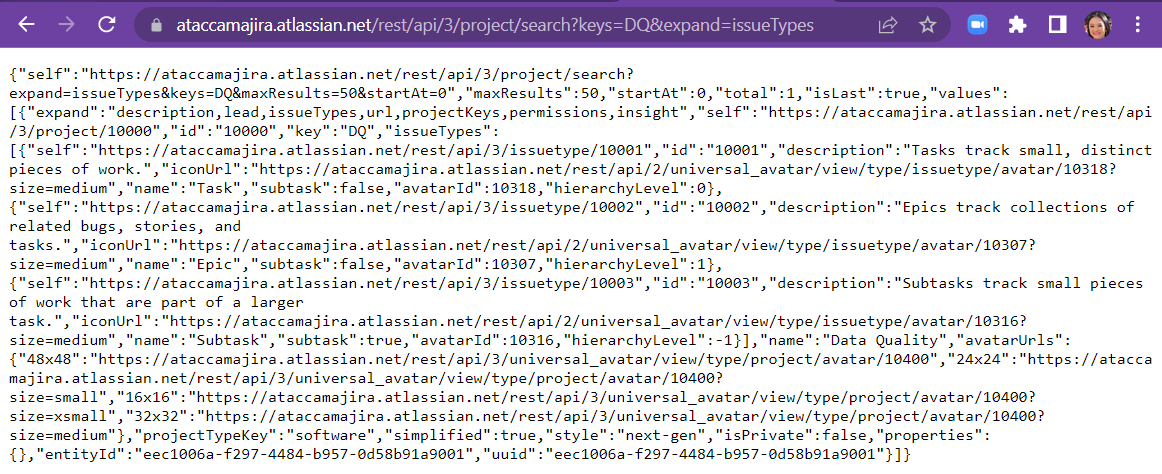
From the above, you should be able to determine which issue type you should use to create your tickets. You will need the issue type id and project id or key.
Hint: There are tools out there that can format JSON into more human readable format, such as Notepad++, use the Json Viewer plugin.
What can help:
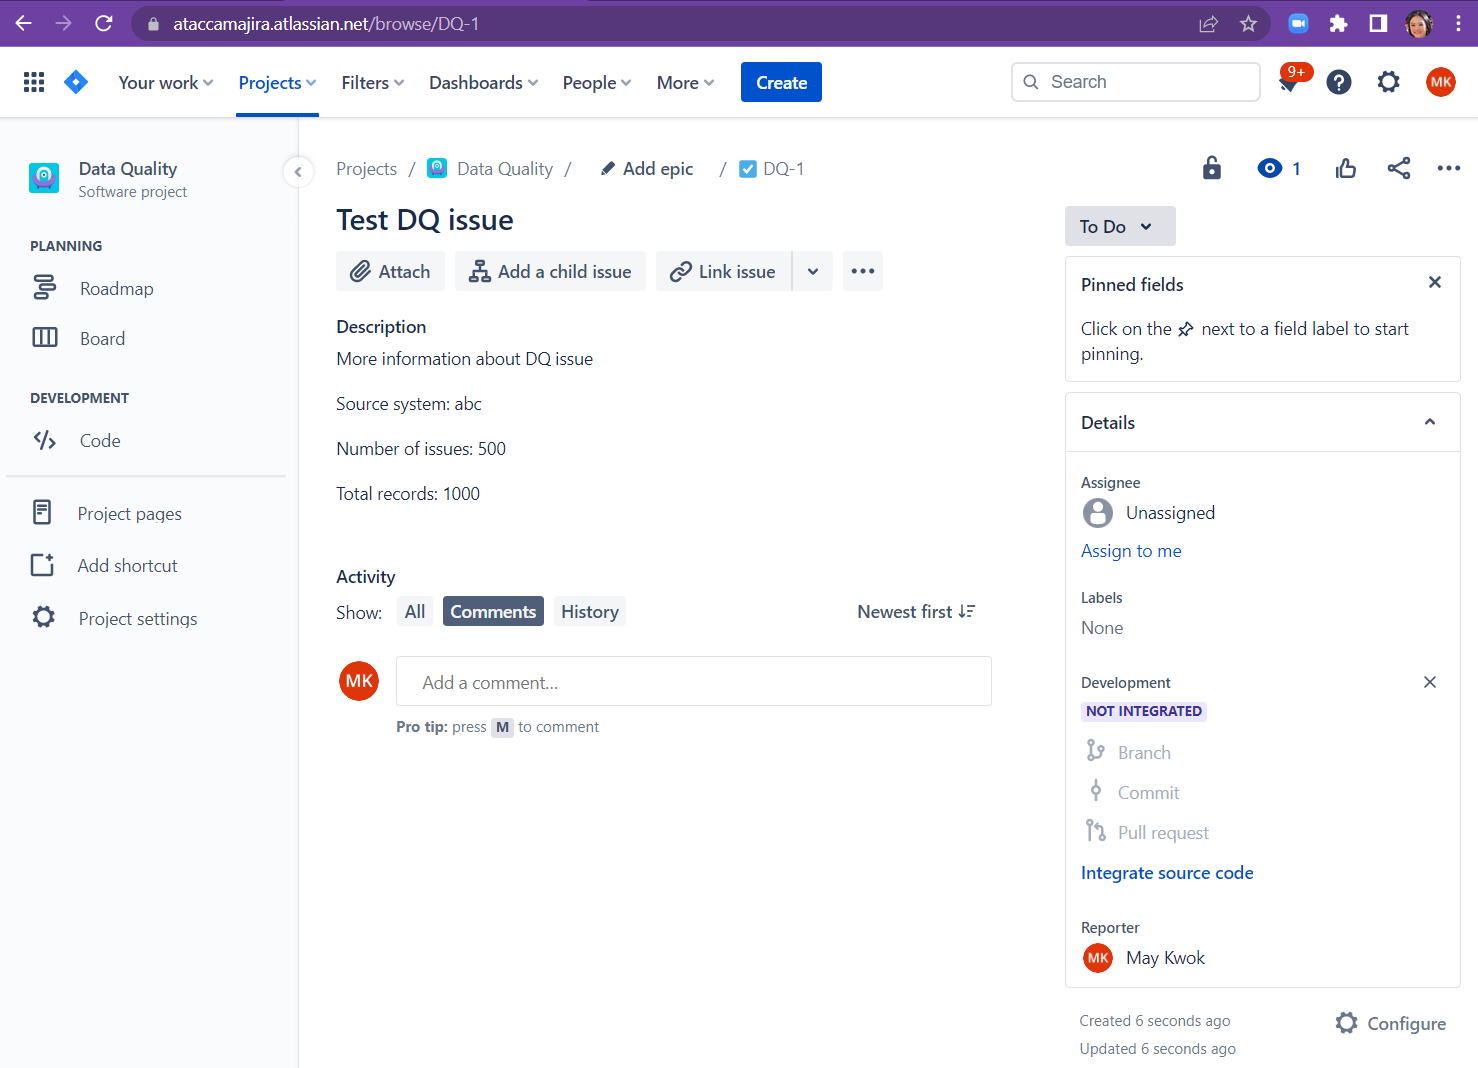
- Open an existing issue of that type in the web interface
-
Make this call to check that same issue and compare how this raw output corresponds to what you see on screen
https://<your-site-url>/rest/api/3/issue/{issueIdOrKey}
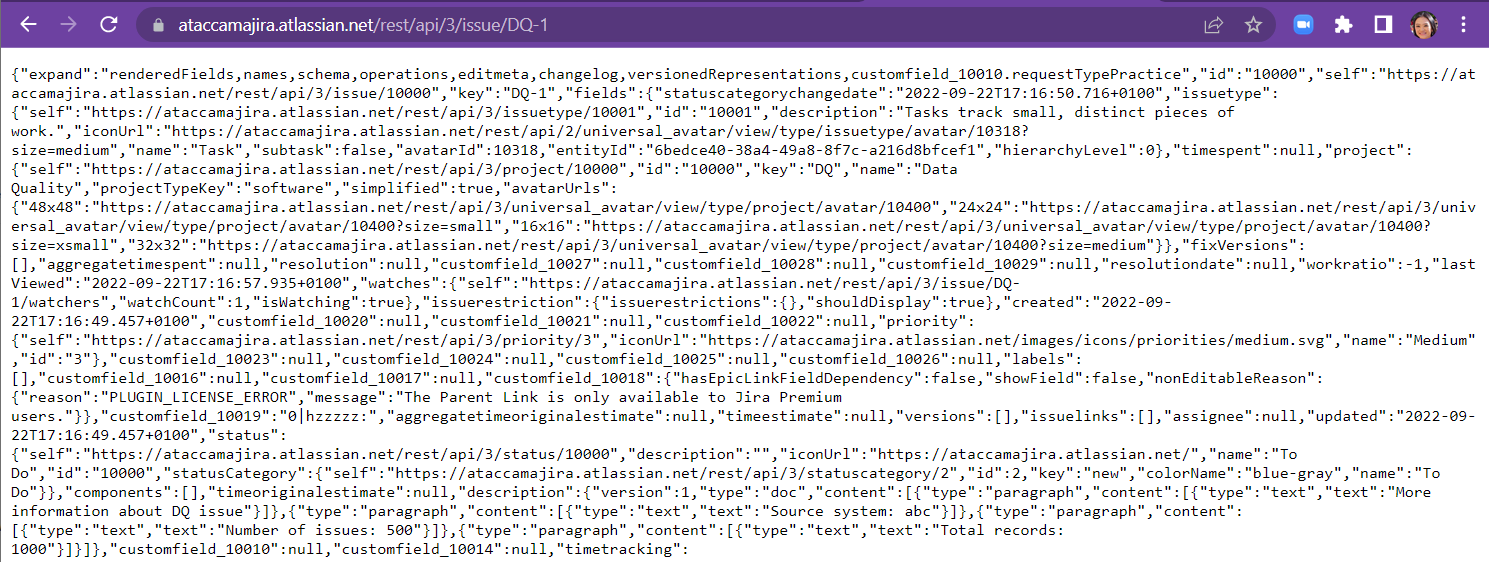
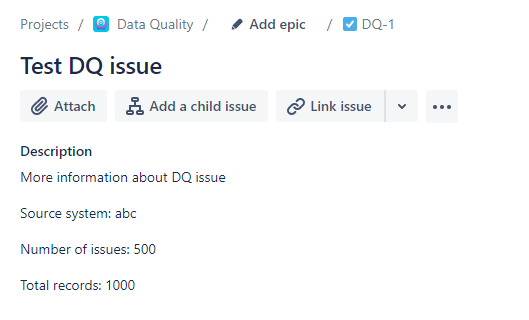
- You should be able to find the issue type. In this case it is 10001 (you can check in line 2 for “issuetype” attribute).
- You should be able to pick out the fields that correspond to the description text:
"description": {
			"version": 1,
			"type": "doc",
			"content": e
				{
					"type": "paragraph",
					"content": e
						{
							"type": "text",
							"text": "More information about DQ issue"
						}
					]
				},
				{
					"type": "paragraph",
					"content": e
						{
							"type": "text",
							"text": "Source system: abc"
						}
					]
				},
				{
					"type": "paragraph",
					"content": e
						{
							"type": "text",
							"text": "Number of issues: 500"
						}
					]
				},
				{
					"type": "paragraph",
					"content": e
						{
							"type": "text",
							"text": "Total records: 1000"
						}
					]
				}
			]
		},
- Note that each line of text that you see in the ticket, is wrapped around by this json structure of:
				{
					"type": "paragraph",
					"content": e
						{
							"type": "text",
							"text": "<whatever your actual text is>"
						}
					]
				},
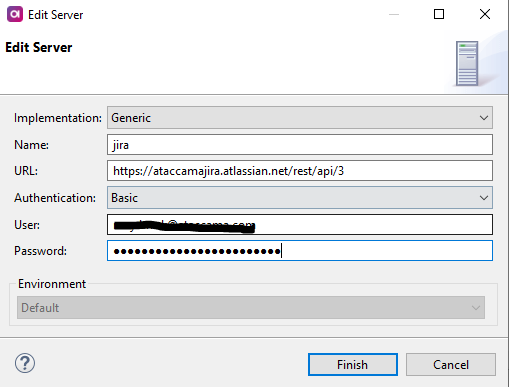
Jira credentials
If you are accessing the Jira instance using your personal account, at this point you should obtain the service account that the plan is going to use, and test using the service account.
You should generate a Personal Access Token (PAT) for the service account. Follow Jira instructions here.
Server connection
Publicly available documentation will instruct you to then generate a Basic Auth header using the username and the PAT. However, this would either require you to store the PAT value directly in the plan, or store the Base64 encoded value in the plan.
You can set up a server connection instead with the details. This will go into the runtimeConfig file and therefore be decoupled from your plan. This also allows you to switch environments with different jira instances should you have the need to.
Construct your plan
This is the ticket template that we are going to try and replicate
Data feed
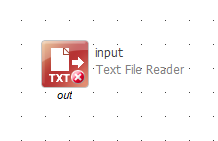
Let’s start with the data feed. You will need to construct the plan to arrive at your data feed based on your own calculations from source data. I’m working with this:

Alter Format - add columns
Let’s add some columns to start to construct our Jira summary and descriptions. Remember the json structure we saw earlier? Let’s create the structure and build the ticket contents.
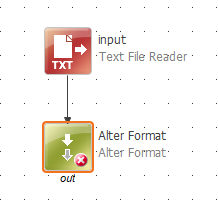
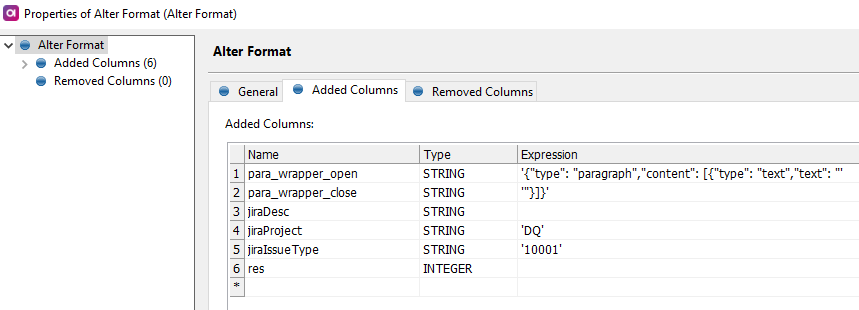
para_wrapper_open is '{"type": "paragraph","content": h{"type": "text","text": "', while para_wrapper_close is '"}]}'.
We have the jira project key and also the issue type.
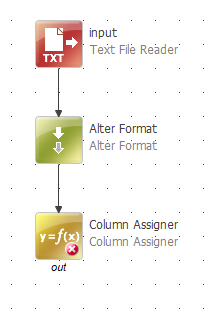
Column Assigner
Now put them together using Column Assigner step
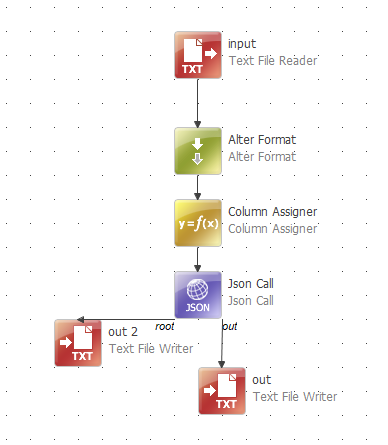
Json Call
Now let’s make the API call using Json call step

General tab lets you use the URL resource (the jira server connection that has been setup), adding on the /issue to the end of the URL there
{
  "fields": {
    "project": {
      "key": "#jiraProject#"
    },
    "summary": "#source_system# DQ issue",
    "description": {
      "type": "doc",
      "version": 1,
      "content":

          #jiraDesc#

      ]
    },
    "issuetype": {
      "id": "#jiraIssueType#"
    }
  }
}
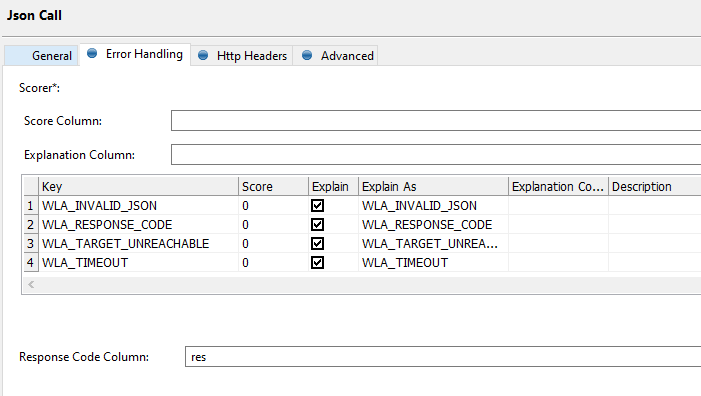
Storing the response code in the res column created in Alter Format:
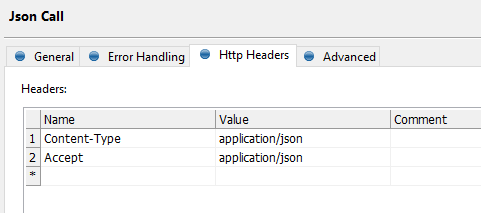
Providing required http headers:
Tweaking some advanced settings:
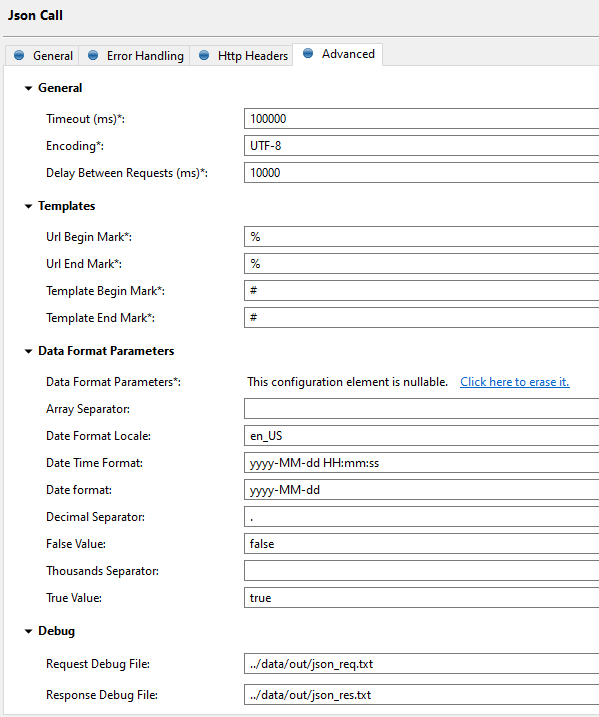
- Adjust the timeout to allow for network latency
- Adjust the delay between requests to allow successive json calls to have some break between them
- Note the template begin and end marks are #. This is how the Json call body is able to take the values from the data flow and substitute them into the call
- Define locations for request and response debug files, so you can see exactly what the json call is sending and receiving
Json Reader
Run the plan first, in order to receive a sample response from Jira. You’ll see the response in the debug response file
My response file gave me this response:
{"id":"10002","key":"DQ-3","self":"<https://ataccamajira.atlassian.net/rest/api/3/issue/10002>"}
I can now construct my json reader to take these 3 fields. I can then carry on and do whatever I need with these 3 attributes that Jira has provided me with - the info about the tickets I’ve just raised.
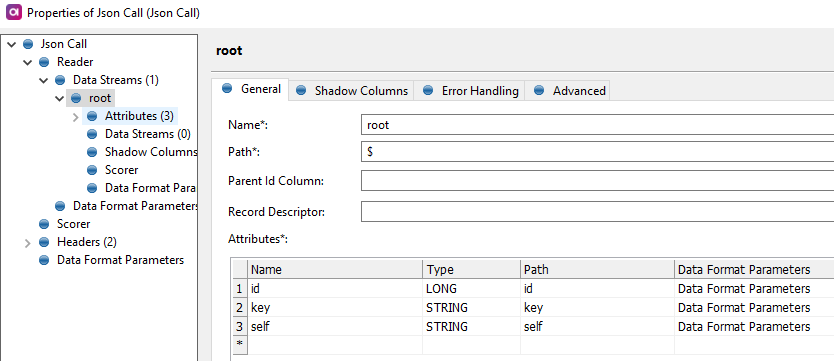
- Path is set to $ because it is top level
- Provide the relevant data types for the values so it can be included in the data flow in the plan, from endpoint “root”.
- “out” endpoint will contain the original data feed that was provided into the Json call step
Now you are ready to wrap this component in a workflow and scheduler etc, and push this to your orchestration server, to automate this according to your requirements.
Have you tried something similar? Let us know how it goes!

